Since the PDF formats are easily shareable and compatible withvarious operating systems, people find it comfortable using it more thanother document format. With the PDF formats, businesses became easier as anyonecan send important documents containing important information through web ormail. For safety purposes, we always secure our PDF files with passwords.However, there are times when we need to unprotect PDF files from suchpasswords for further processes. In these cases, many people find themselvesbaffled. If you are one of those, feel relaxed and read this article. We aregoing to illustrate here some free ways to unsecure PDF files. Please check out!

Part 1: How Does Your PDF File Is Secured?
Part 2: Unsecure PDF without Password
Part 1: HowDoes Your PDF File Is Secured?
Before we proceed further to understand how to unsecure PDF files, it becomes essential to get insights on how your PDF file is encrypted. Thereare two types of password that can be applied to your PDF file. If your PDFfile is protected, it could be a "document open password" or "permissionspassword".
The former, as the name suggests, is a password created to avoid anyunauthorized access to the file. In other words, if someone would try to open aPDF file, it will ask the password to get it opened.
On the other hand, the permissions password is set by the owner inorder to avoid further editing, printing or any type of alterations on thetext.
Part 2: UnsecurePDF without Password
To unprotect PDF files, one of the most efficient ways will be Passper for PDF by iMyFone. It ensures the quick and easy access of the lockedfiles. A user can effortlessly recover the document open password and removethe permission password if necessary. It offers four methods to unsecure PDFfiles with open document password. With a higher success rate and ease of use,it is the best option one can opt to unprotect PDF files. Let us now learn thetutorials to serve the purpose.
1. Remove document open password from PDF
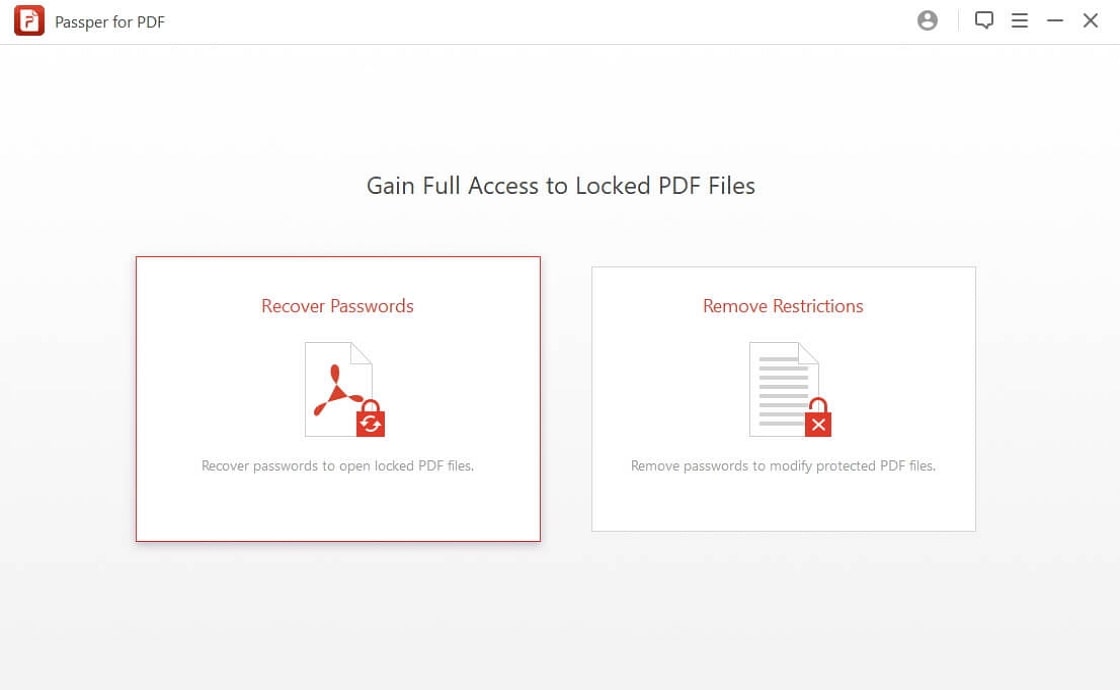
Step 1: Post successful installation of the program, you need toclick on the "Recover Passwords" button provided on the homepage of thesoftware.
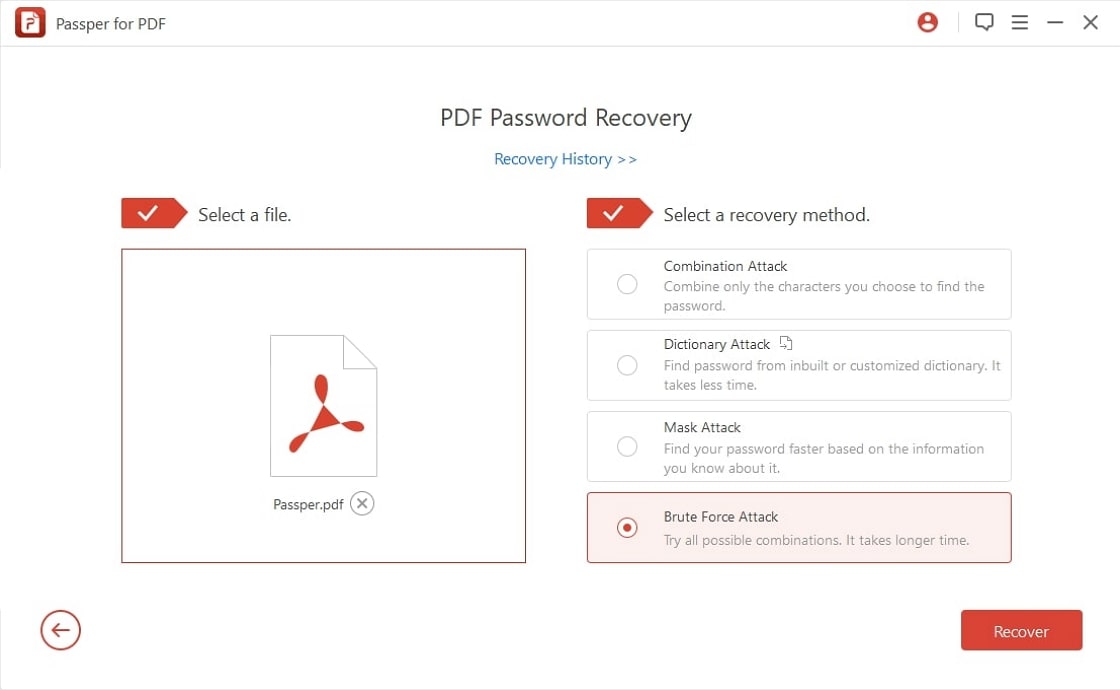
Step 2: As the next step, you need to click on the "+" icon and then browse for the password protected PDF file. In order to proceedfor recovery, there are different recovery methods you need to opt for. You canchoose among "Combination Attack", "Mask Attack", "Dictionary Attack" and"Brute Force Attack". Click on "Recover" button once the recovery method isselected.
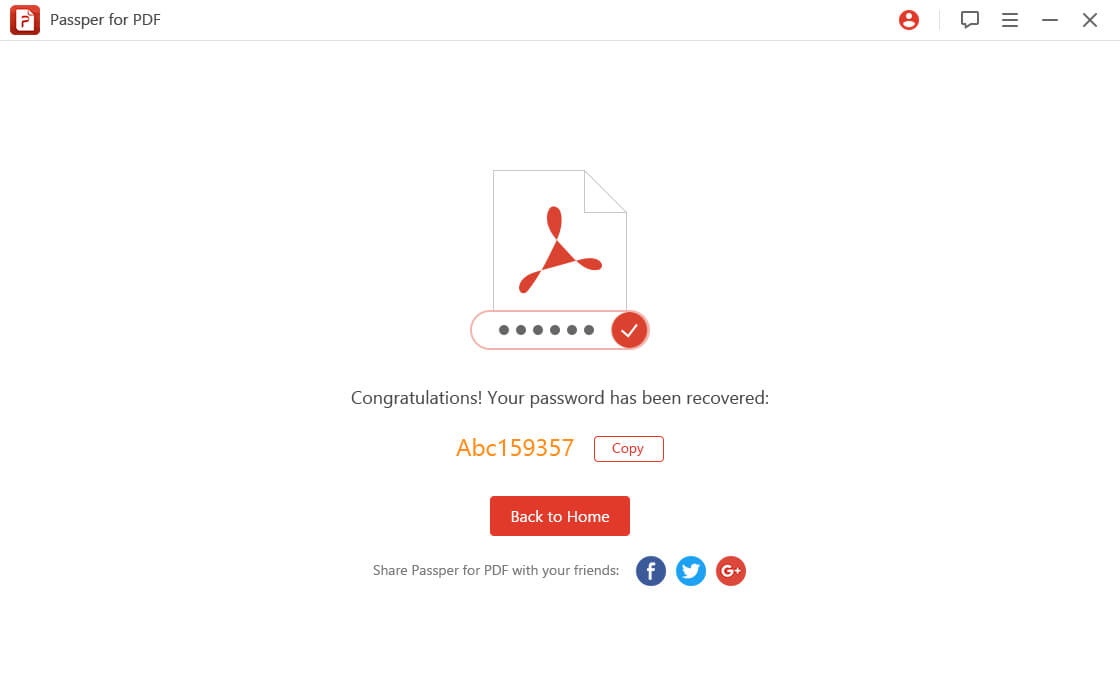
Step 3: After clicking the button, the password recovery will begin.In case there is a requirement to halt the process, you can go ahead and laterresume it. The program is able to save the last progress easily. Also, pleasenote that it may take time if the password is complex or it simply depends onthe attack method. Therefore, stay patient while it works.
2. Remove permissions password from PDF
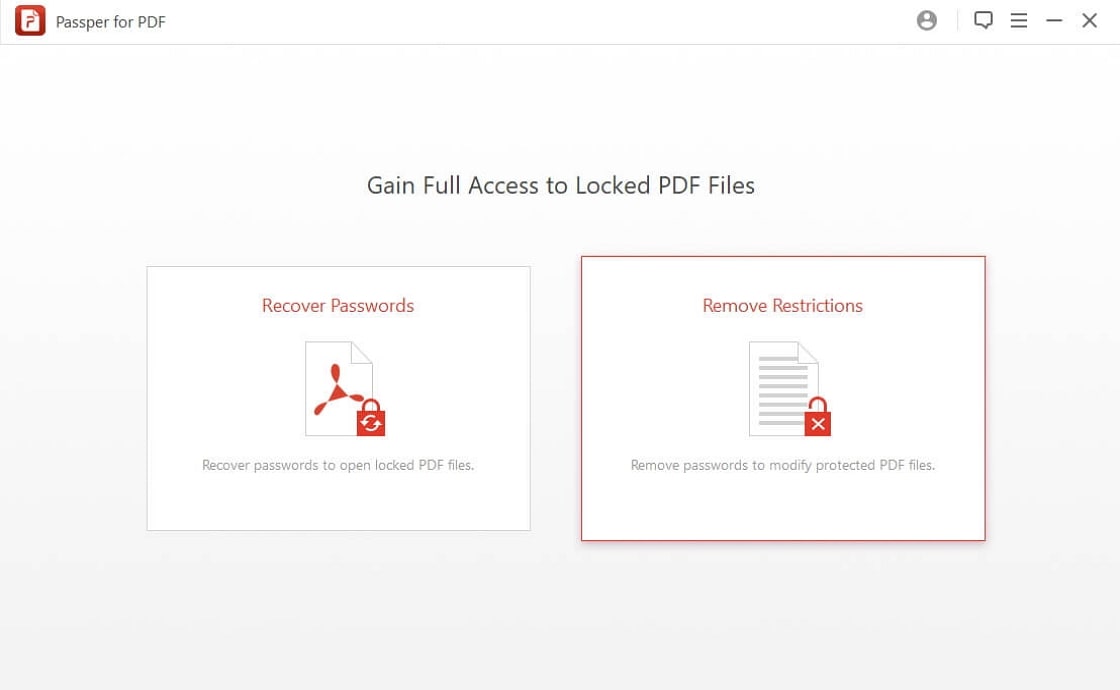
Step 1: Launch the program and from the main interface of Passper,click on "Remove Restrictions".
Step 2: Hit on the "+" icon after that and choose the PDF file to beunsecured. Then, hit on the "Remove" button to get your file unlocked.
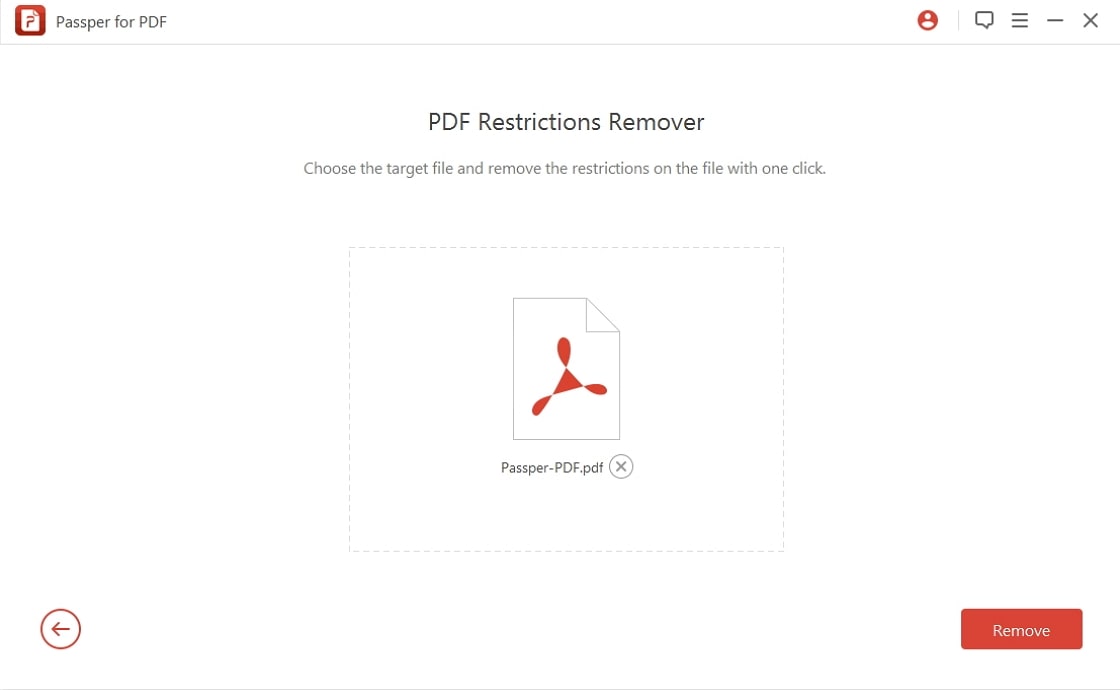
Step 3: Stay for some seconds and the process will be over. The unprotected PDF file will be saved inthe desktop folder and the folder will get opened for you. you can now easilyaccess the file which is ready for editing, printing and other modifications.
Part 3: UnsecurePDF with Password
In case you wish to unprotect your PDF file using the password, wehave two solutions for the same. Please read the following sections carefullyand get helped.
1. Use Adobe Acrobat to unprotect PDF files
The first and the most popular way is Adobe Acrobat. With the helpof this, you can easily remove the dual protection i.e. document open passwordand the permission password. However, you will need to know the password inorder to proceed for removal. Here is how you can use Adobe Acrobat to unsecure PDF file and start editing it.
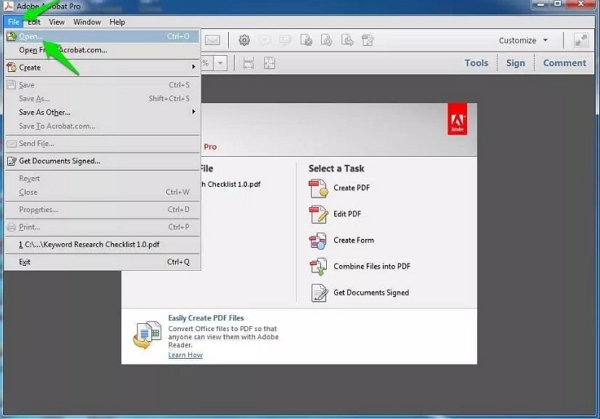
Step 1: Start with launching the Adobe Acrobat Pro. Proceed withclicking on "File" option located at the top right corner. After clicking,choose the "Open" option and browse for your PDF file.
Step 2: You will now be prompted to enter the password. After whenyou enter it, the PDF file will be opened.
Step 3: Look for the "Protect" option located on the right side ofthe screen and click on it.
Step 4: Followed by this, click on the "More Options" drop-down atthe top and choose "Security Properties".
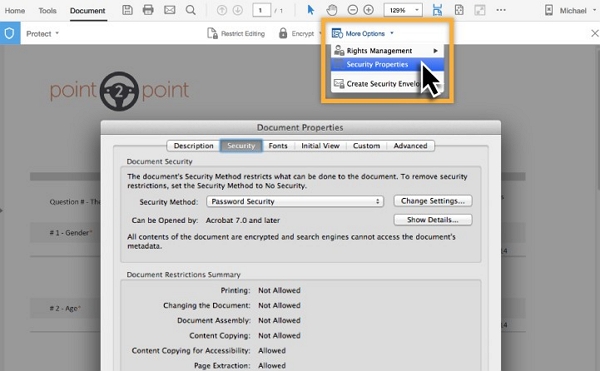
Step 5: From the pop-up that appears, go to "Security" tab and clickon "Security Method" drop-down menu. From there, hit on "No Security". In caseof a document open password, you simply need to confirm the change whereas ifthere is permission password, enter the password again and unprotect PDF files by removing security.
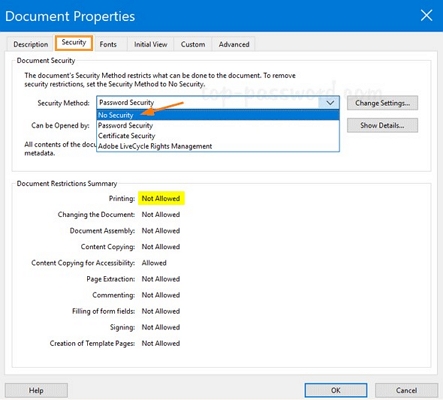
Step 6: You can now save the file to go with the changes. Thepassword is now removed.
2. Use Google Chrome to Unprotect PDF Files
Another option that can assist you in un-protecting the PDF file isGoogle Chrome. However, this can only help in removal of permissions passwordor you can only unsecure the owner-protected PDF file. To know how it works,please have a look at the following step by step tutorial.
Step 1: Visit your browser on your computer and head to https://drive.google.com/drive/. Youwill be directed to the Google Drive page.
Step 2: Choose your email account to proceed with Google Drive. Incase you are not logged in, hit on "Go to Drive" and then feed in thecredentials to proceed.
Step 3: Drag the PDF file from your PC and drop it in the GoogleDrive. Alternatively, click on "New" followed by "File Upload" and choose thePDF file to upload.
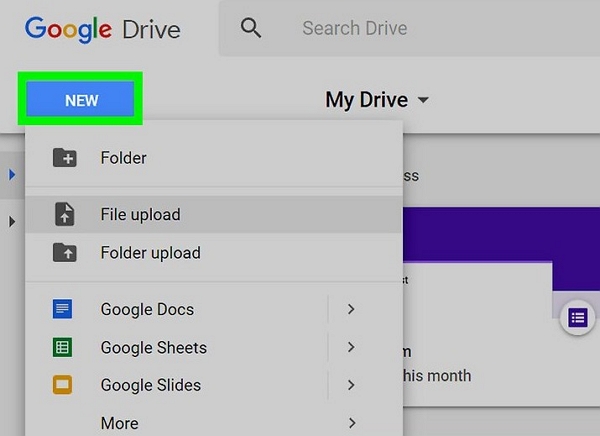
Step 4: Now, click twice on the uploaded PDF file in Google Drive toopen it inside the Chrome.
Step 5: You will be needed to feed in the password if the PDF isuser-locked. Hit on "Submit" after entering password to see the contents.
Step 6: After the PDF gets opened, press the "Ctrl" + "P" keys(Windows)/"Command" + "P" keys (Mac). The print window will appear.
Step 7: On the leftpanel of the Print window, click on "Change" which can be found under"Destination". It will bring a menu.

Step 8: Hit on "Saveas PDF" and click "Save". Now, the file will be saved as unsecure PDF fileallowing you to edit, copy text from PDF or print the file.
Extra Tip:How to Sign a PDF File
After making you fully acquainted with the worthwhile ways on howyou can unsecure PDF file, we would also like to add an interesting tip foryou. A lot of times you may find the need of signing the documents digitally.Well! It is not difficult if you know how. Keep scrolling and reading thefollowing guide to know how you can sign electronically with Acrobat Reader.
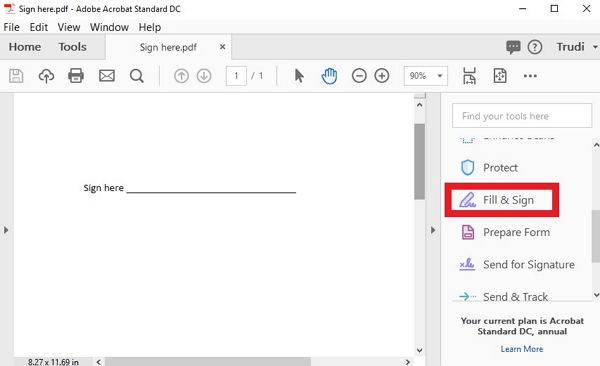
Step 1: In order to begin the process, open the PDF document in thefirst place in Acrobat Reader. Hit on "Fill & Sign" button available on theright panel.
Step 2: Move with clicking on the "Sign" button and choose "AddSignature". Now, add the signature on Adobe Acrobat Reader DC.
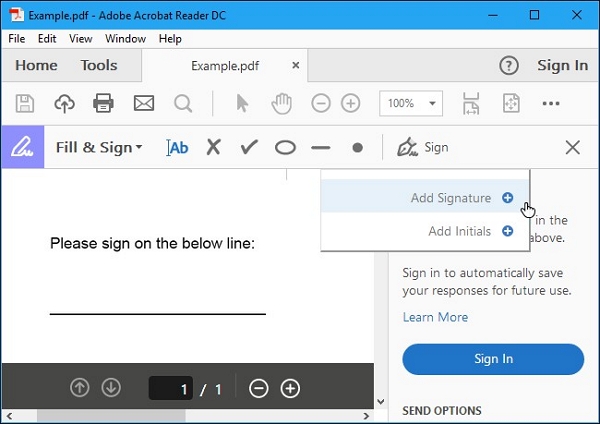
Step 3: You can make use of other buttons given on the toolbar incase you want to add other information. Typing text or adding checkmarks forinstance can be done using the buttons on "Fill & Sign" toolbar.
Step 4: The signature creation can be done in three ways.
Firstly, with the "Type" option which the program selects by default. Here you need to just type your name and it will get converted into a signature. Though it won"t give a real signature look so it will not probably be ideal.
Secondly, you can choose the "Draw" option followed by drawing the signature with the help of mouse or touch screen.
A yet another way is to select "Image". However, this method will demand scanning of your signature. In other words, you will need to sign on paper and then scan it using the scanner. Lastly, add it on the Adobe Reader. Although it requires scanning, using this can save you for future whenever you have to sign electronically.
Step 5: Once you decide the method and create the signature, hit on"Apply" option and he signature will be applied to the document. Make sure that"Save Signature" is checked. This will enable you to quickly add the signaturein future.
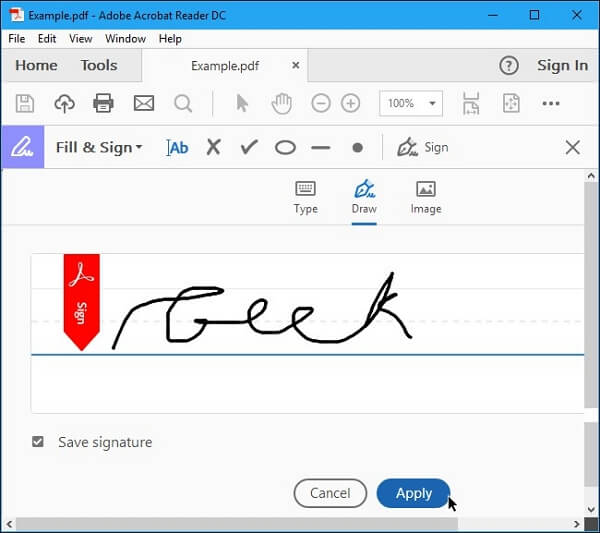
Step 6: Lastly, simply set the signature on the needed place usingyour mouse and click to apply. If you have selected the save your signatureoption, you can later locate it in the "Sign" menu if needed. Also, if you needto save the signed PDF document, you can choose "File" followed by "Save" andchoose the location.


