You've just finished writing a crucial letter for your employer. You were told to keep the letter's extremely private information and never share it. Therefore, the first thing you did after finishing the letter was to impose access restrictions by giving it a password. Four days have passed since then, and when you try to make a few changes to the paper before forwarding it to your boss, you find that none of your usual passwords are working.
Even though you are sure you remember the password, Word immediately informs you that it is incorrect whenever you write a new version of it. Read on before you hurriedly start typing the document again. We will discuss how to unlock a word document for editing.
Part 1. Save read-only Word document with modified password as another file
Part 2. Unlocks word documents using WordPad.
Part 3. The fastest way to remove a password from a word document
Part 1. Save read-only Word document with modified password as another file
Making a Word document read-only is the easiest way to prevent its contents from being unintentionally changed by others. This article will now demonstrate how to make a Word document read-only using Microsoft Word 2016 as an example. These techniques work with Word 2013, Word 2010, and Word 2007.
Way 1: Make a Word document read-only with a password
There are two ways to utilize the password to make a Word document read-only.
Option 1: Create a password to prevent changes to a document.
- Launch the Word file.
- Select one location to store this document by clicking File -> Save as.
- Select General Option by selecting the drop-down arrow next to the Tools button in the Save As window.
- Check the box next to Read-only suggested in the General Options window, then enter a new password if necessary. To change the password, enter it again and choose OK.
- To save this Word document and make it read-only, click Save when you are back in the Save As dialogue box.

Option 2: Employ the function that restricts Editing
Use the limit editing option to make a read-only document that may be opened without a password.
- Launch the Word file.
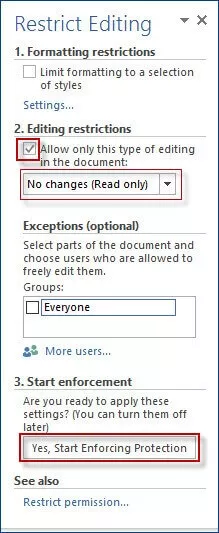
- Click Protect -> Restrict Editing on the Review tab after selecting it.
- Check the boxes next to Formatting limits and Editing restrictions as needed after the Restrict Editing panel has shown. Then choose Yes, Enforce Protection Now.
- Enter the password twice in the Start Enforcing Protection dialogue box to secure the Word document.
- To save the modifications and make the Word document read-only, press Save + S.
- By doing this, Read-Only is also indicated in the Word document. Although you can update the text, your changes won't be retained in the original File. To save the modifications, you must save the Word document under a new name or in a new location.
Part 2. Unlocks word documents using WordPad.
When word documents are password-protected, and you need to alter one of them, you realize that you can't recall the password.
Here's what you will be doing to solve it:
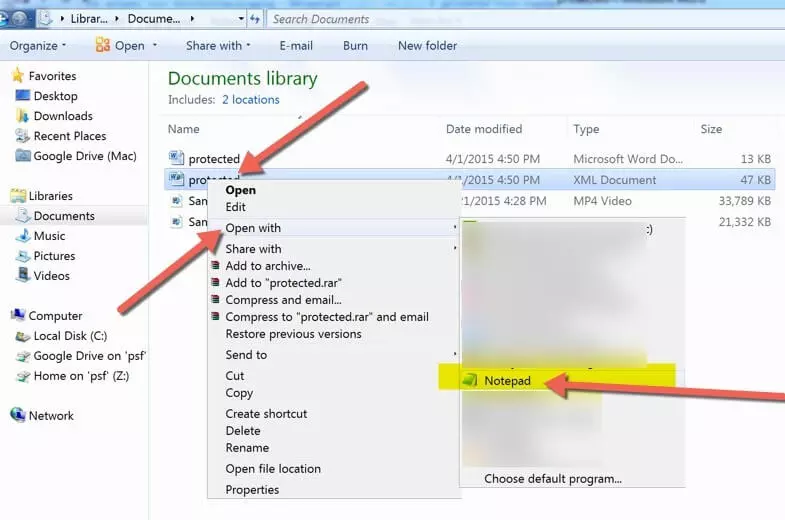
- You must first open the document in Word. After selecting "Save As," save it with the ".xml" extension:
- Use a text editor to see this new.xml File (Notepad, WordPad, etc.)
- Search for the string w:enforcement="1" by pressing CTRL + F.
- Change the "1" to a "0" now.
- Save the XML file.
- Open the XML file in Word.
- To save the document as a doc or docx, choose "Save as."
Part 3. The fastest way to remove a password from a word document
Because you lost the password, you can't access a Word document. Passper for Word has four sophisticated attack techniques that may drastically cut the number of potential passwords and speed up password recovery. The saved document will be restored to its original condition after recovery, with no alterations. Passper for Word also operates quickly so that you will have your recovered passwords in a short period.
Features of Passper for Word:
- The best chance of successfully recovering the password is to open a password-protected Word document.
- Remove the limitations from a Word document right away to make it editable.
- Support for GPU-accelerated password recovery 10x quicker.
Additionally, Passper for Word aids in removing formatting and editing constraints from a Word document. It is the procedure:
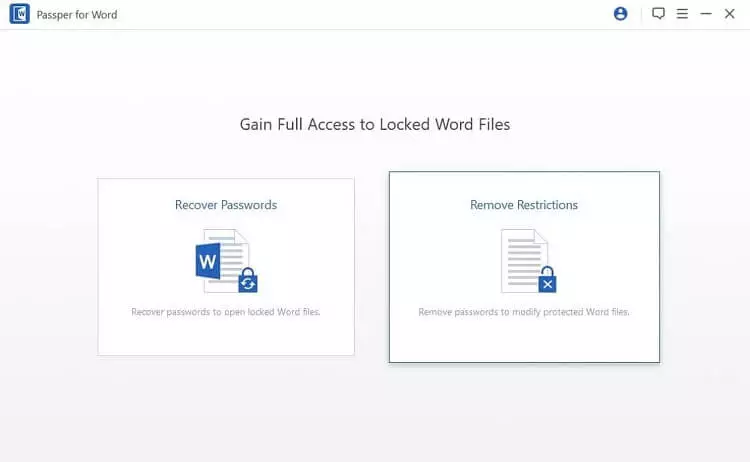
Step1: Start the software and choose "Remove Restrictions."
Step 2: Using the 'Select a File' option, add the password-protected Word document. Click the "Remove" button after uploading the file to the application.
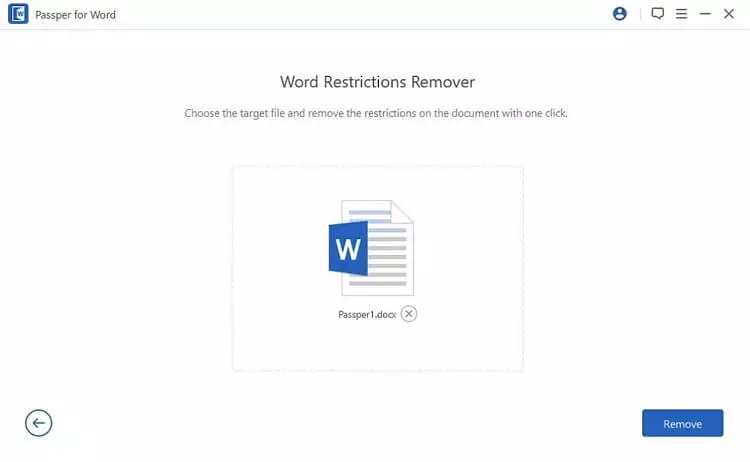
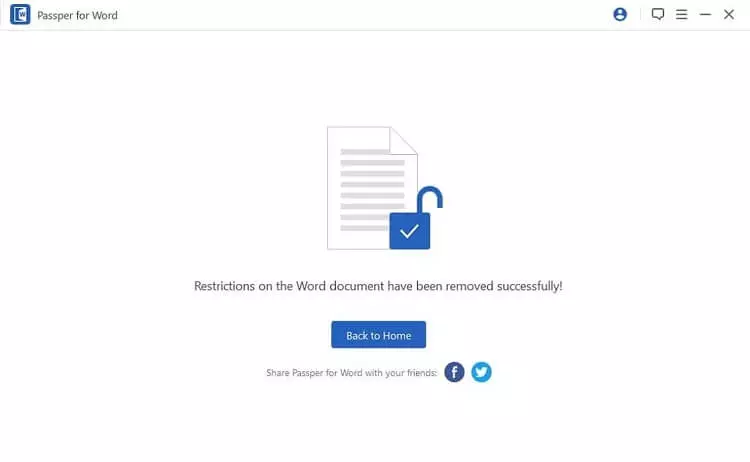
Step 3: Soon, all restrictions will be lifted. The Word document is now editable.
Conclusion
How to unlock Microsoft Word with or without a password has been discussed. Passper for Word is the ideal approach. Because it has received high ratings and endorsements from tens of thousands of users and professionals, this Word password unlocker is always given priority. Second, when unlocking, your file type is secure. As a result of its perfect performance, we would undoubtedly recommend this to everyone. If you have anything to say, please do so in the space below and let us know your thoughts. Follow us for more.
