There are some people who choose to use Windows 7 even if Microsoft offers free upgrades. The choice to remain with an older version of Windows can be attributed to a number of reasons. Maybe you want to save some space on your computer and would rather not download the huge file a Windows update can be. Or maybe there are some specialized programs on your computer that may be affected if you upgrade your Windows 7.
But it doesn't mean that Windows 7 doesn't have its own issues. One of the most common problems is when Windows 7 boots to black screen with a cursor. This problem can be very frustrating especially when you are unable to use your computer and you are unsure of the safety of your files. In this article, we are going to offer you some solutions that can help you fix the issue of Windows 7 black screen and get your computer working normally again.
1. Remove All External Connections
2. Reinstall Graphics Card Driver
3. Boot Into Last Known Configuration
5. Check Malware on Your Computer
1. Remove All External Connections
It is very possible that some hardware connections could be causing the problem. This is why the first thing you must do when you encounter this problem is to remove all eternal connections. To do that effectively, follow these simple steps;
Step 1: Switch off the computer.
Step 2: Unplug and remove all external devices including the headset, microphone and USB drive.
Step 3: If the computer is a laptop, remove the charger cable and the battery (if you can).
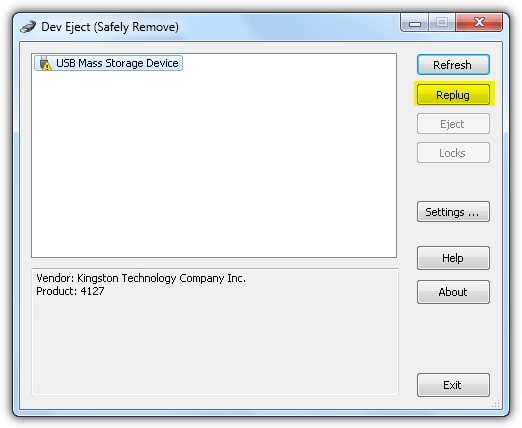
Step 4: Now press and hold the power button for 30 seconds. While you do this, the computer will boot up and turn off repeatedly.
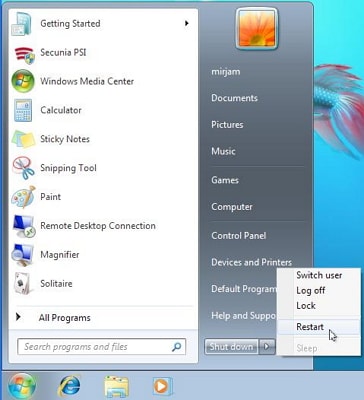
Step 5: Put the battery back into the laptop and plug the charger back in.
Step 6: Turn on your computer as normally.
If the computer turns on normally, plug in your hardware devices one at a time. If the black screen appears again, you will know which hardware device is causing the problem and you can then replace it.
2. Reinstall Graphics Card Driver
This solution is only effective if you can still access the Task Manger on your Windows 7 computer.
Step 1: Press and Hold the "Ctrl + Alt +Delete" to launch the Task Manager.
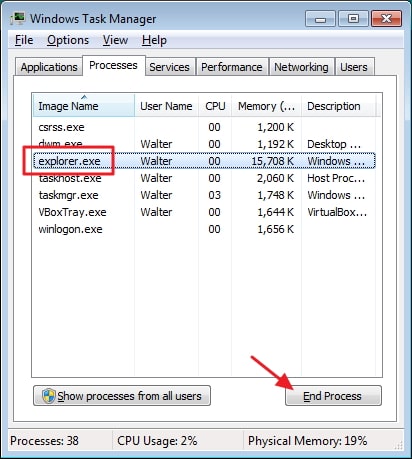
Step 2: click on the "Processes" tab and the find "explorer.exe".
Step 3: Right click on all selected processes and then click on "End Process".
Step 4: Now click on "File > New Task" to create a new task.
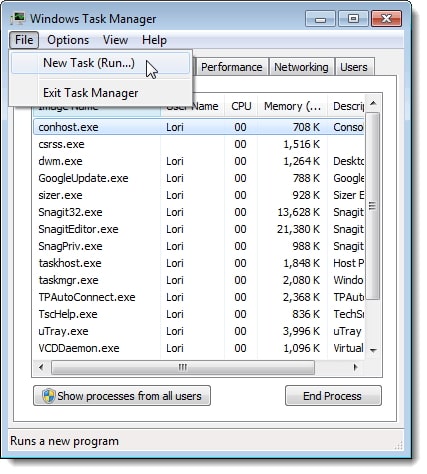
Step 5: Type in "explorer.exe" and then click "OK". You should now be able to see the Windows taskbar.
Step 6: Now click on the start button in the Windows search bar, type in "Device Manager". Click on it when it appears in the search results.

Step 7: Find the "display adapter" and double-click on it. Right-click on your device name when it appears, and then select "Update Driver Software".
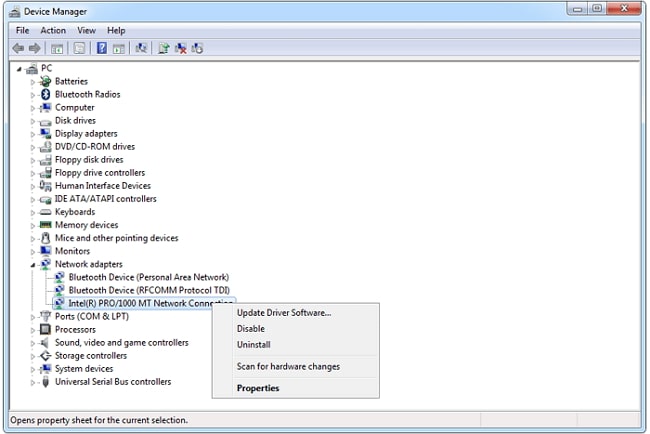
Step 8: Follow the instructions in the update Wizard that appears and when it is complete, your computer should be back to normal.
3. Boot Into Last Known Configuration
This is a process that allows you to start your Windows 7 system when your computer has serious problems. It loads the system that has worked properly in previous sessions. Here's how to do it.
Step 1: Make sure that your computer is completely turned off and then press the "Power Button" to turn it on.
Step 2: Press "F8" on your keyboard as soon as you see the computer logo appeared on the screen.
Step 3: This will open the "Advanced Boot Options" menu. Using the arrow keys to select "Last known Good Configuration" and then press Enter" on your keyboard.
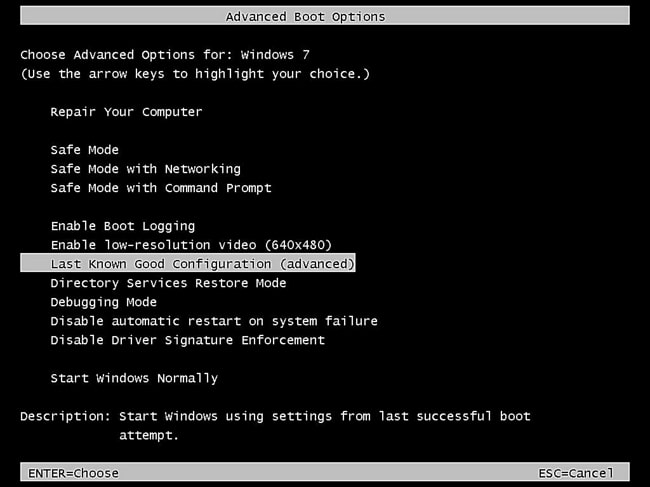
Now simply wait a moment while the computer restarts. The process should hopefully save your computer and fix the black screen with a cursor problem.
4. Run System File Checker
This problem could also be caused by some corrupted files on your system. If you suspect that there are some corrupted files on your computer, you may want to run a System File Check (SFC) to fix them and fix the system itself. Here's how you can do that;
Step 1: Power up your computer and hit the "F8" key on your keyboard after you see the computer's logo.
Step 2: This will launch the "Advanced Boot Options" menu. Use the arrow keys on your keyboard to select "Safe Mode" and then press "Enter".
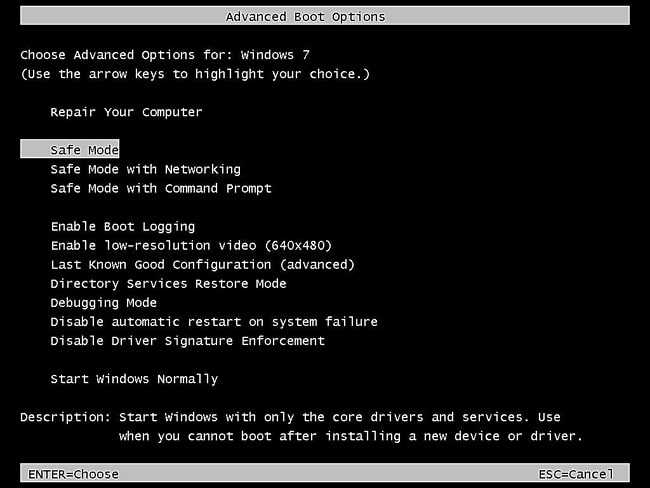
Step 3: When your computer is in Safe Mode, type in "cmd" in the search box. Right click on the "cmd" that appears and then click "Run as Administrator".
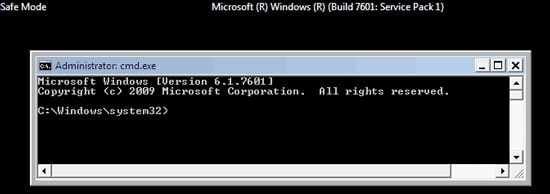
Step 4: Type in "sfc /scannow" and then press "Enter".
Step 5: The Windows system will be scanned to find and fix any corrupted files on the system. It may take a while depending on the number of files on your system.
Step 6: Type "exit" and then press "Enter" to exit the Command Prompt when the process is complete.
Now restart your computer and the Windows 7 black screen issue should hopefully be gone.
5. Check Malware on Your Computer
Malware on your system can also cause this issue as well as many other problems you may be experiencing with Windows 7. In this case, you would need a good anti-virus program to help remove the malware to get rid of this problem. You can use Windows Defender or a more powerful Anti-Malware to conduct a deeper search.

6. Uninstall Windows Security Update
Certain Windows security updates have been known to cause this problem. If you suspect that this could be the issue, follow these simple steps to uninstall the Window security update.
Step 1: Open the Task Manger on your computer. You can do that by pressing the "Ctrl + Alt + Delete" keys on your keyboard at the same time.
Step 2: Click on the "Processes" tab and then find "explorer.exe".
Step 3: Right click on all the selected processes and then choose "End Process".

Step 4: Now click on "File > New Task" to create a new task.

Step 5: Type in "explorer.exe" in the provided field and then click "OK". This will make the Windows taskbar visible.
Step 6: Click "Start" and in the search function, type in "programs and features". Click on the first result that appears.
Step 7: Click on "View Installed Updates" located in the upper-left of the window.
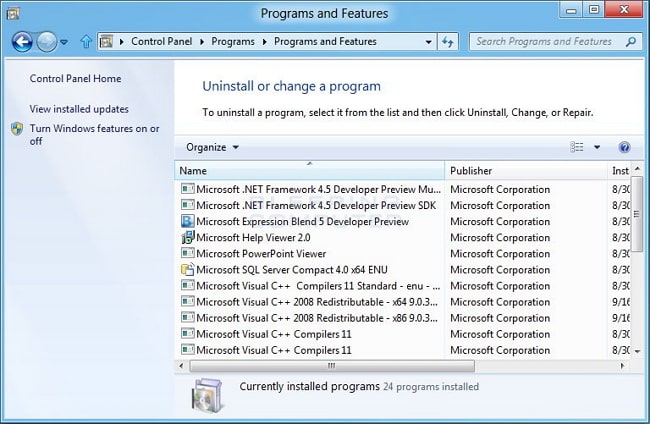
Step 8: Look at the name and dates of the updates listed to find those with the code name KB2607712, KB976098 and KB915597. If they were installed immediately before the black screen issue occurred, right-click on each one and select "uninstall".
Step 9: Restart your computer and it should hopefully work perfectly.
7. Restore OS System
To fix this problem, you can also choose to do a system restore to restore the computer to a previous state. You can do this even if you don't usually save restore process and the restore will not affect any of your files. Here's how to do a system restore.
Step 1: Boot your PC in safe mode.
Step 2: On the lower-left corner of the screen, click on the "Start" button.
Step 3: In the search function, type "recovery" and then select it from the results that appear.
Step 4: Click on "Open System Restore" option to launch the system restore Wizard.
Step 5: Now simply follow the instructions on the Wizard to restore the system to a previous point.

The Windows 7 black screen of death is without a doubt a big problem. But it is our hope that you can find a solution from the one's highlighted above.


