There are times when you lose a lot of confidential information, just because you were not careful about protection when you share your PowerPoint Presentation. Well, you can easily add a password to protect your PowerPoint presentation from unauthorized access or modification.
There are various methods that you can use to password-protect PowerPoint files. Here we introduce two free methods that you can use to add security layers to your PowerPoint presentation.
Part 1: 2 Types of Password Protection in PowerPoint
Part 2: How to Password Protect PowerPoint
Bonus Tip: How to Remove Password Protection from PowerPoint
Part 1: 2 Types of Password Protection in PowerPoint
To be very specific, there are two password options for you to add security layers to your PowerPoint presentation. The first one is the password to open PowerPoint files. No one can open or read the PowerPoint presentation without first entering the correct password. The other is the password to modify PowerPoint files. Protected by password to modify, the PowerPoint presentation can be read only.
Part 2: How to Password Protect PowerPoint
There are two free options that you can use to add password to protect your PowerPoint presentation. Just few simple steps and you can easily password protect your PowerPoint files in almost no time. The best thing is, you do not need to be an expert to do the procedure, as you can do this yourself. Take a look at the below-mentioned steps of adding passwords to your PowerPoint presentation files.
Method 1. Use File Menu to Add Password Protection to PowerPoint
From File menu, you can only add password to protect your PowerPoint from unauthorized access. Anyone who tries to open that particular file will be required to enter the password first.
Please follow the steps below to encryp your PowerPoint Presentation:
Step 1: Run Microsoft PowerPoint and open the presentation file that wants to add password. Click on the File menu at the top left corner, then click on the Info tab from the left navigation panel.
Step 2: Find the Protect Presentation option and click on it. You will get a drop-down menu list. Select Encrypt with Password to encrypt the PowerPoint file.
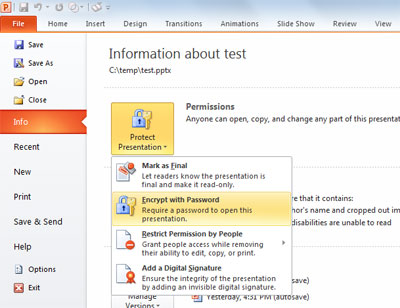
Step 3: Type the password in the Password dialogue box and click on the OK button.
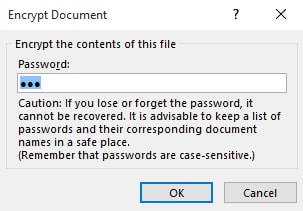
Step 4: Re-enter the password in the box to confirm it and click the OK button again. Save your PowerPoint presentation and now your file is protected with a password.
Method 2. Use General Option to Add Password Protection to PowerPoint
Another free and better way to add a password to your PowerPoint presentation is using General Option:
Step 1: After you finish your PowerPoint presentation, click F12 to recall the Save as dialog. You can also click on the File menu and choose Save as.
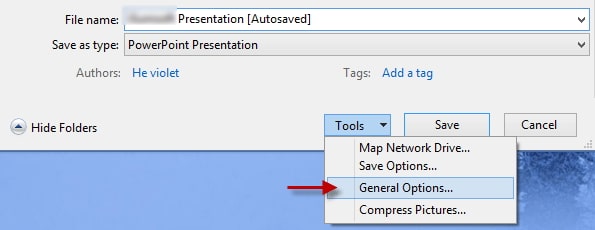
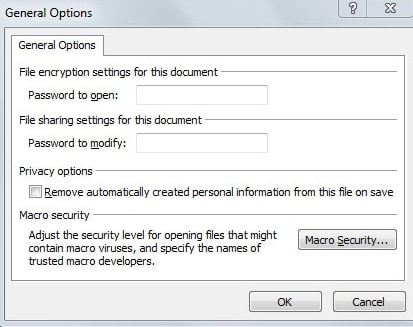
Step 2: Open the drop-down Tool. Select and click on the General Options. Here, you can both set password to open and password to modify.
Step 3: Enter a new password as you wish and then click OK to reconfirm it.
Bonus Tip: How to Remove Password Protection from PowerPoint
People usually panic and feel helpless when they have an encrypted PowerPoint file and forgot the password. And it becomes worse when they are about to go into a client meet and have no way to access the files. But what if I tell you that there is a way out to this situation and that you can recover the password and then remove the password protection?
Passper for PowerPoint is such an tool that can be used to recover password and remove password protection on your PowerPoint presentation. It’s a tool with user-friendly interface and it can be easily used even if you are a computer novice.
Some other features of Passper for PowerPoint:
Multifunctional: It can recover password to open PowerPoint and remove password to modify it. It is useful when you are unable to view or edit your presentation.
High success rate: It offers 4 attack types to highly increase the success rate of recovery.
Fast speed: Advanced algorithms are used to largely accelerate the recovery speed. And the password to modify can be removed within seconds.
Compatibility: It supports operating system Windows and macOS. And supports PowerPoint version from 97-2021.
Recover Password to Open
First of all, download and install the program Passper for PowerPoint on your computer, and launch it.
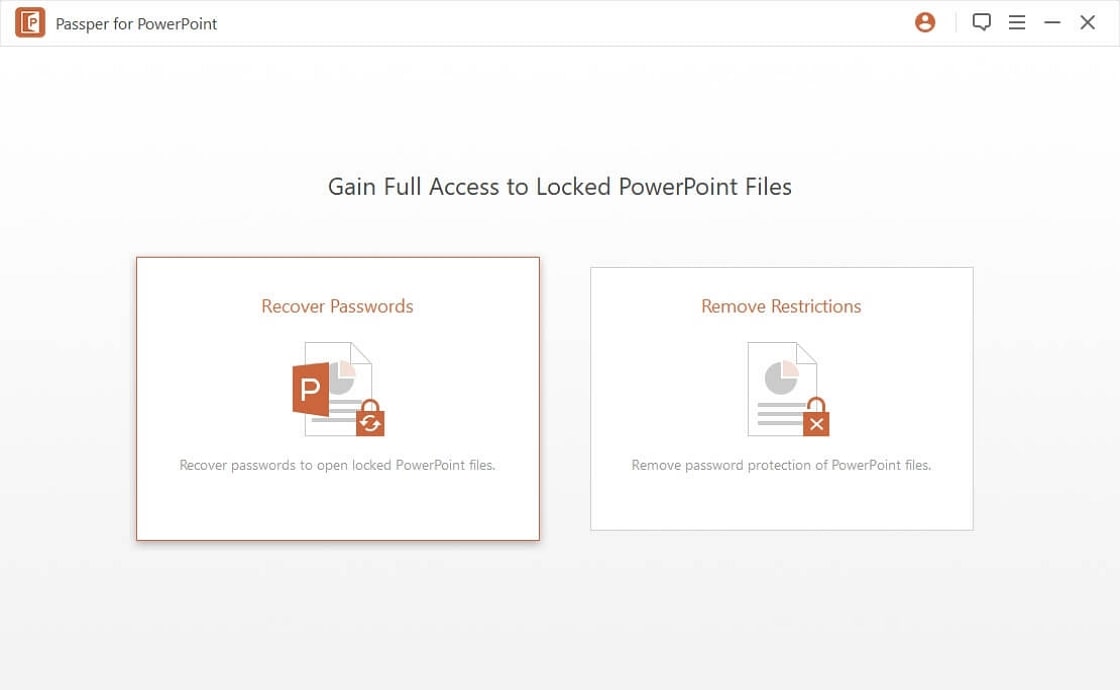
Step 1 Choose Recover Passwords on the main interface.
Step 2 Click on the “+” button to import your password-protected PowerPoint files to the program. And choose one suitable attack types out of four.
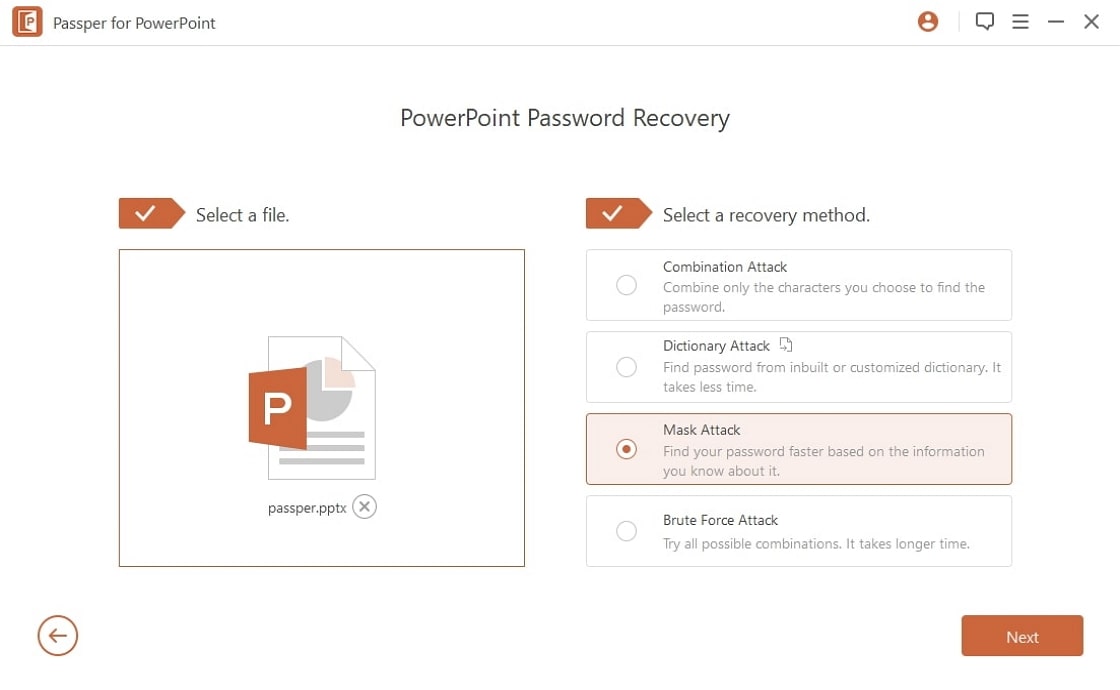
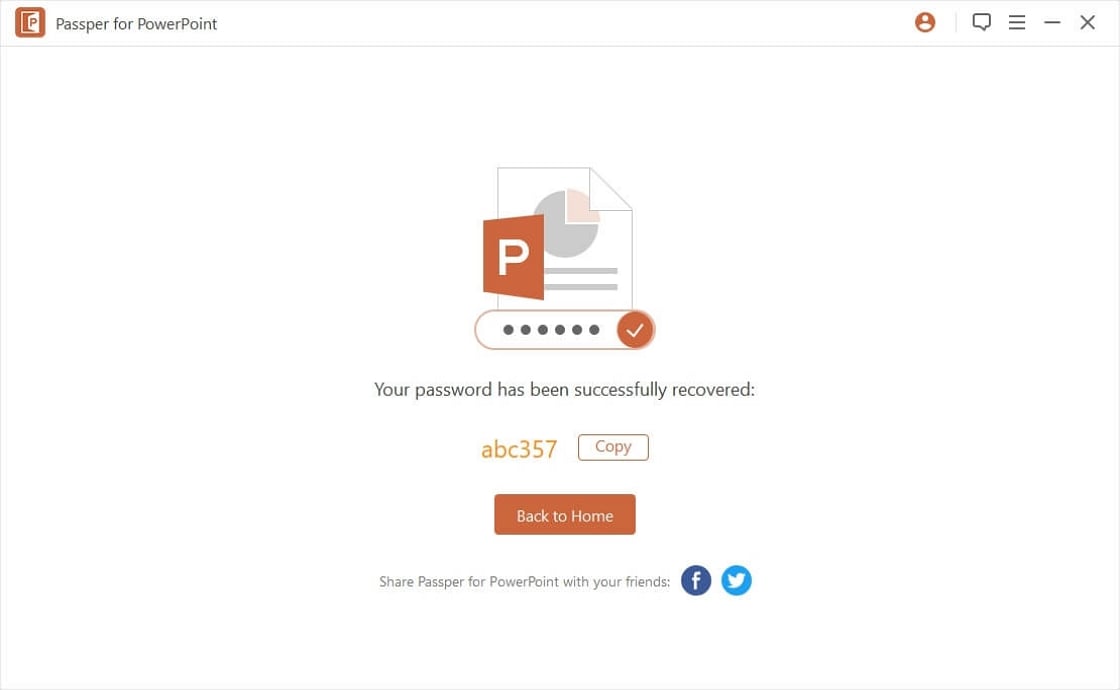
Step 3 Once you have finished all the settings, click on the Recovery button and the process will be initiated automatically. The program will take some time based on password complexity. It will later configure the password and you can get access to your file.
Remove Password to Modify
Remove password to modify is much easier and faster than recovering. You can check the following simple steps:
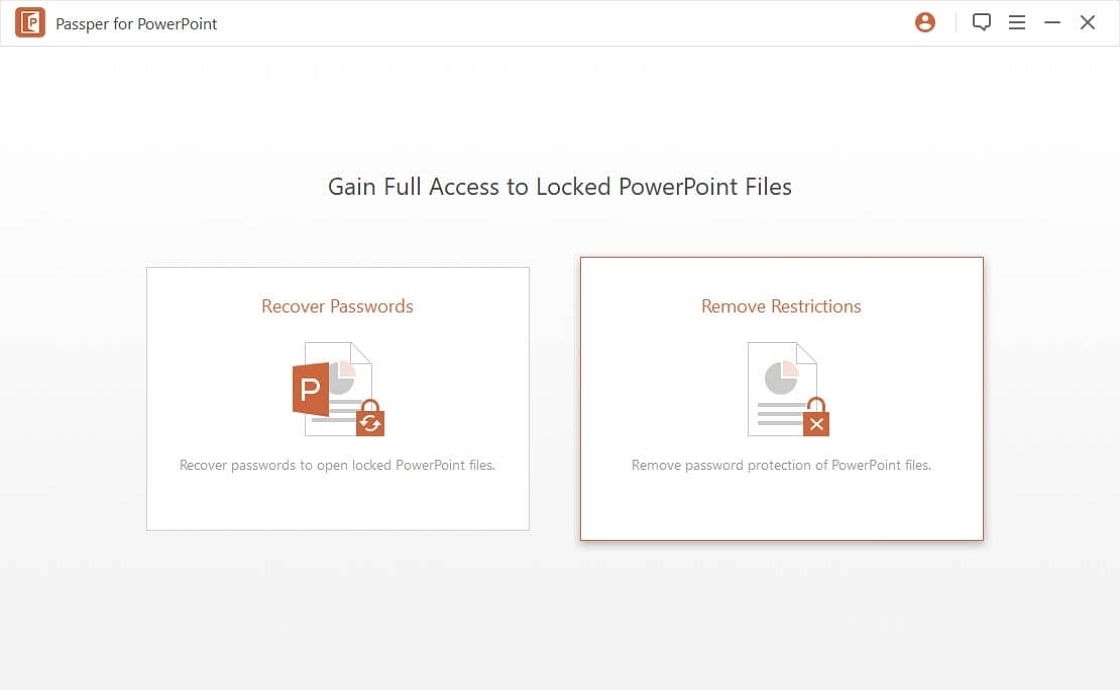
Step 1 In order to remove the password to modify in your PowerPoint file, please choose Remove Restrictions on the main window.
Step 2 Click on the Select a File to add your password protected PowerPoint.
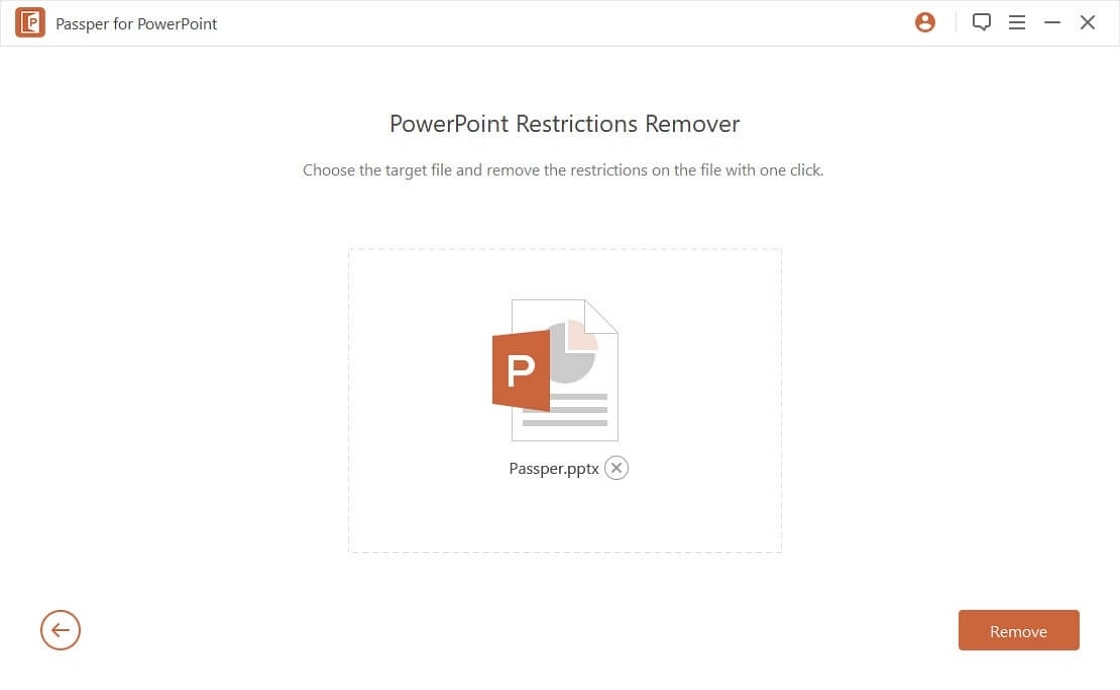
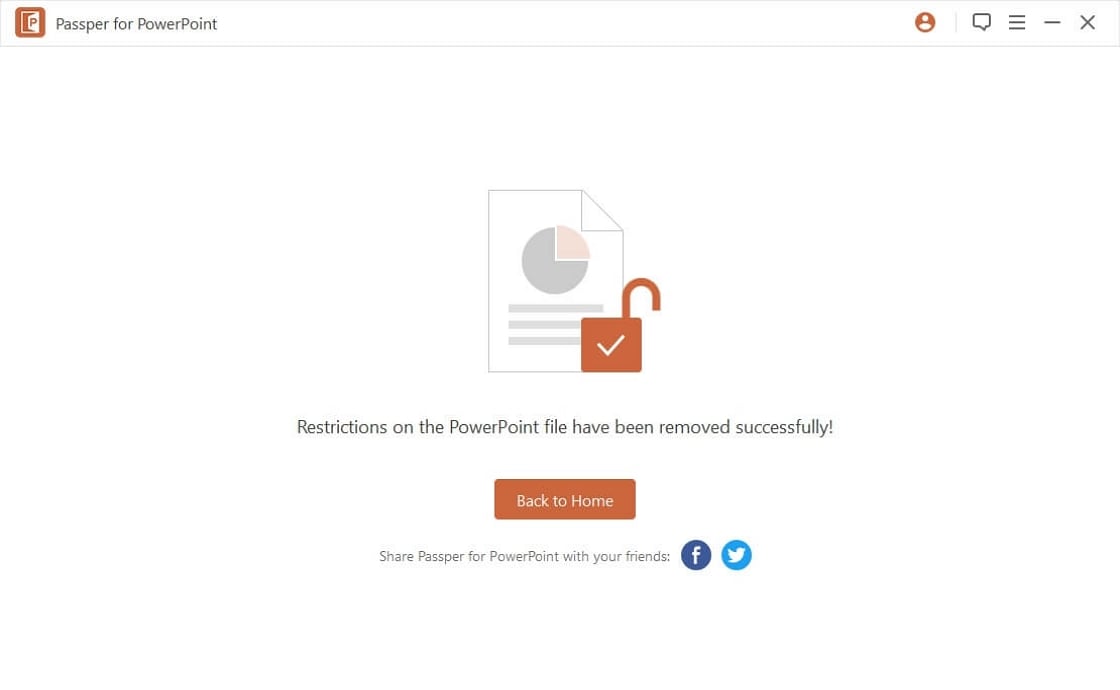
Step 3 Now, click Remove button to start the process. The password that restricts you from modifying will be removes within seconds.
Drawing A Conclusion
If you don’t want to lose your confidential documents, pay attention to the above-mentioned ways and get rid of such problems. They keep your PowerPoint safe and secure from any type of unauthorized access or modification. Therefore, you ever get into the wrong foot, where you need such kind of help, this article can be a savior. Keep your files protected by taking care of simple password managing ideas.


