It is 21st century and almost everyone uses passwords for essential protection from fraud, identity theft and unauthorized access to personal data. Everyone wants to protect and secure their data in this digital world.
Same goes for PowerPoint. People use passwords to protect and secure their PowerPoint files to maintain their integrity and prevent them from unauthorized access. PowerPoint offers 2 types of password protection. One is password to open and other is password to modify. Password to open is a password used to prevent unauthorized access to PowerPoint and password to modify is a password used to prevent unapproved changes and edits to PowerPoint. In this article, we will guide you how to secure your PowerPoint by using these types of passwords and what different methods can be used for securing PowerPoint files.
Part 1: How to Secure PowerPoint Presentation
● 1. Secure PowerPoint Presentation from Opening
● 2. Secure PowerPoint Presentation from Modifying
Part 1: How to Secure PowerPoint Presentation
PowerPoint files contain research materials, important data, confidential company details, sales worksheet and information that you don't want to share with everyone except authorized personnel. To prevent and secure your PowerPoint presentation file from unauthorized access, editing and modification, just follow the steps and methods listed below to protect your file from unwanted access and modifications.
1. Secure PowerPoint Presentation from Opening
Security in PowerPoint is a concern when your presentation contains sensitive or confidential information. Securing a PowerPoint presentation with password adds a layer of security to your file so that it can only be opened by intended and authorized persons. Let's take a closer look and see how it's done.
Method 1: Use File Option to Secure PowerPoint Presentation
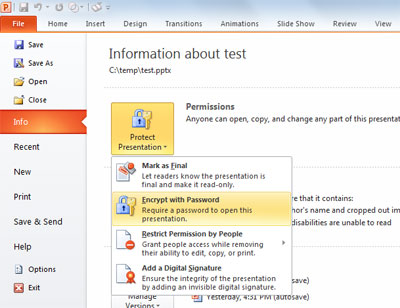
Using File option in PowerPoint ribbon is the most easy and convenient way to secure your presentation with password. Follow the steps listed below to encrypt your file with password.
Step 1: Open the file you want to secure with password and click "File" option.
Step 2: Click "Info"on the left and then select "Encrypt with Password" on the drop-down menu under Protect Presentation.
Step 3: In the Password field, enter the password you'd like to use for accessing your file and select OK.
Step 4: Save the file and your PowerPoint file is secured by a password now.
Method 2: Use General Option to Secure PowerPoint Presentation
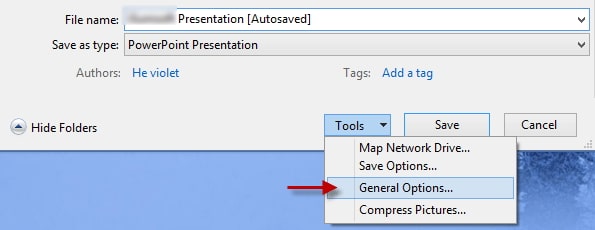
Other way to secure PowerPoint presentation is by using "General Option". To secure PowerPoint presentation using "General option" follow the steps listed below:
Step 1: Select "File" option.
Step 2: Select "Tools" option from "Save As" dialog.
Step 3: Click "General Options" and enter the password in password field. Save your presentation after completement.
You can also use "General Option" method to set password to modify PowerPoint. So that no one can edit, modify or copy the content without the password.
2. Secure PowerPoint Presentation from Modifying
Do you want to share your PowerPoint presentation with others but also want to make it secure and protect your presentation from being copied, edited and modified? Listed below are the methods to securely share PowerPoint files with anyone.
Method 1: Mark as Final Feature in PowerPoint Presentation
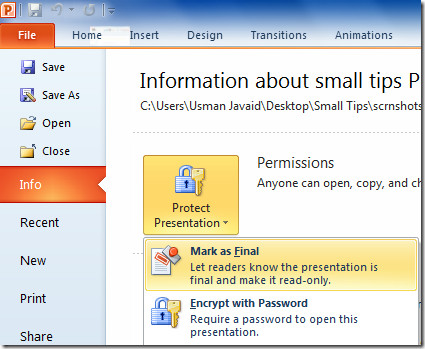
"Mark as Final" feature helps to make sure no unauthorized additional edits are made to your PowerPoint file. This feature is like a warning and it hides editing commands and features options from the ribbon. But "Mark as Final" option does not completely prevent edits because mark as final status can be reversed and file can be edited.
Below are the steps to use "Mark as Final" feature.
Step 1: Select "File" option, then click "Info".
Step 2: Select Protect Presentation option. From Protect Presentation menu, click "Mark as Final".
Step 3: Save your PowerPoint file.
Method 2: Save PowerPoint Presentation as Graphic Image
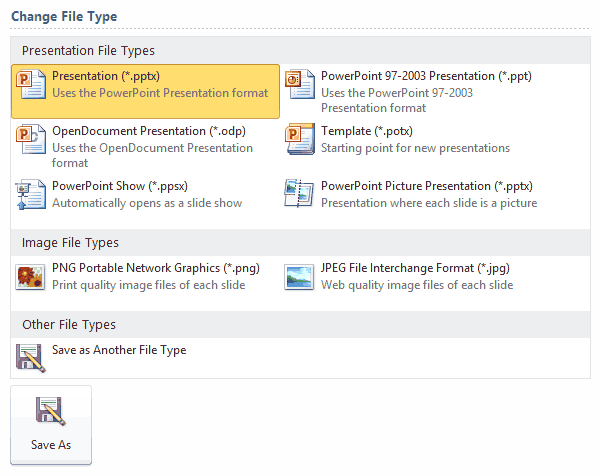
Saving your PowerPoint presentation in.jpg or .png files is a simple way to prepare them to go on the web, or work with any software without allowing anyone to modify the file.
Listed Below are the steps to secure your PowerPoint as a Graphic image.
Step 1: Click "Save & Send" option from the "File" option.
Step 2: Select "Change File Type" option from the menu.
Step 3: Choose the image type you like and then click "Save as" tab.
Method 3: Save PowerPoint Presentation as Adobe PDF
One simple way to stop people from making changes and edits in your file is to convert it into an Adobe PDF document. When you save PowerPoint presentation file as an Adobe PDF file it restricts the formatting and layout of file. People can view the PowerPoint slides, but they can't make changes to it. This method is useful to secure PowerPoint Presentation when you have to upload your PowerPoint on web or share it with large group of people.
Below are the steps to save PowerPoint as an Adobe PDF document.
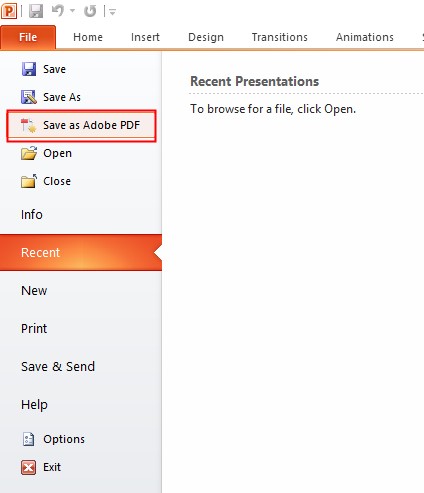
Step 1: Select "File" option. From the file menu, click "Save as Adobe PDF" option.
Step 2: Please click "Yes" in the prompt to continue. (If you have saved the file before, it will only show the "Save as Adobe PDF" pop-up.)
Method 4: Add a Digital Signature to Your PowerPoint Presentation
In today's world getting credit and accreditation for something you have created or accomplished can be a struggle. You can get the credit, ensure the integrity and secure your PowerPoint presentation by adding a digital signature to your file. People who receive the PowerPoint file can verify the authenticity of the slides and know who has provided the information with the help of a digital signature.
Below are the steps to Add a Digital signature to a PowerPoint file.
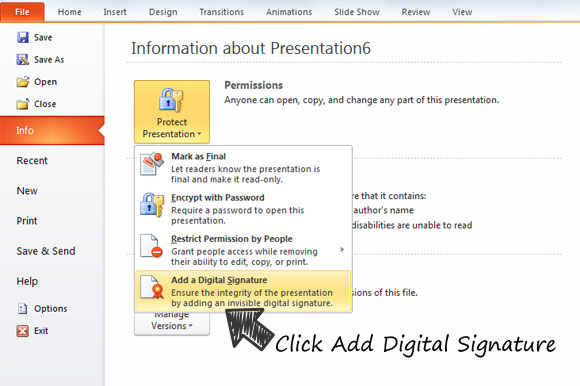
Step 1: Select "File" option. From the file menu, click "Info".
Step 2: Select Protect Presentation option. From Protect Presentation menu, click "Add a Digital Signature".
Step 3: In the Sign dialog, please enter the purpose in the "Purpose for signing this document" box.
Step 4: Click "Sign". Now your PowerPoint Presentation is protect with a signature.
Part 2: What If You Forgot PowerPoint Password
Securing a PowerPoint presentation and protecting it from an unauthorized access sounds perfect but forgetting the password can create a lot of problems and give you a real headache specially if you have an important meeting depending on that ppt or some data that is not backed up anywhere else.
Passper for PowerPoint is an easy, fast and professional password decrypting tool that can help you out the delimma.
It is a fantastic tool to recover password to open and remove password to modify.
It offers you simplest, safest and most workable solutions to retrieve your password.
It is not only powerful and effective, but it also has intuitive and user-friendly interface.
Below is a complete guide about how to use amazing features of Passper for PowerPoint.
1. Recover Password to Open
Listed below are the steps to recover PowerPoint opening password.
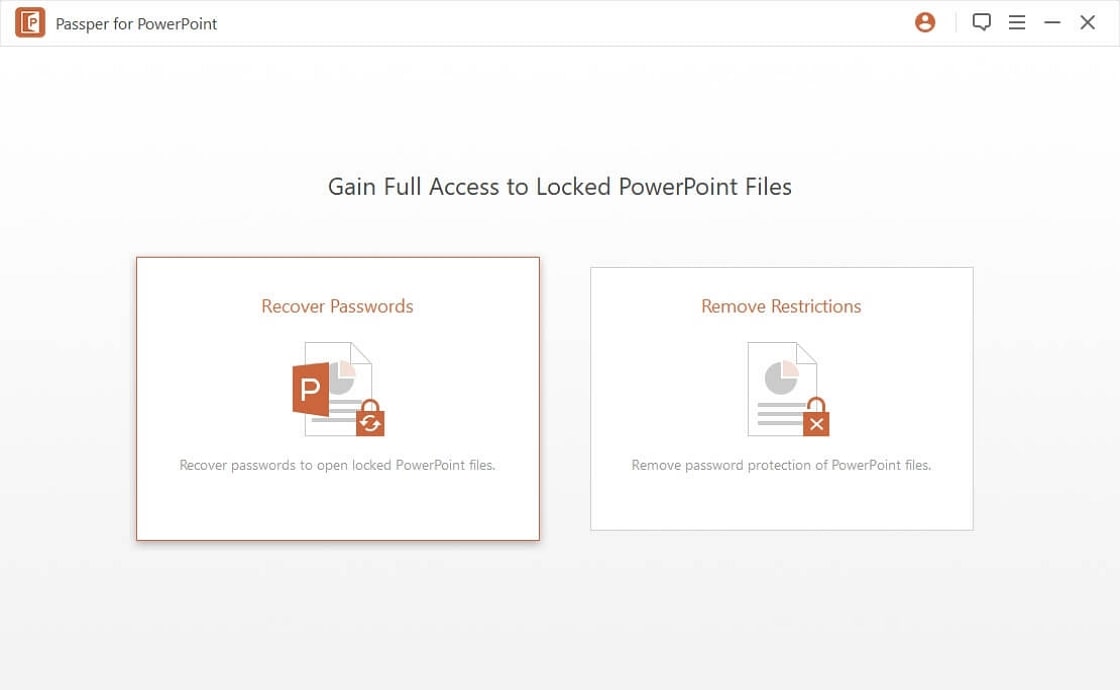
Step 1: Download Passper for PowerPoint and install it on your system. After installing, launch Passper for PowerPoint and select the "Recover Password" option.
Step 2: Add the encrypted PowerPoint file to software by browsing to the location of the file. Choose attack type that suits you to decrypt the files.
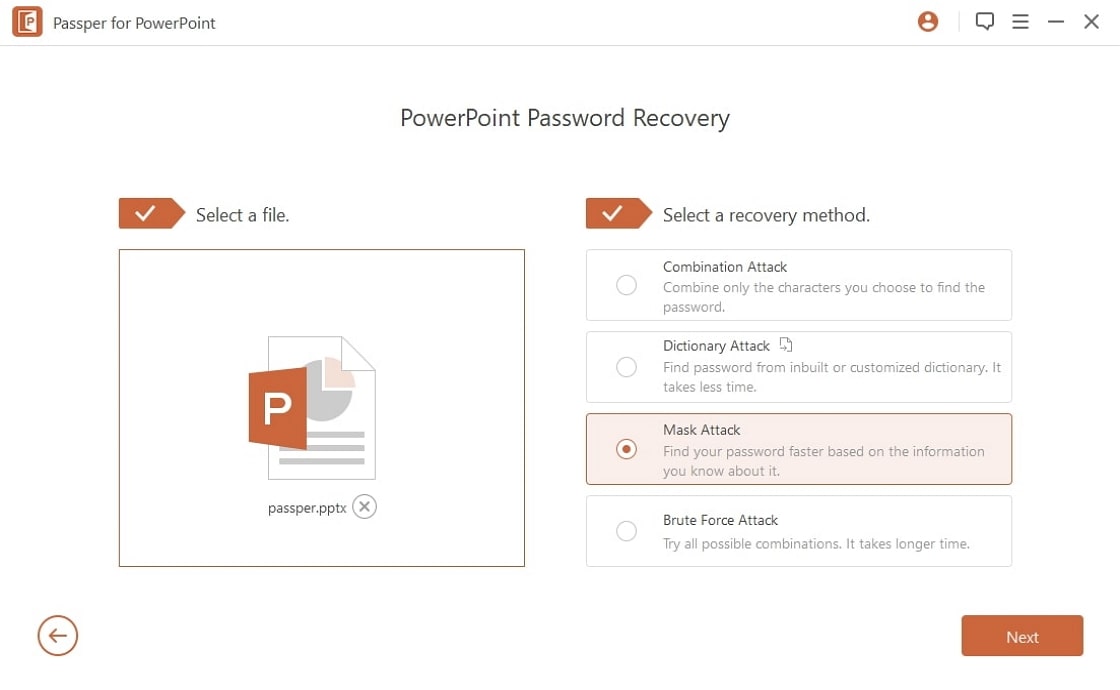
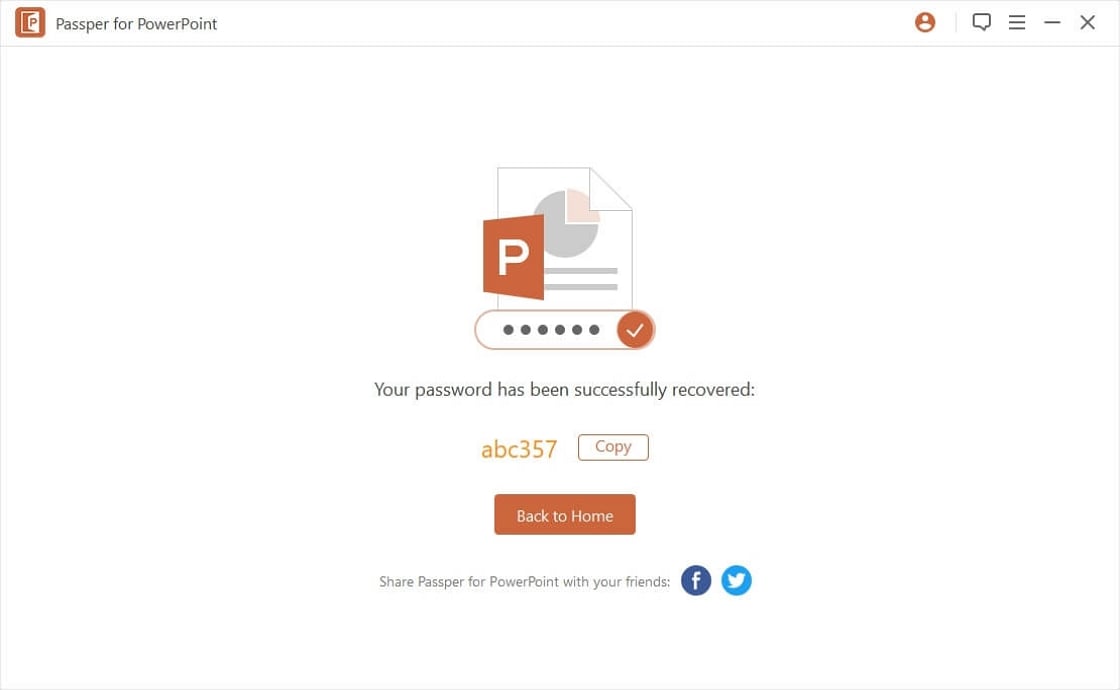
Step 3: After selecting the appropriate attack type, click on recover for the tool to start looking for password. Once found, use the displayed password to decrypt your PowerPoint presentation.
2. Remove Striction to Modify
Passper for PowerPoint can also remove the restrictions from PowerPoint archives.
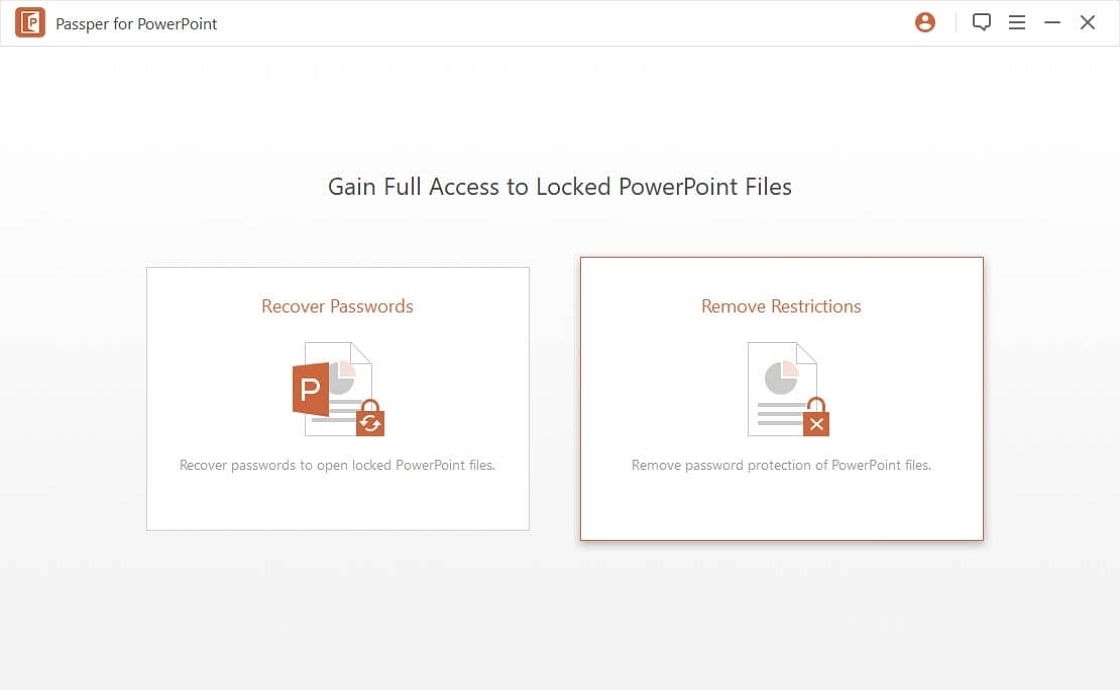
Step 1: After installing, launch Passper for PowerPoint and select the "Remove Password" option.
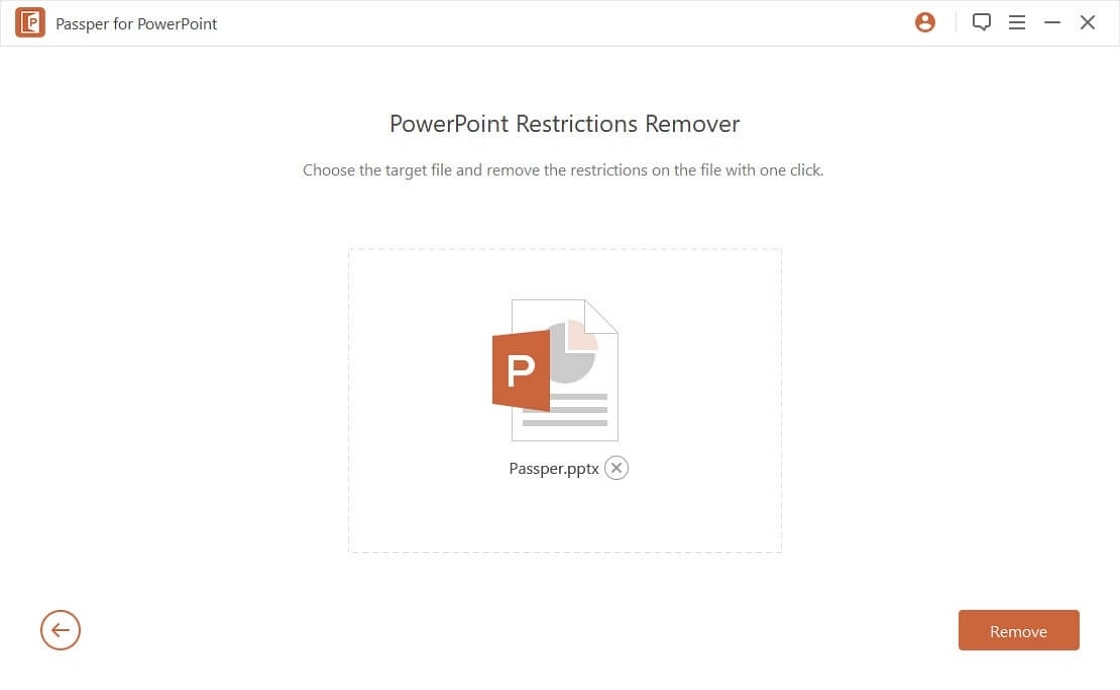
Step 2: Add the encrypted PowerPoint file to software by browsing to the location of the file and click remove.
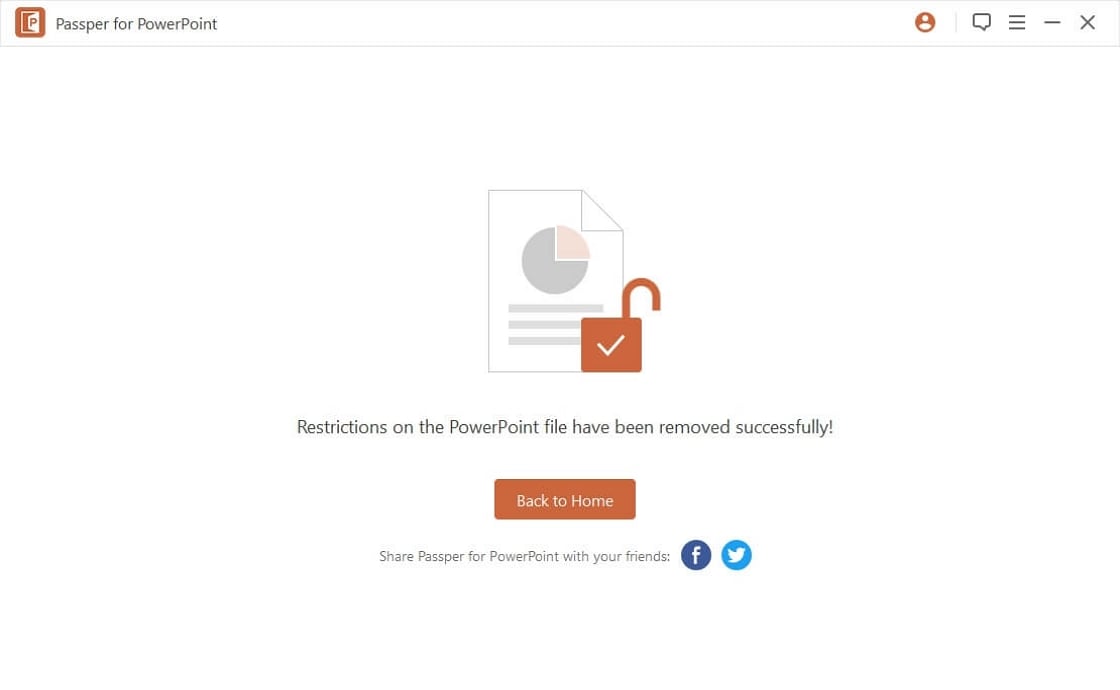
Step 3: This process might take some time, restriction will be removed soon, and you will have the access to files.
Conclusion
Encrypting PowerPoint file with password is a best way to prevent unwanted access and modification until you forget the password. It can give you a real headache and frustration to retrieve the password of your encrypted file. Passper for PowerPoint is a best and easy solution for password decryption and removing restrictions from PowerPoint files.


