Whether you're working on a school project, work presentation, or just want to spruce up a personal slideshow, adding pictures can make your PowerPoint slides more visually appealing and effective.
However, many people who are new to Microsoft PowerPoint often find themselves struggling with how to add pictures to PowerPoint presentations. But don't worry - it's actually pretty easy, especially if you follow this step-by-step guide!
In this article, we'll show you how to insert pictures in PowerPoint using different options depending on your specific needs. So, let's get started!
Part 1: How to Add Pictures to PowerPoint
As PowerPoint is specifically designed to help you present professional-looking electronic slide shows, it's no surprise that adding pictures to your presentation is a breeze.
Whether you want to insert a single picture or multiple pictures at once, PowerPoint offers you various options to make it.
Let's start with some of the most basic methods you can use to insert pictures into PowerPoint.
Method 1: Add Pictures to PowerPoint Using Insert Menu
The first and simplest way to add pictures to PowerPoint is by using the "Insert Pictures" menu.
This option lets you insert pictures into your PowerPoint slides, including those that you've saved on your computer as well as from different online sources.
To add a picture to PowerPoint using this method, simply follow these steps:
Step 1: Open your PowerPoint presentation and go to the slide where you want to insert the picture.

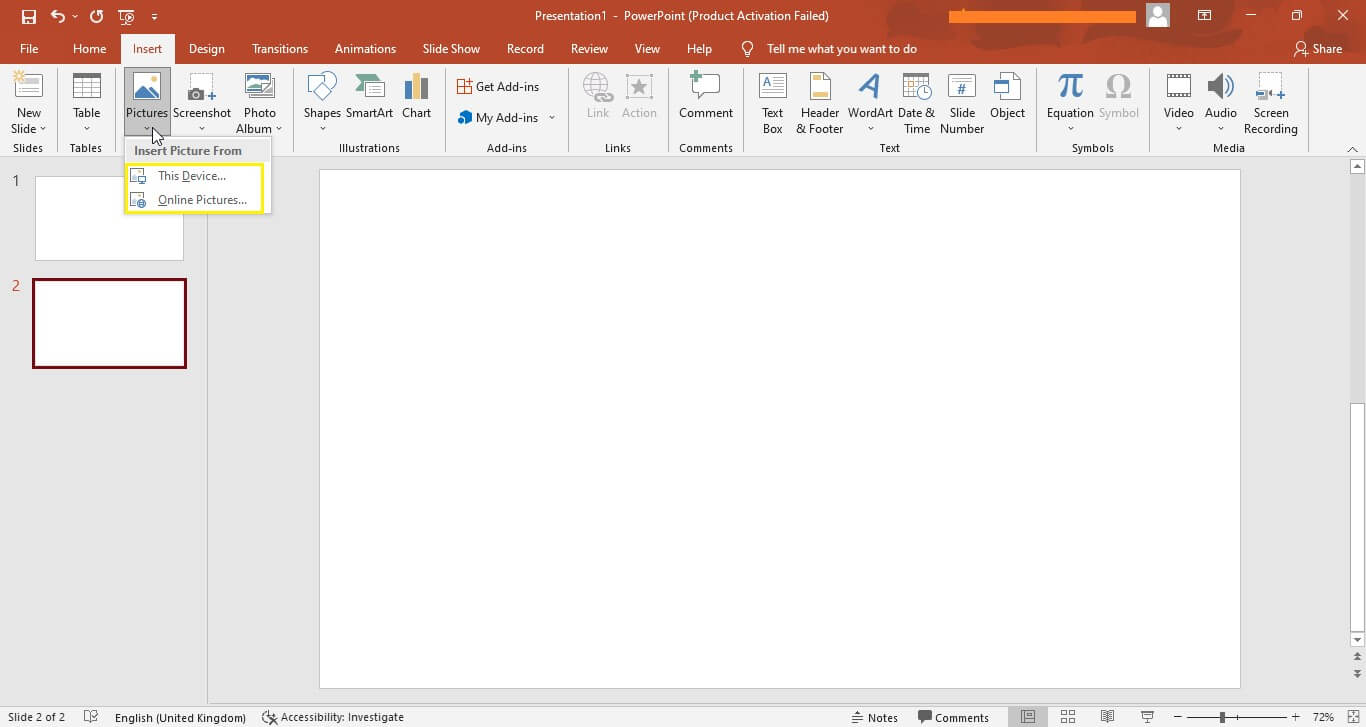
Step 2: On the top menu bar, click on the "Insert" tab and select "Pictures" from the available options.

Step 3: Select either the "This Device" or "Online Pictures" option to insert images into your PowerPoint slide.
Method 2: Add Pictures to PowerPoint Using Copy Paste
If you already have a picture saved on your computer, or if you've seen an image online that you want to use in your presentation, you can add it to PowerPoint using the copy and paste method.
To do this, simply follow these steps:
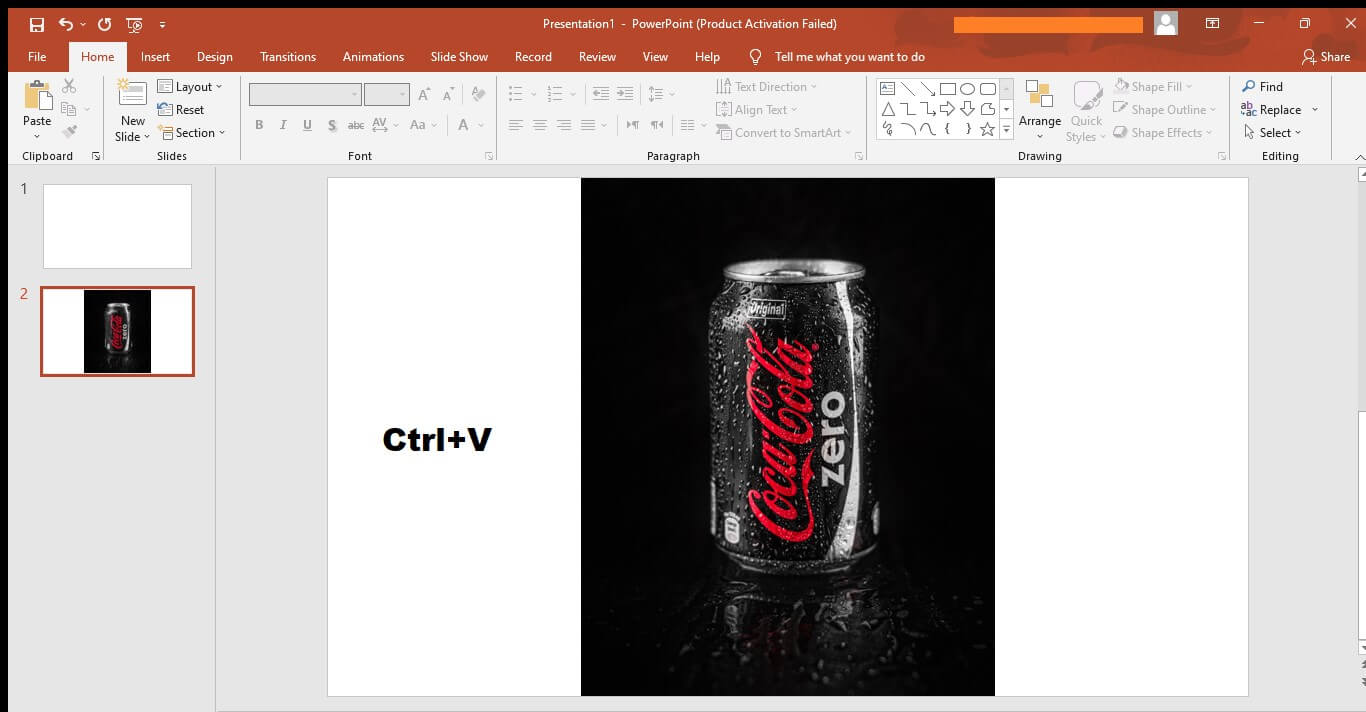
Step 1: Go to the image's location, right-click on it, and select "Copy" from the drop-down menu.

Step 2: Open your PowerPoint presentation and go to the slide where you want to insert the picture and simply press "Ctrl+V" keys or go to "Home > Paste" to add the image.
Part 2: How to Insert One Picture Per Slide PowerPoint
Although the first two methods can also be used to insert one picture per slide in PowerPoint, there are also some special options available for this specific task.
Let's take a look at how to insert one picture per slide in PowerPoint using two different methods.
Method 1: Add Pictures to PowerPoint Using Layout Option
When you're working on a PowerPoint presentation, each slide has a specific layout that determines the position of various elements on the slide, such as text, pictures, and shapes.
To insert one picture per slide in PowerPoint, you can use the "Layout" option to select a predetermined layout that already has a placeholder for a single image.
To do this, simply follow these steps:
Step 1: Right-click anywhere on the slide where you want to include the picture in your PowerPoint presentation and select "Layout" from the drop-down menu.
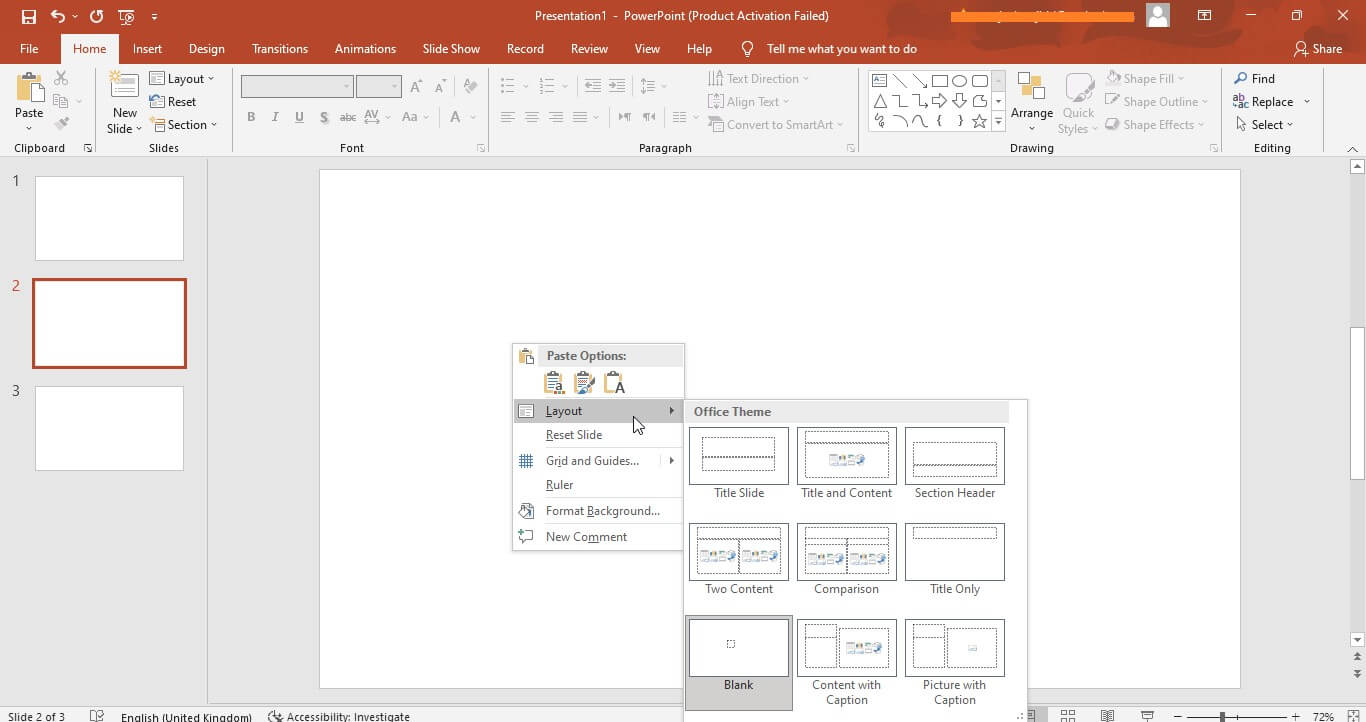
Step 2: A new window with a list of available layouts will open. Choose the one that has a single image placeholder. If there isn't one, edit the “Slide Master” to create your own.
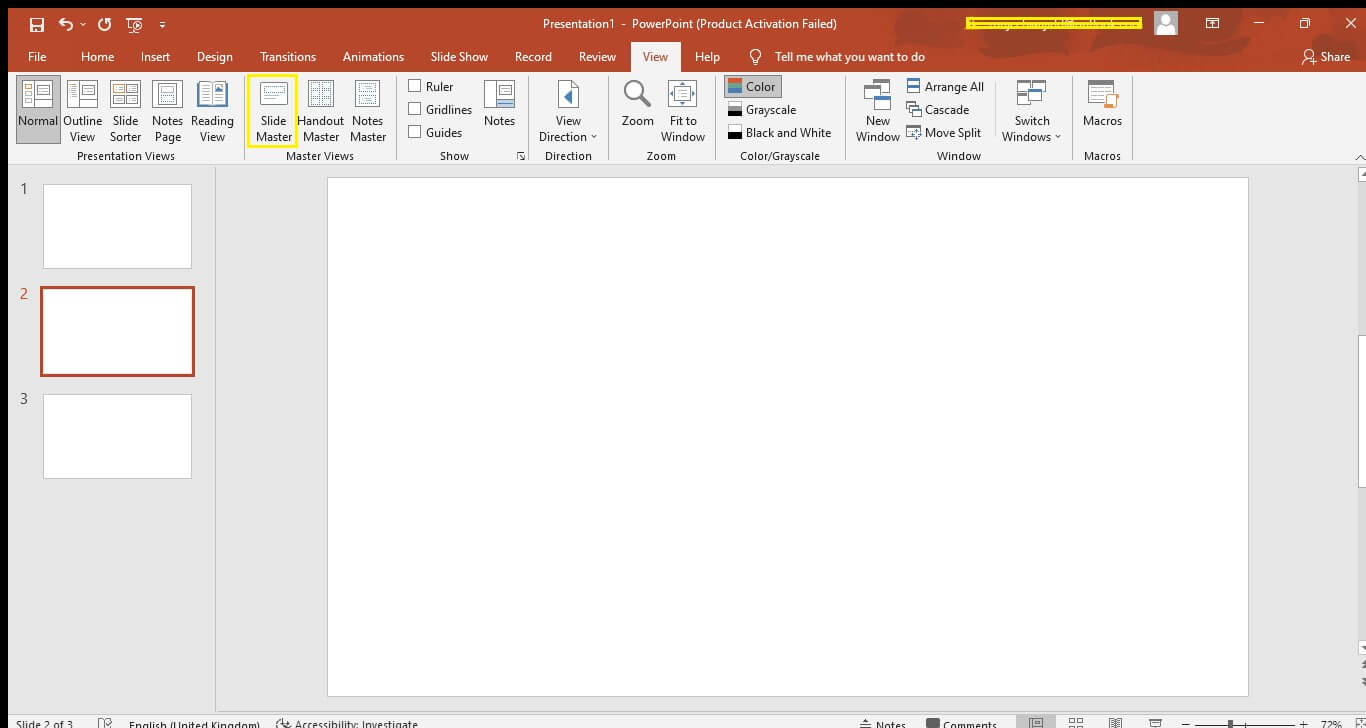
For it, go to View > Slide Master > Insert Layout, then click the "Insert Placeholder" button and select "Picture." Once the placeholder is added, close the Master View.
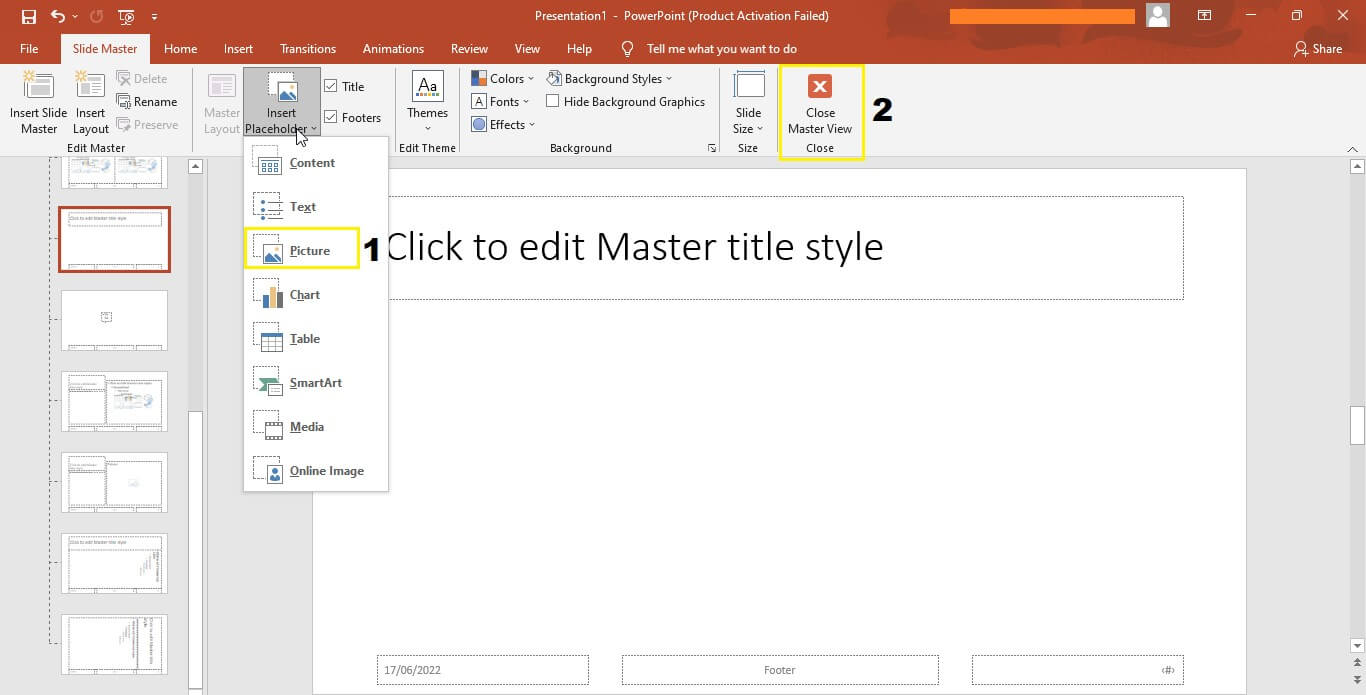
Step 3: Right-click the slide again and choose your custom-made layout from the Layout option, then add an image to the placeholder.
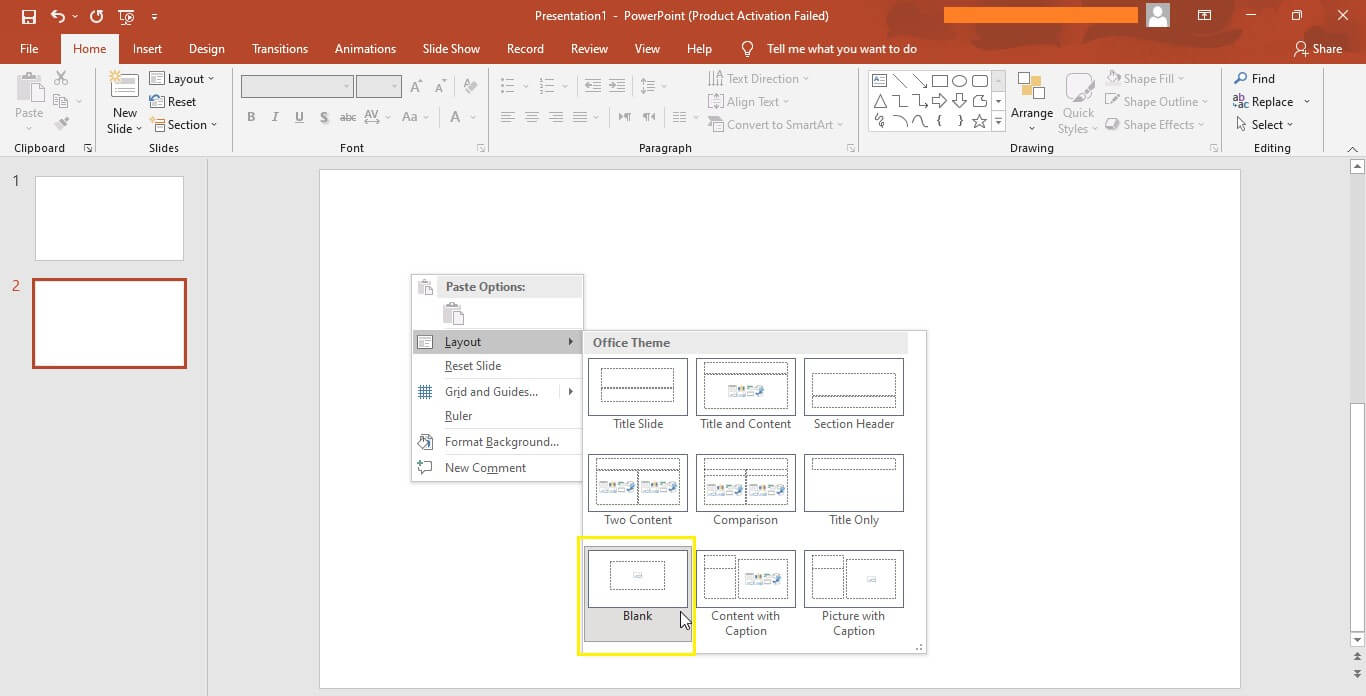
You can also duplicate this slide and insert different images into each copy.
Method 2: Add Pictures to PowerPoint Using Slide Background Images
Another way to insert one picture per slide in PowerPoint is by using the slide background image feature.
It is essentially inserting the image into the background of your PowerPoint slide, which is a great way to use photos that are not the main focus of your slide.
Here is how to insert one picture per slide PowerPoint using the slide background image feature:
Step 1: Go to the slide where you want to insert the picture in PowerPoint.

Step 2: On the top menu bar, click on the "Design" tab and select "Format Background" from the available options.
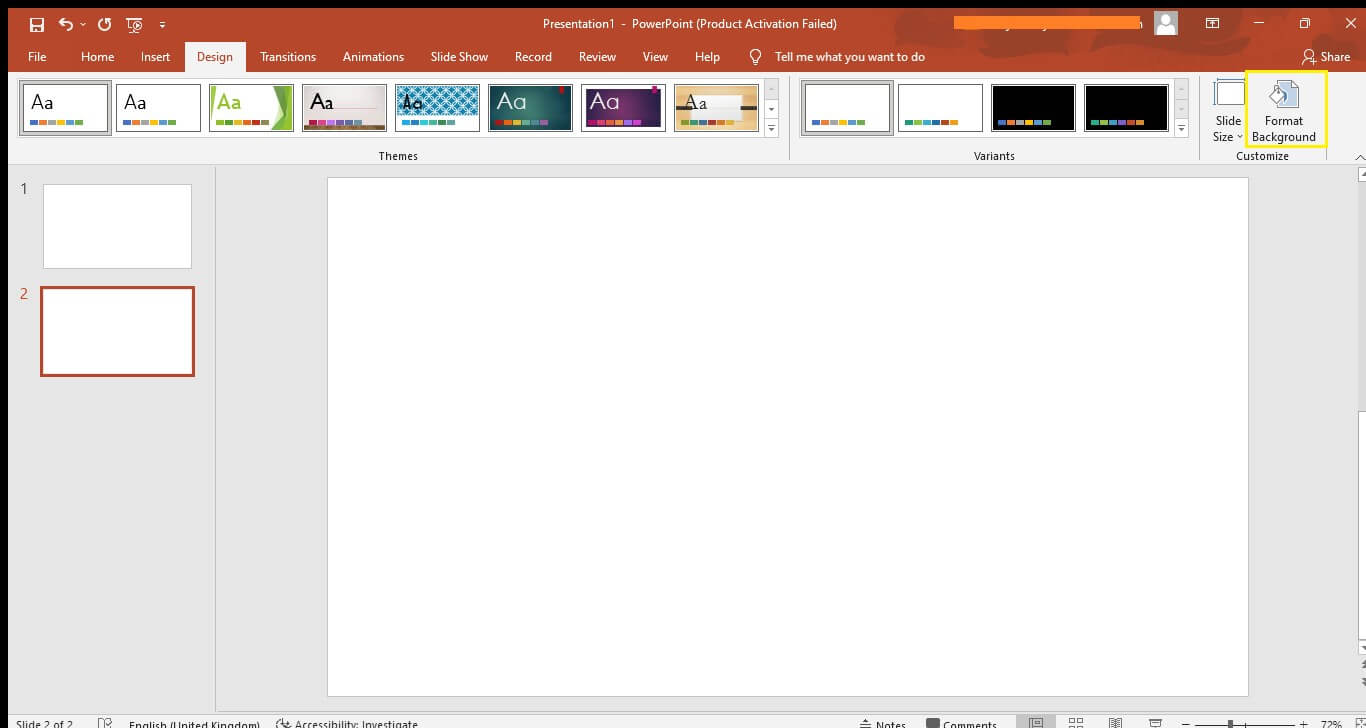
Step 3: From the right side menu that opens up, select the "Picture or texture fill" option and then browse and add the image.
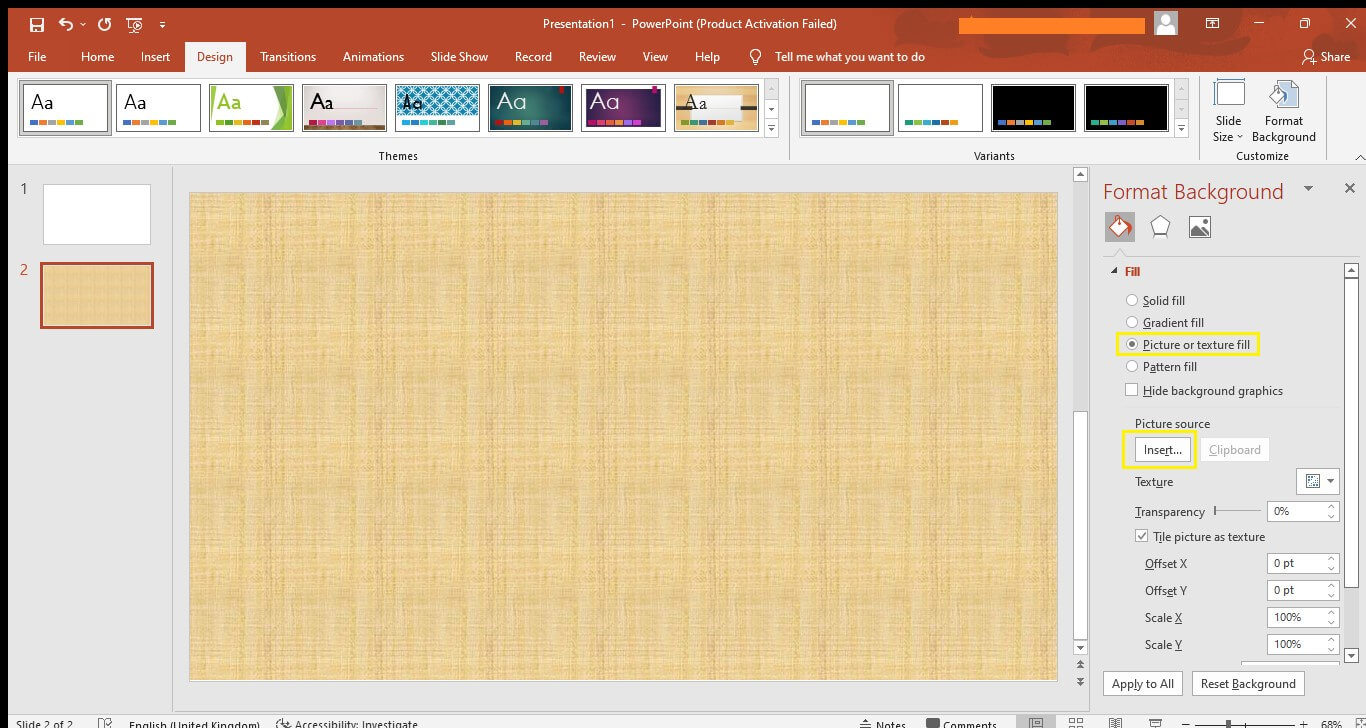
Part 3: How to Insert a Folder of Pictures Into PowerPoint
If you have a folder of images that you want to insert into PowerPoint and create multiple slides with them, then the best option might be to use the Photo Album feature.
This feature is available in all versions of PowerPoint and it lets you insert an entire folder of pictures into your presentation with just a few clicks. You can also customise the options by reordering the photos, adding captions, and selecting different frame shapes.
Below are the steps on how to insert a folder of pictures into PowerPoint:
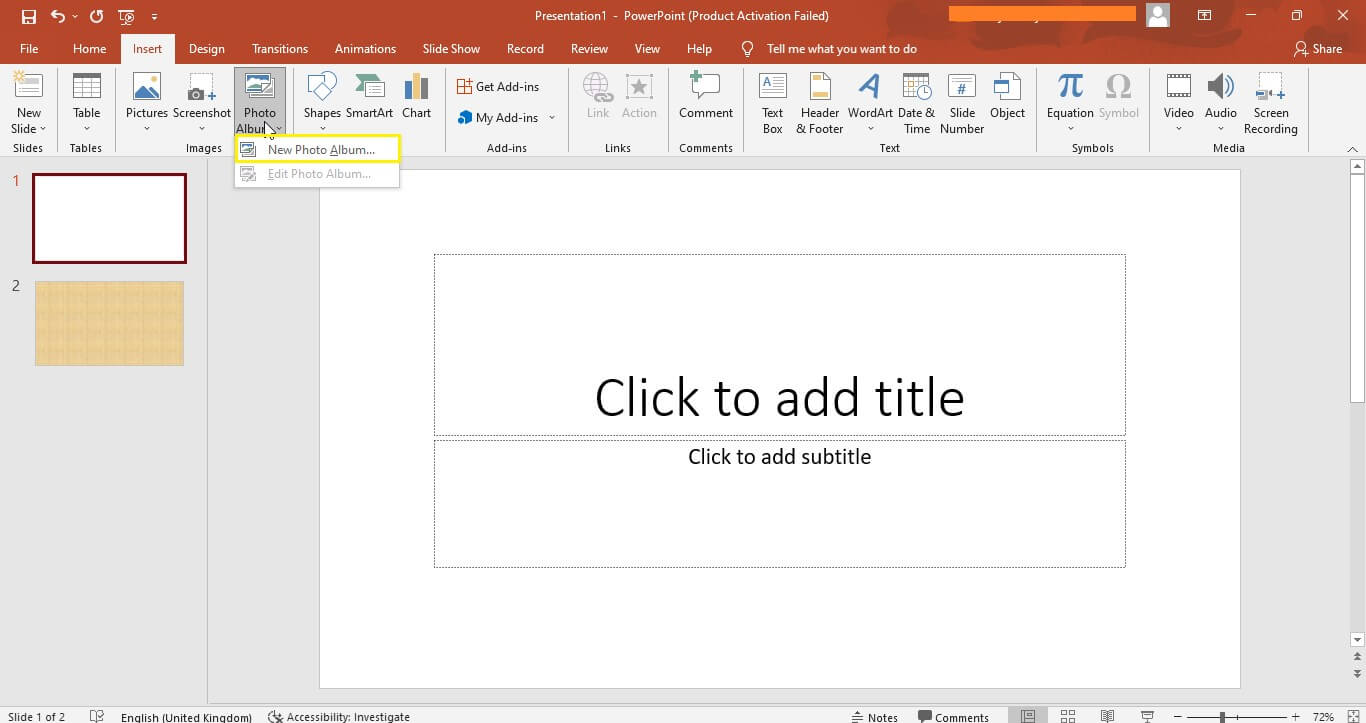
Step 1: Go to the "Insert" tab and select "Photo Album > New Photo Album."
Step 2: In the new window that appears, click "File/Disk" to browse and choose the folder containing the images, then select them to insert.
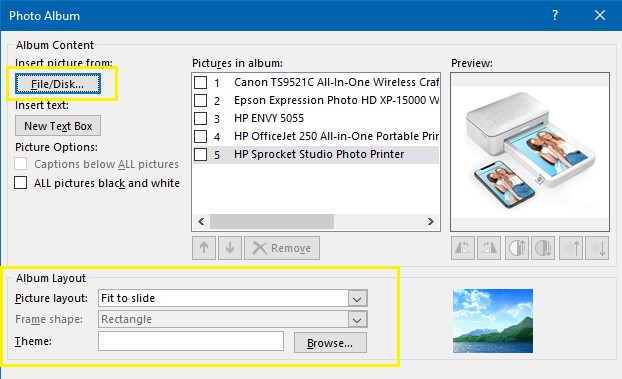
Step 3: After that, customise the options as per your needs and click the "Create" button.
Conclusion
Adding pictures to PowerPoint presentations gives them a sense of visual interest that text alone can't provide. Luckily, PowerPoint offers many different ways to make inserting pictures into your presentation quick and easy.
We hope this article has helped you understand how to add pictures to PowerPoint in the right way. Now that you know all about these methods, go ahead and try them out in your next presentation!


