Are you stuck looking for how to enable editing in Excel read-only? Have you tried multiple options and still found yourself in the same loop? Worry no more because we have good news for you. To access the file in an editable mode, you need to perform some operations on the Excel file. These processes vary depending on the type of protection in question as discussed in detail in this article.
Part 1: Directly Disable Protected View to Enable Editing in Excel
When you try to open a downloaded file in Excel, the worksheet will automatically open in a read-only mode meaning you can only view but you cannot edit or apply other commands. In this case, there are plenty of ways to disable protected view in order to enable editing on your Excel file. One of the most straightforward options is to do it directly via program settings. This method will open the Excel file in editable mode and prevent it from displaying protected notification every time you open the file. This helps to save the time required to disable the protected view every time you open the Excel file. To disable the protected view directly, follow the steps below.
Step 1: Double-click the Microsoft Excel icon on your desktop to access the primary interface. Once opened, navigate to "File" and choose "Options" from the subsequent list.
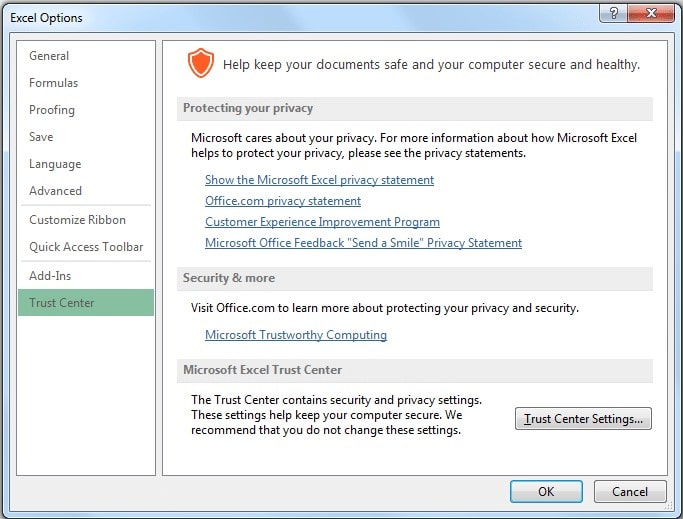
Step 2: From the displayed "Excel Options" window, choose "Trust Center" > "Trust Center Settings" on the bottom left pane.
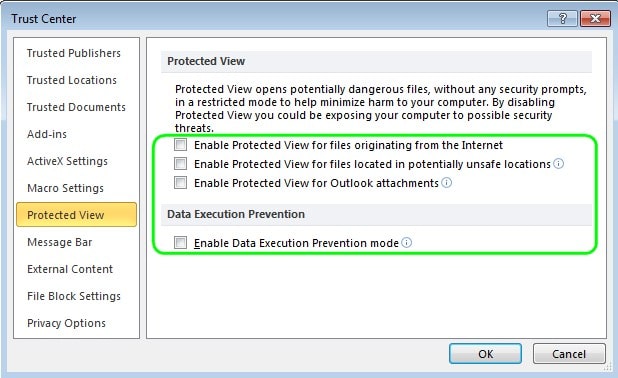
Step 3: Click on the "Protected View" and then uncheck any or all of the protected view options given. Once satisfied, click "OK" to directly apply the settings.
Part 2: Other 4 Ways to Enable Editing in Excel Read Only
Protected View is one of the most common situations you will meet if you download files from the Internet. Of course, you will also encounter some other cases where you need to enable editing in read-only Excel file. In this section, we will list 4 common cases and solutions as well.
● Case 1. Excel File is Marked as Final
● Case 2. Excel File is Recommended as Read Only
Case 1. Excel File is Marked as Final
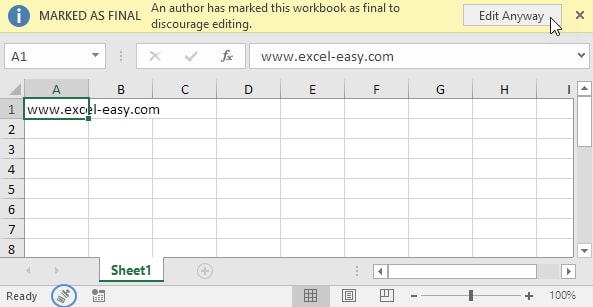
How to know that your Excel file is Marked as Final? When you open a read-only Excel file Marked as Final, there is a yellow notification on top of the Excel worksheet. This notification is a warning that the author of the Excel file has denied you to edit the Excel sheet. This means you can only read the contents of the workbook but not perform operations like typing, editing, and engage proofing marks and commands.
In order to edit the Excel file Marked as Final, you need to get rid of the read-only feature. This is simple as you can simply click the "Edit Anyway" button within the "MARKED AS FINAL" notification at the top of the worksheet.
Case 2. Excel File is Recommended as Read Only
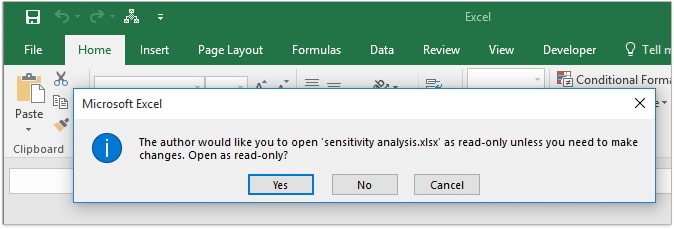
In the case where you open an Excel file recommended as a read-only, it is usual to get a pop-up window asking you to open the file in read-only mode. Selecting "Yes" will open the file in read-only mode and you cannot apply any changes. However, if you want to make any changes to this file, choose "No" instead.
Now if you want to remove read-only recommended feature for good, then do the following.
Step 1: Open the Excel file recommended as read-only and select "No" from the pop-up window.
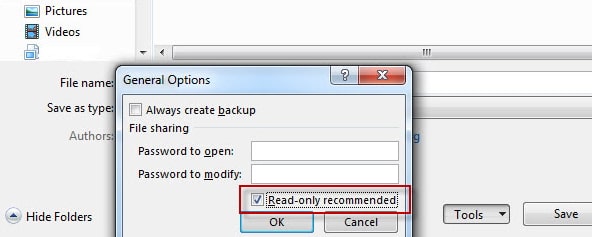
Step 2: Navigate to "File" then choose "Save As" to open the file directory. Click the drop-down icon beside "Tools" at the bottom of the file explorer window and select "General Options".
Step 3: The "General Options" window will open. Locate and uncheck the "Read-only recommended" box. Click "Ok" to complete the removal of the read-only recommended mode on your Excel file.
Case 3. Excel File is Protected with Modifying Password
If you try to open an Excel file that is protected with a modifying password, a pop-up window asking you to enter the password will appear. In this case, it is really easy to enable the editing mode whether you know the correct password or not.
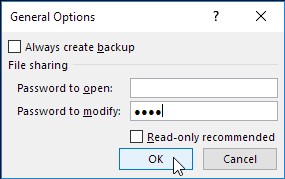
If you know the correct password, just type it within the prompt. Then go to the "File" option and select "Save As" from the subsequent list. Delete the password in the "Password to modify" field in the "General Options" dialogue box. Now, you will receive a Excel file without protection.
If you don't know the correct password, then the only option for you is to open this Excel file in the read-only mode. After opening, press "Ctrl+A" to select the whole worksheet and then press "Ctrl+C" and "Ctrl+V" to copy the content to a new worksheet. You can edit the new worksheet as you wish now!
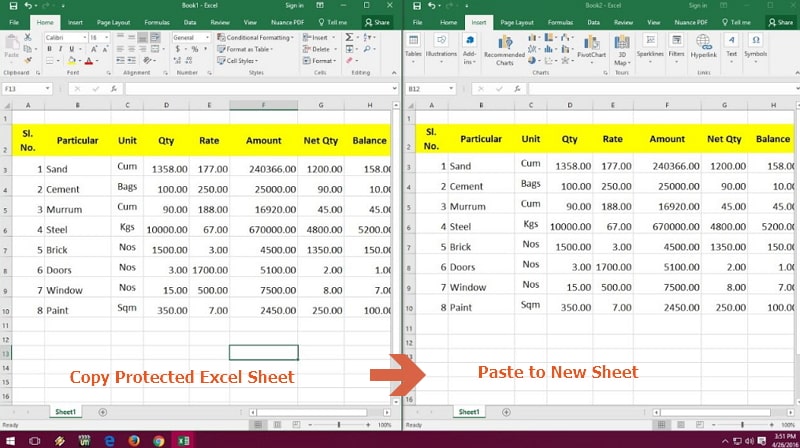

This method only works when you can select the content. Sometimes, you are not allowed to select the cells if the "Select Locked Cells" and "Select Unlocked Cells" options are forbidden by the owner. If this is the situation, you can try the solution in Case 4.
Case 4. Excel Worksheet is Protected with Password
In this case, you won't know that the worksheet is password protected until you want to select or edit some cells. An "Unprotect Sheet" dialog box will pop up requiring you to enter a password. Different from the above 3 cases, an Excel worksheet protected with a password can only allow you to open the file in editable mode if you know the password. The only way that is easy to use and 100% workable is by using a password remover tool.
Passper for Excel is the best password remover tool for Excel worksheets or workbooks. It uses advanced AI algorithms to intelligently identify issues in Excel files, allowing for the quick removal of read-only restrictions or cracking passwords. With one simple click, all restrictions can be removed easily.
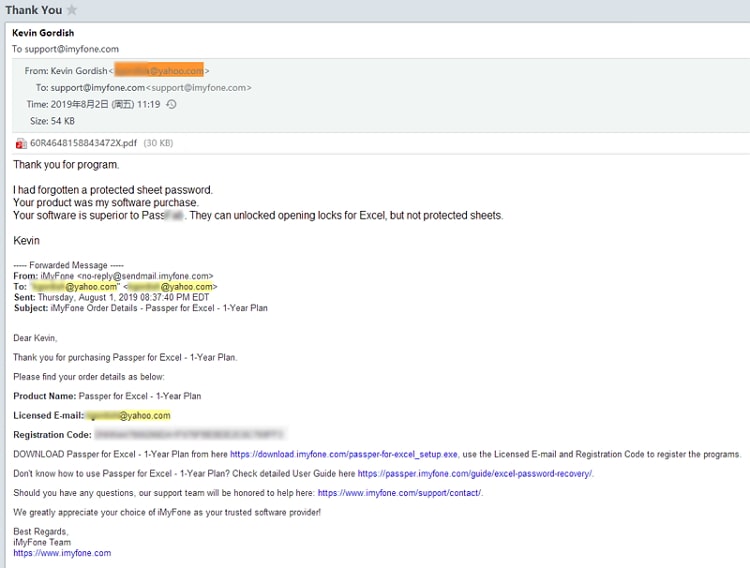
Passper is a sub-brand of the hi-tech corporation iMyFone, which has been trusted and recommended by many professional websites like Cnet, Cult of Mac, etc. Before you decide to use this program, you can also check the user's feedback below.

Now follow the simple steps below to enable editing in your Excel file. Start by downloading and installing the program on your computer or laptop.
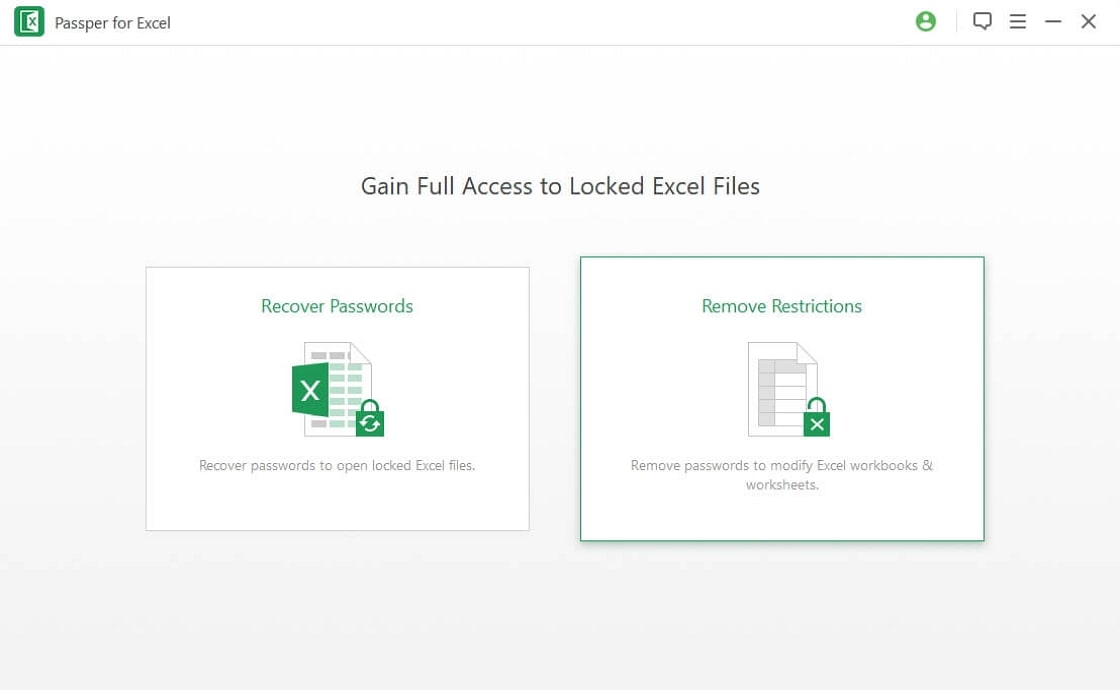
Step 1 Open Passper for Excel on your PC to access the main interface. Choose "Remove Restrictions" option.
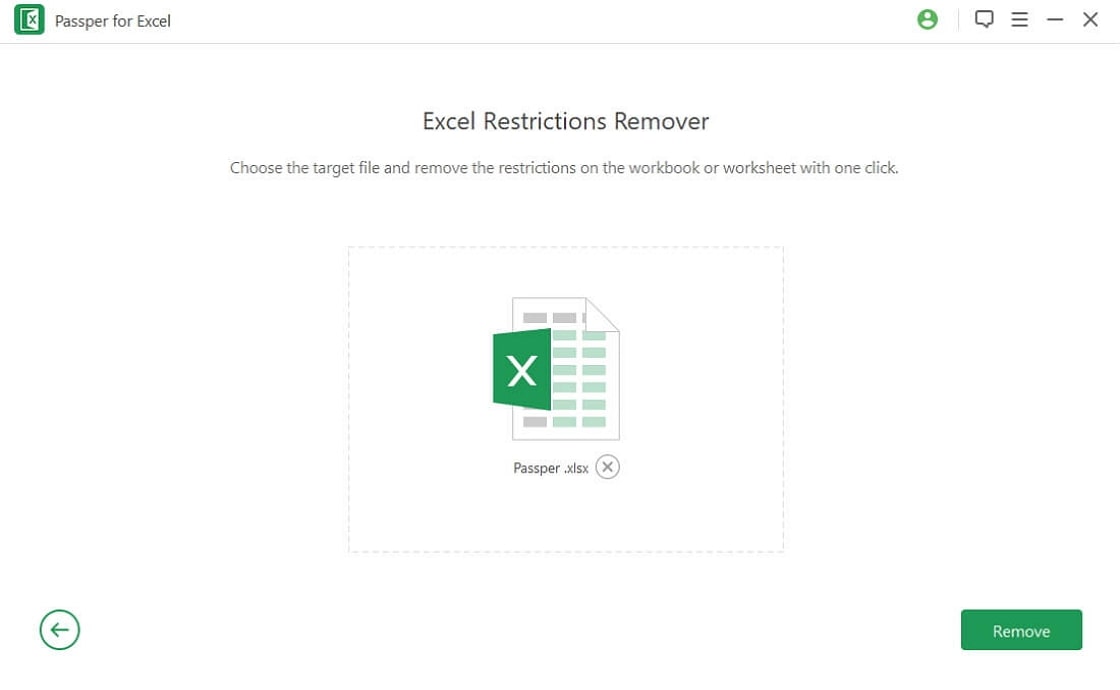
Step 2 Click on the "Select a File" button to upload your password protected Excel file. Once the restricted Excel file has been successfully uploaded onto the program, simply hit the "Remove" button to activate the removal process.
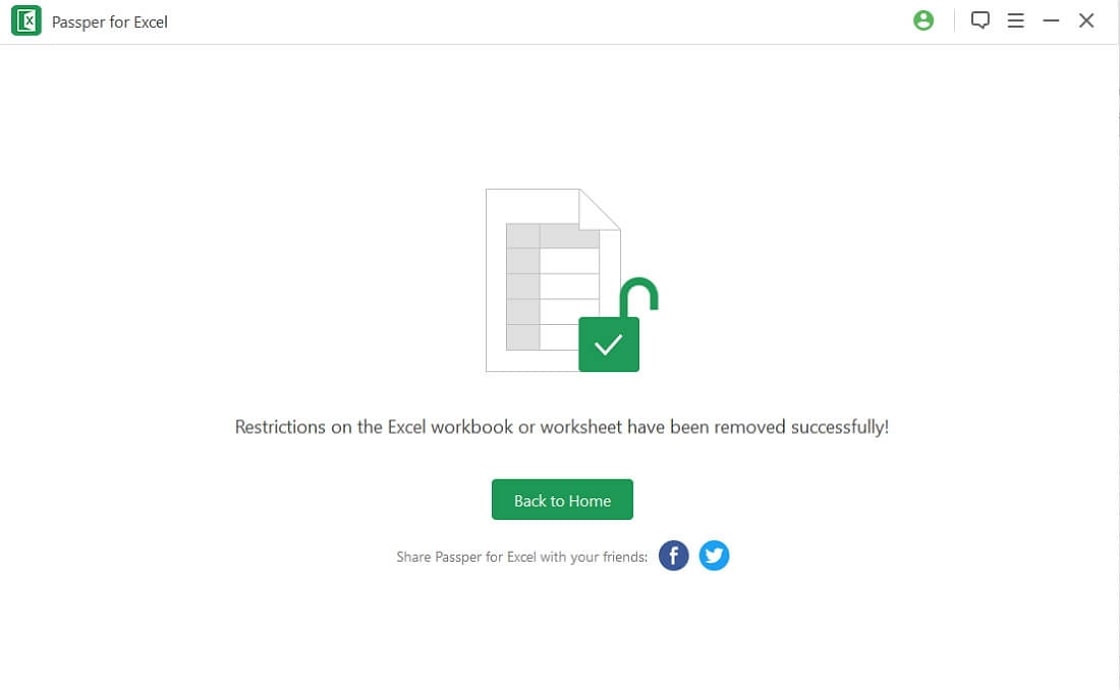
Step 3 The process is super-fast and will take about 2 seconds to complete. When it is successfully completed, the program will display a success notification. Your Excel file is now restrictions-free and you can freely edit it.
Conclusion
As you have seen from the information above, it is clear that there are several options for enabling editing on read-only Excel worksheets or workbooks. After reading this article, you can easily edit your protected Excel file no matter what the case is. If you have any doubt about the above solutions, you can turn to the comment section below and leave us a comment. We will try our best to help you!


