In case you are in need to share larger files, the Zip file format is one of the most useful file formats. They help you compress the files by reducing the file sizes. The Zip format also lets you encrypt the file so that your privacy and confidentiality of the data is protected. But, how to make a zip file? Let us check out the options available.
Method 1: Create Zip File on Windows
Method 2: Create Zip File on Mac
Method 3: Create Zip File using Zip Utility
Part 1: 3 Methods to Create a Zip File
Essentially, you can create a Zip file using a host of options. For the sake of this tutorial, we will focus on three major options to create a Zip file. Please note that the exact method to make a ZIP file would be dependent upon the ZIP tool you have opted for.
Method 1: Create Zip File on Windows
The simplest option to create a Zip file is to shift all the files that you want to add to the archive into one single folder. Here are the steps involved:
Step 1: Create a new folder and add all the files you want to add to the archive, and rename the folder to whatever you want to name the archive as.
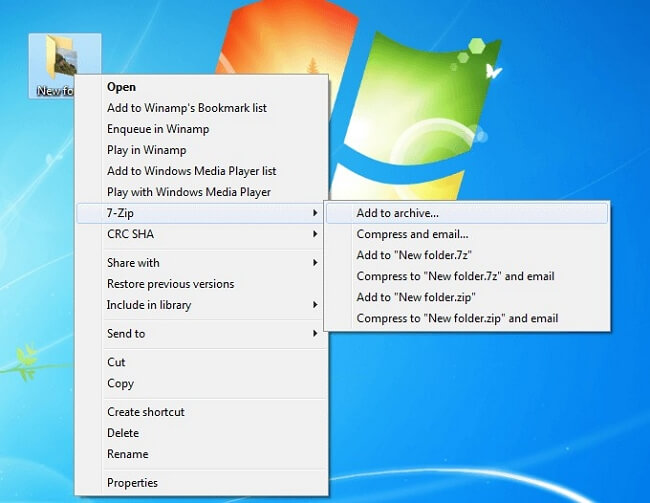
Step2: Right click on the folder and hover the pointer over Send To. Then click on the option Compressed (zipped) folder option.
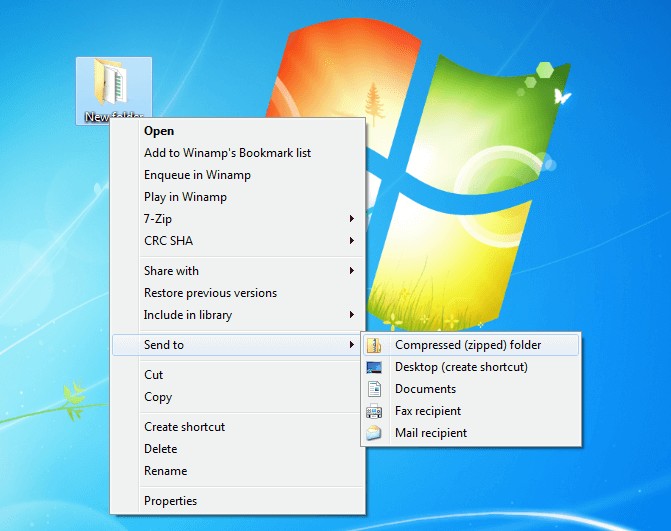
Step 3: Wait patiently till the folder is created. It can take time if you are adding a large number of files. You will be shown the progress indicator.
That does it. You have successfully created a ZIP file. Do note that instead of selecting an entire folder, you can even choose multiple files manually and follow the same procedure.
Method 2: Create Zip File on Mac
Once again, you need to create a folder with the files you plan to add to the archive. Make sure that all the files are in the same folder.
Step 1: Create a new folder with the constituent files. You can even add folders inside a folder.
Step 2: Rename the folder to anything you want it to. Then right click on the folder and then click on Compress option.
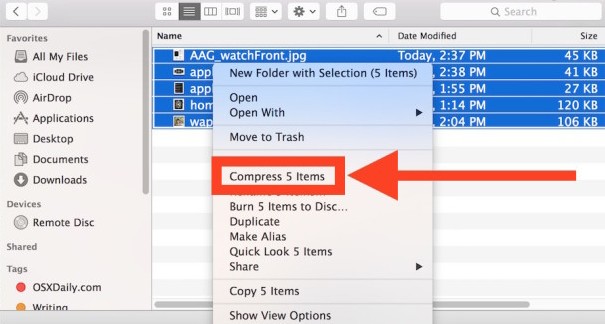
That does it. Your entire folder will be converted into a ZIP file. The ZIP file will be located in the same folder where the original files are placed. As in the case of Windows, you can select multiple files manually and follow the same process. The archived file will be named as archive.zip. You a later rename if you want to.
Method 3: Create Zip File Using Zip Utility
This method will be dependent upon the exact ZIP utility you have opted for. The steps indicated here may vary depending upon the ZIP utility you may have opted for.
Step 1: Download and install any of your favourite ZIP utility. For the sake of this tutorial, we will use WinRAR.
Step 2: Launch your WinRAR program and choose your files from the folder. You may navigate to your chosen folder from within the application.
Step 3: Once your files are chosen, click on Add.
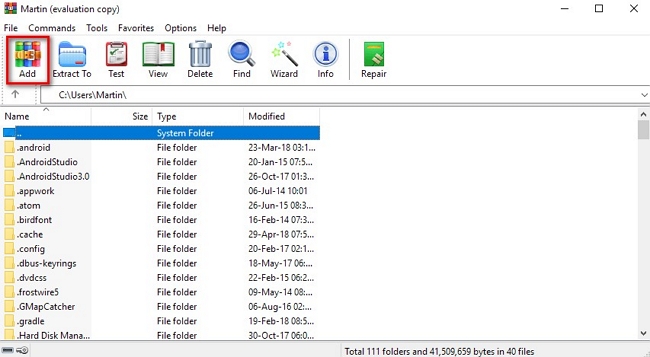
Step 4: Choose the appropriate settings including the file name and other specific details.
Click on OK after configuring your preferences. Wait patiently till your ZIP archive is created.
Part 2: How to Password Protect a Zip File?
Password protecting your ZIP files is one of the best options to safeguard the misuse of your ZIP files. You can communicate the password to the intended recipient through other messaging platforms. You may also use a password that only the recipient is aware apart from you, as his date of birth or other details.
Here is how you can password protect a ZIP archive. Once again, we will use the 7-ZIP utility and to address this concern.
Step 1: Launch 7 ZIP and create a ZIP file as explained in the previous steps.
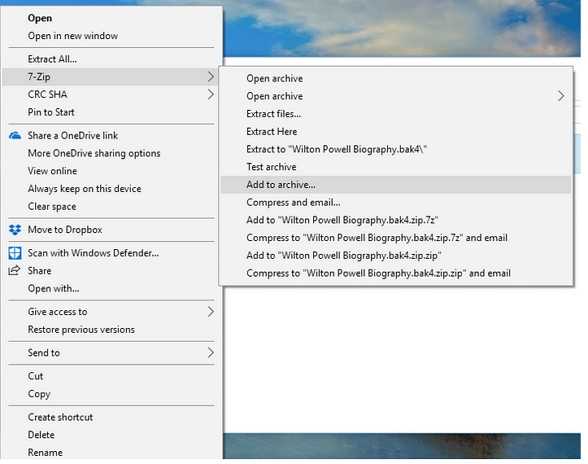
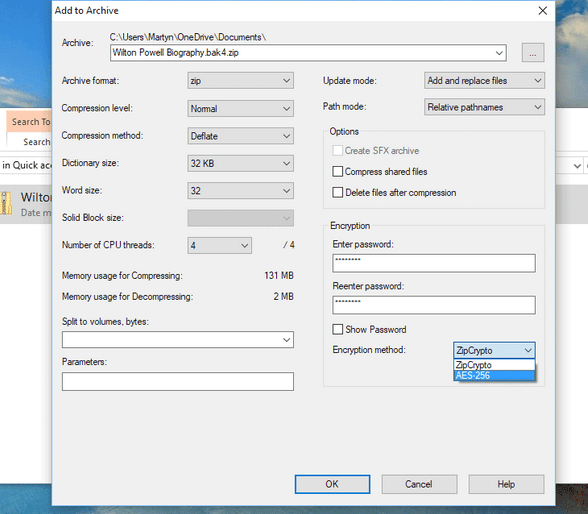
Step 2: While you make the configurations to your intended ZIP archive, you will find the option for setting up a password. Click on it.
Step 3: Enter your password and confirm it. Click on OK, and your password will be configured.
Part 3: How to Unlock A Encrypted Zip File?
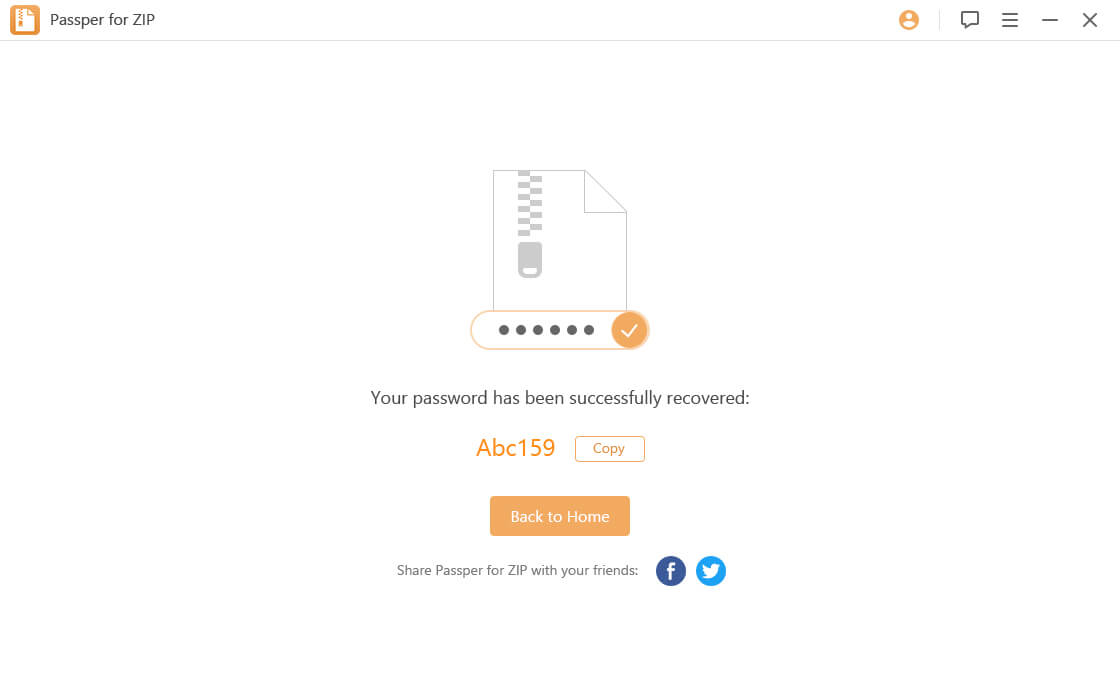
What if you have forgotten your password? Maybe you do not have access to the password for any particular reason. In that case, Passper for ZIP can be a great option to recover your archive by recovering the password.
Here are the steps involved
Download, install and launch Password for ZIP. Let it download the dictionaries.
Step 1: Import the ZIP archive files by clicking on Add option. The software will read the application and enlist the information that can be found about it.
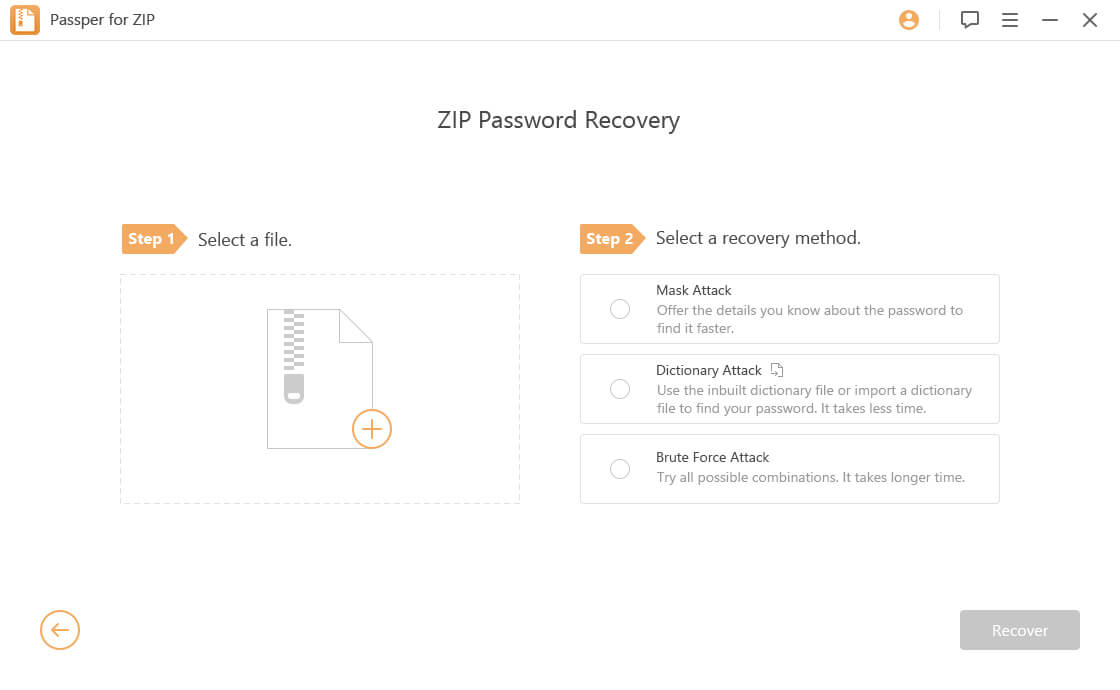
Step 2: Choose the Attack option you want to use. PassFab for ZIP provides you with 4 different attack types – Combination Attack, Dictionary Attack, Brute Force with Mask Attack and Brute Force attack. The choice will depend upon the complexity of the password.
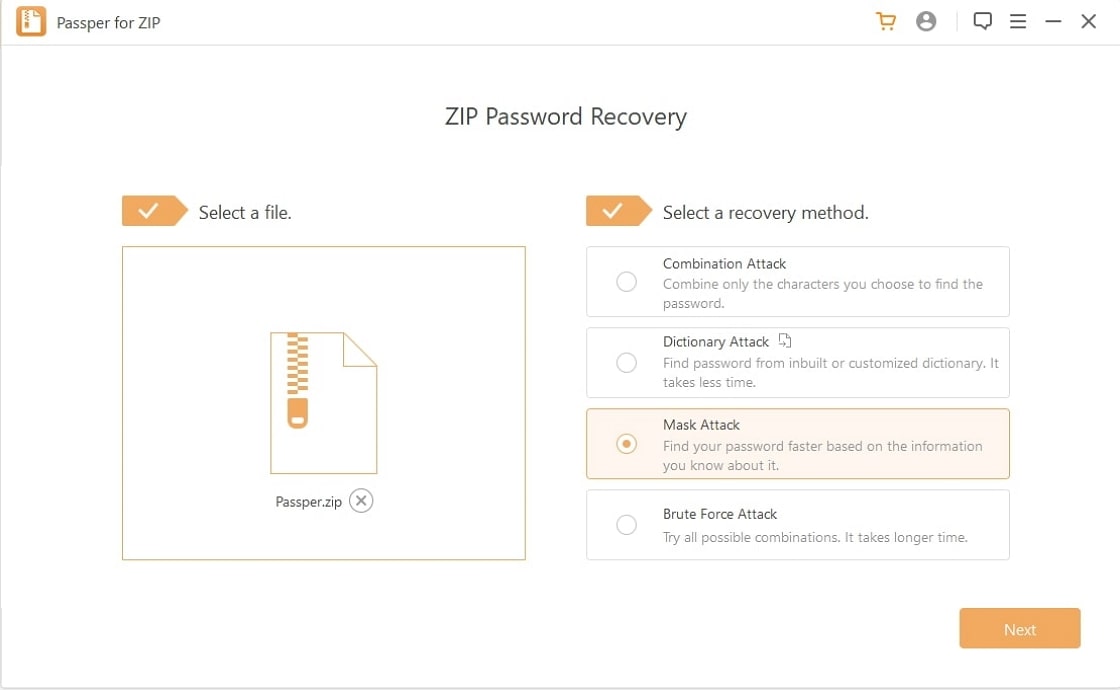
Step 3: Click on NEXT once the settings and attack types have been done. The tool will begin looking for the password. It may take time depending upon the attack type you have chosen and the complexity the password you are trying to recover.
Conclusion
If you are looking for options on how to make a ZIP file on different platforms, we assume the tips and tricks as in the above discussion should have ideally helped you in creating your files. The ease of configuring a password to your ZIP archives should also be an excellent option to safeguarding your data and the privacy thereof.
Check out the options above and share your thoughts with us.


