If you use Microsoft Word a lot, you may already be aware of various options you have in document sharing. A single Word document can be edited by multiple people, with each person's edit clearly marked, making it very easy for users to collaborate on a single project. But as easy as it is to share and collaborate on a Word document, Microsoft has also included features that are meant to restrict the number of people who can collaborate on a document.
You can lock a Word document by setting a password so that someone can't access the document. You can also restrict editing on the document, meaning that someone can only read the document but they can't modify it in any way. These protections can be very useful when you want to keep the content of the document private. But sometimes the protections can cause problems for you when you're trying to open or edit a protected document without knowing the password. Here comes the question: how do you unprotect a Word document?
In this article, we are going to share with you the various ways you can do to unprotect a Word document, a skill that should come in handy if you ever come across a locked or restricted Word document.

Part 1. How to Unprotect A Word Document to Open It
Part 1. How to Unprotect A Word Document to Open It
If you have a Word document that needs a password to be opened, this section deals with how to unprotect the Word document with or without password.
● 1.1 Via Add-in Feature (Password Required)
● 1.2 Unprotect Document in Word Without Password
● 1.3 Unprotect Word Document Without Password with VBA Code
1.1 Via Add-in Feature (Password Required)
If you have the password to a protected Word document, unprotecting the Word doc is a very simple process. Follow these simple steps to do it:
Step 1: Open the Microsoft Word document that you want to unprotect and then click on "File" and select "Protect Document" under the section marked "Info".
Step 2: In the drop-down menu, select "Encrypt with Password" and then remove the password from the password field. Click "OK".
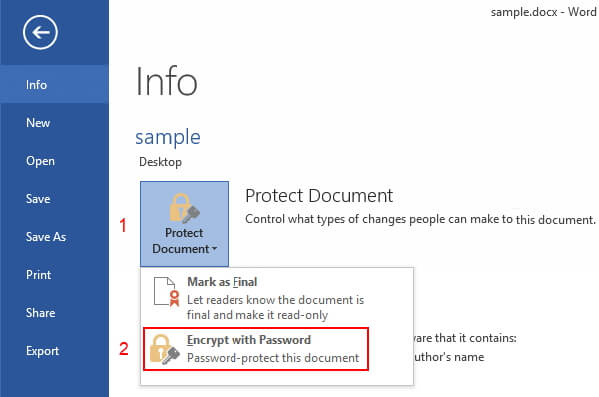
This will remove the password from the document, thereby unlocking it.

If your Word document was created by an older version (like Word 2003), and now you are working with a newer version (like Word 2013), the above steps won't be workable for you. If you encountered the same situation, following steps can solve the problem for you.
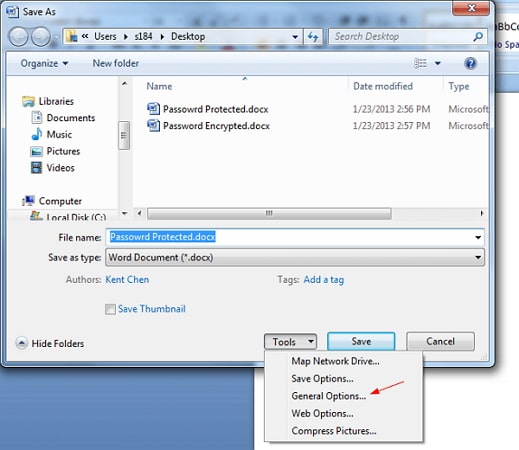
Step 1: Open the password protected Word document. Click on "File" and choose "Save as".
Step 2: A "Save as" window will appear. Click on "Tools" tab and choose "General Options".
Step 3: Delete the password in the "Password to open" box. Now, you have unprotected the Word document.
1.2 Unprotect Document in Word Without Password
If you don't have the password to open the document, you may need a simple and effective way to unprotect it. Passper for Word is a password unlocker tool that is innovatively designed to help you unprotect any Word document. Whether your document is protected with an opening password or you can't edit the Word file, Passper for Word can help you fix the problem without affecting the data on the document. To do this effectively, Passper for Word must have a set of features that are specifically designed for this purpose. The following are some of these features:
-
Based on the advanced algorithm and smart recovery strategies, Passper for Word can unlock opening password with high success rate even if your password contains letters, numbers and symbols.
-
It offers 4 customized attack modes allowing you to choose according to your situation.
-
You can also unprotect a Word document for editing with 100% success rate. And it can be done within seconds.
-
Your data security is 100% ensured since your Word file will only be saved in your local system.
-
The program is truly easy to use. Whether for a tech newbie or expert, the document can be unprotected within 3 steps.
-
It can unprotect Word document 97/2000/2003/2007/2010/2013/2016/2019/2021 on Windows and macOS.
Here's how you can use Passper for Word to unprotect a Word document if you don't have the password:
Step 1: Install Passper for Word on your computer and then launch the program. On the main window, select "Recover Passwords".
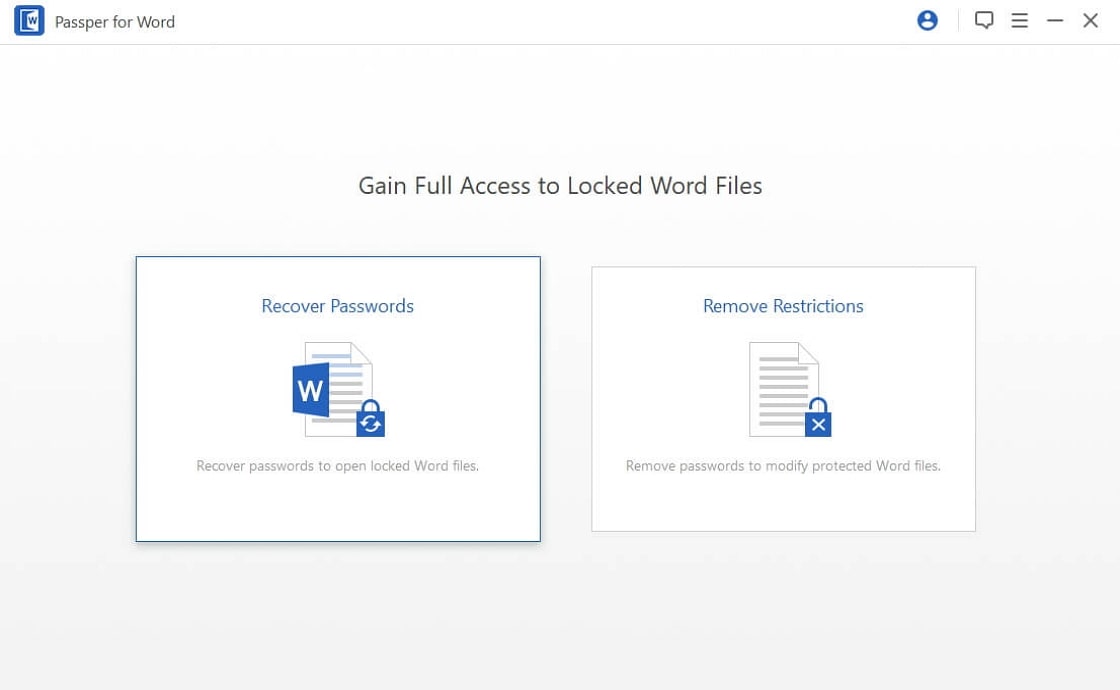
Step 2: Click on "Add" to browse your computer for the protected Word document and open it.
Once the document is open, you need to select one of the 4 attack modes to use when recovering the password. Each of the modes are useful for certain situations. Select the one that corresponds to your needs.
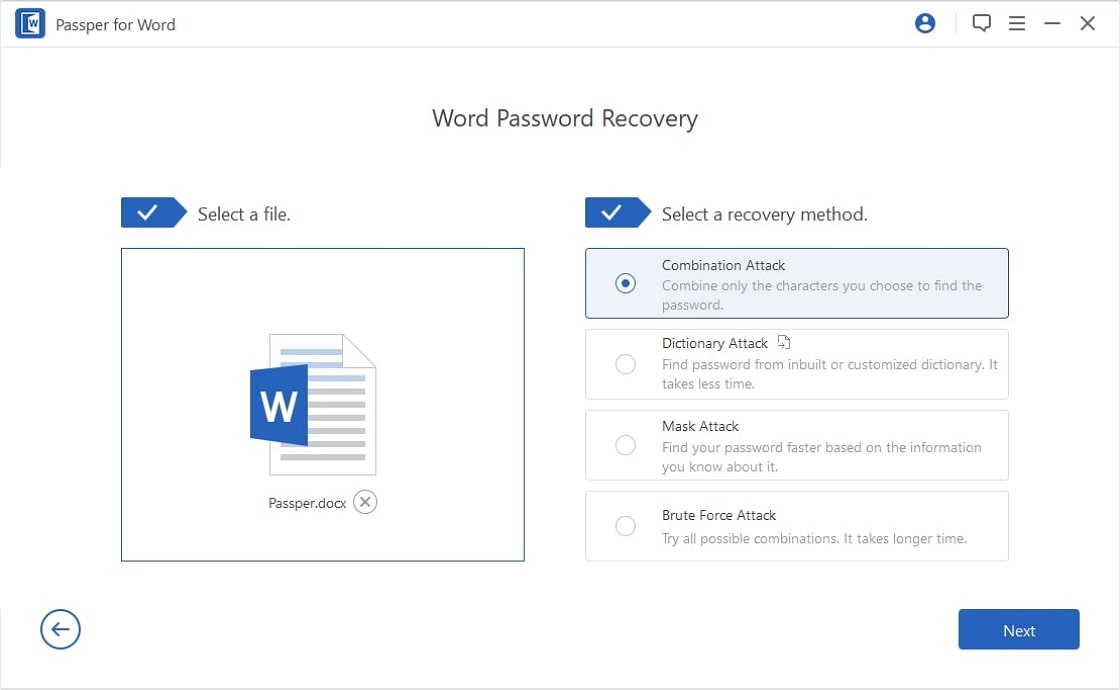
Step 3: Click on "Recover" after you have selected an attack mode and Passper for Word will begin the recovery process.
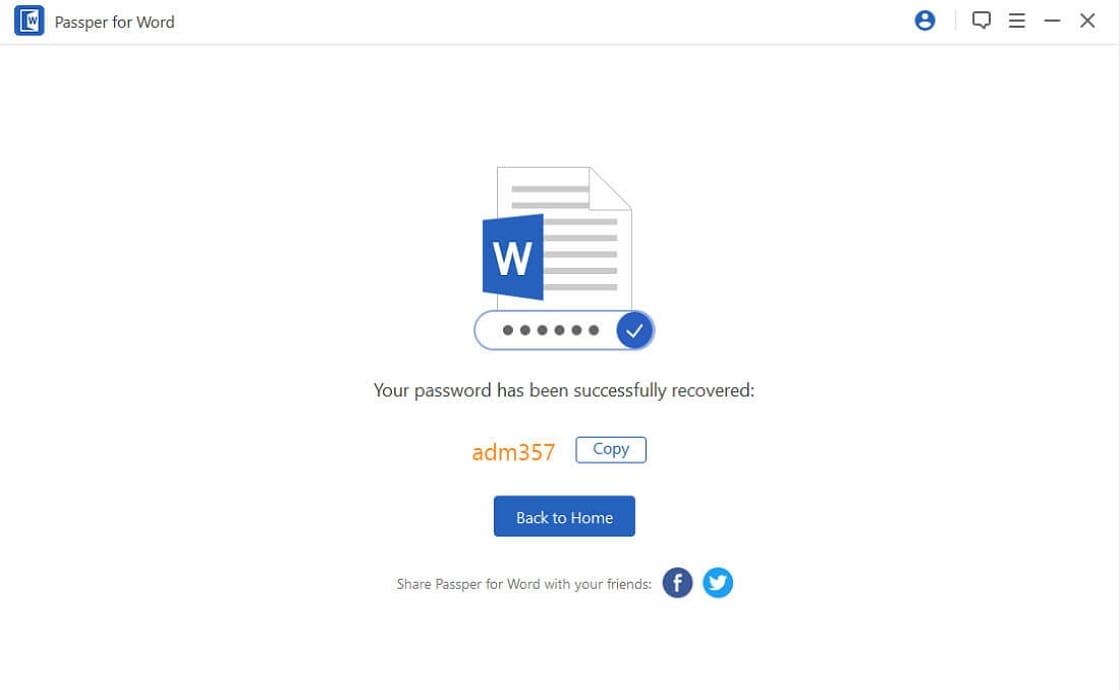
The process will take a few minutes, but once it is done, you should see the password on the screen. You can then use it to unprotect the Word file.
1.3 Unprotect Word Document Without Password with VBA Code
If you don't want to download or install any third-party software on your computer, you can also use VBA code to unprotect your Word document. However, this method only works for numeric passwords and passwords no longer than 3 characters. If you would like to try this method, you can go through the detailed steps below.
Step 1: Open a new Word document and press Alt+F11 to open the Visual Basic editor. You can also navigate to Developer>Visual Basic to open it.
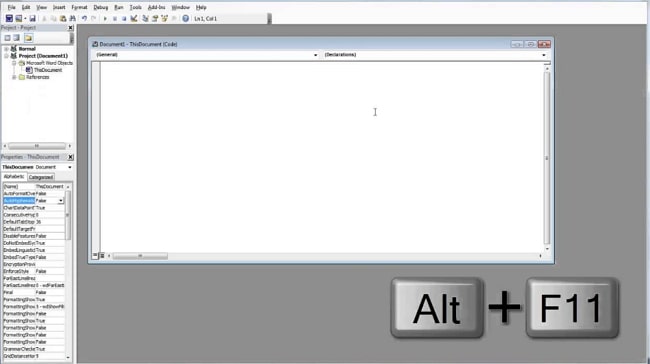
Step 2: Click on "Insert" tab and choose "Module". Then enter the following code:
Sub test()
Dim i As Long
i = 0
Dim FileName As String
Application.FileDialog(msoFileDialogOpen).Show
FileName = Application.FileDialog(msoFileDialogOpen).SelectedItems(1)
ScreenUpdating = False
Line2: On Error GoTo Line1
Documents.Open FileName, , True, , i & ""
MsgBox "Password is " & i
Application.ScreenUpdating = True
Exit Sub
Line1: i = i + 1
Resume Line2
ScreenUpdating = True
End Sub
Step 3: Press F5 to run the code.
Step 4: A new screen will pop up. Now, locate your password-protected Word document and open it.
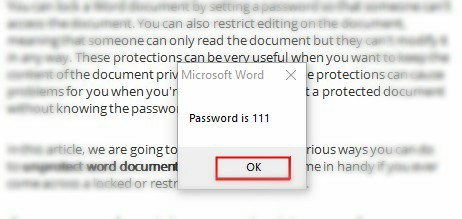
Step 5: Once done, the program will begin to unprotect the Word document for you. After a while, your protected Word document will appear in a new window with a password dialog. Click "OK" and now you can view your locked Word document.
Part 2. How to Unprotect A Word Document for Editing
If you can open the Word document but you can't edit it, this section deals with how to edit a protected Word document with or without password.
● 3.1 Unprotect A Word Document for Editing with Password
● 3.2 Unprotect A Word Document for Editing without Password
3.1 Unprotect A Word Document for Editing with Password
If you have the password, follow these simple steps to unprotect your Word document:
Step 1: Open the Word document you would want to edit.
Step 2: Now click on the "File" tab and then select "Info > Protect Document".
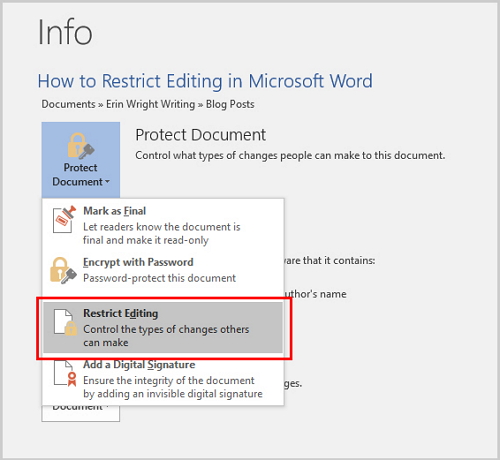
Step 3: This will open a list of options. Choose the "Restrict editing" option to open the "Restrict Formatting and Editing" section on the right of the document.
Step 4: Click on the "Stop Protection" button and you will be prompted to enter the password. Click "OK" once you have typed in the password and all restrictions on the document will be lifted.
3.2 Unprotect A Word Document for Editing without Password
If you don't have the password to the restricted Word document, Passper for Word can help. Here's how:
Step 1: Open Passper for Word on your computer and then click on "Remove Restrictions".
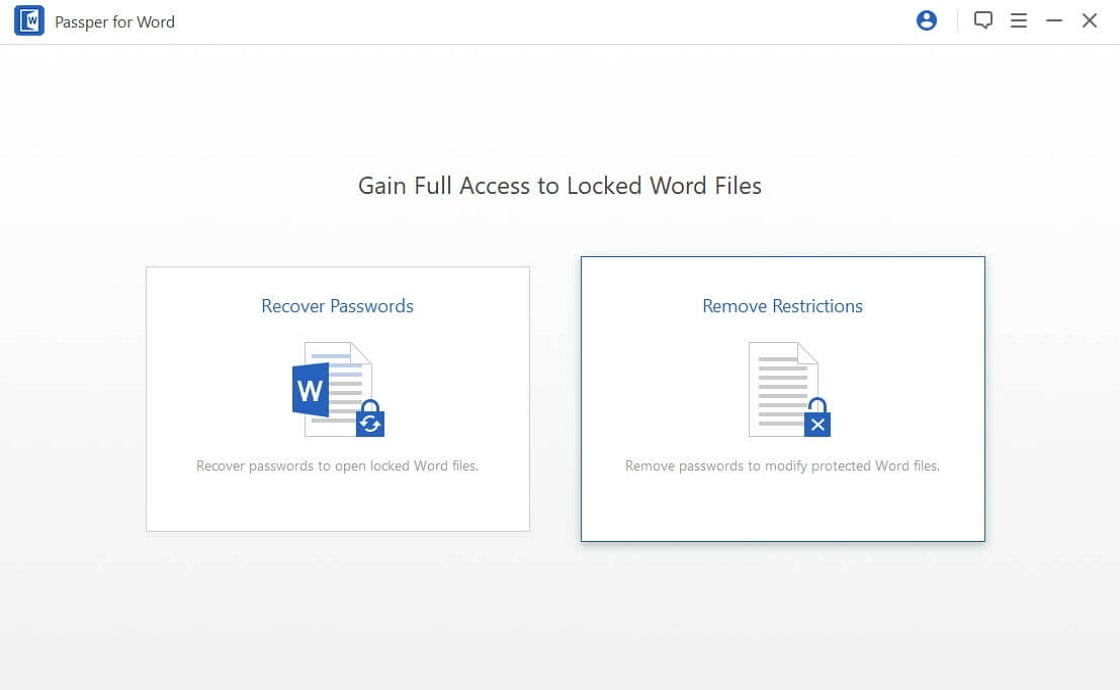
Step 2: Click on the "Select a File" option to add the restricted Word document into the program.
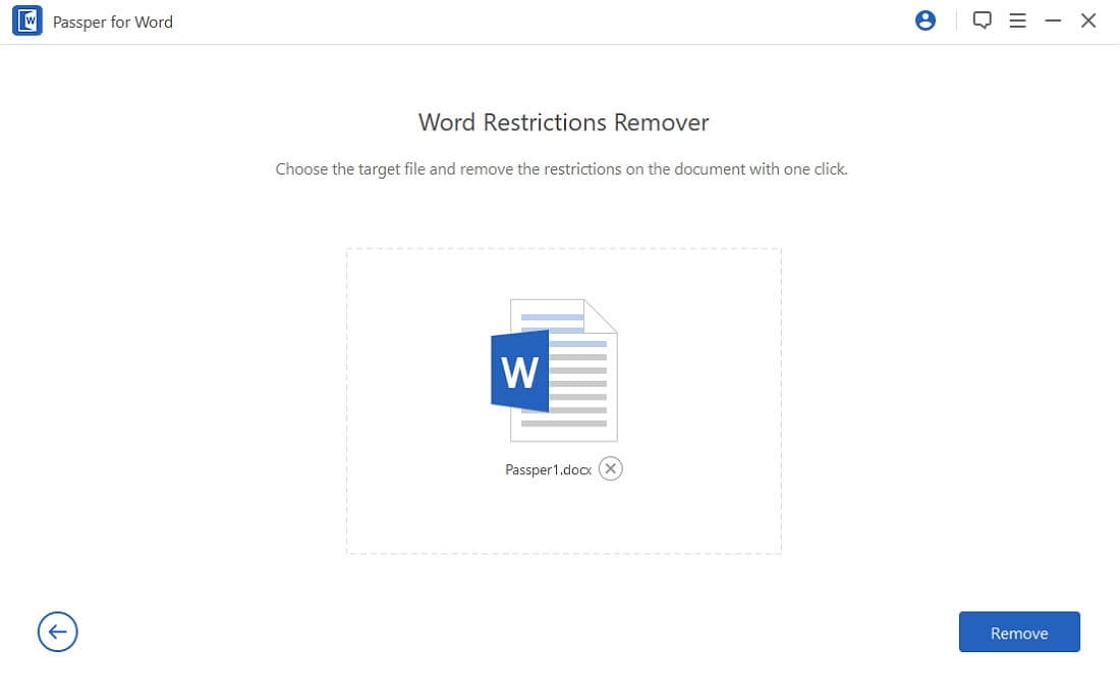
Step 3: Once the Word file is open in Passper for Word, click on "Remove" to begin the process.
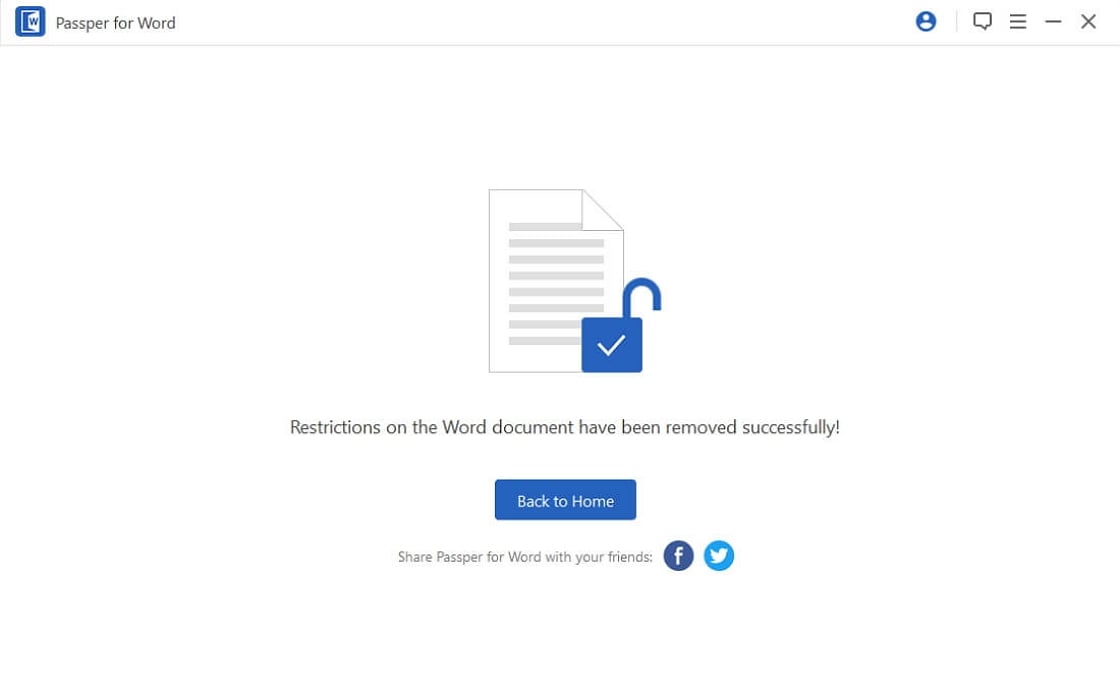
In a few seconds, the restrictions on the document will be removed and you will be able to edit the document.
Tip. How to Unprotect Multiple Word Documents at Once
It's common that you have multiple password-protected Word documents and you need to unprotect them now. It's time-consuming if you unprotect the files one by one. Are you looking for a way to unprotect all the files at once? If yes, then you have landed on the right place. We have found one effective method for you.
Step 1: Search Lord Unprotector™ on the website. Download and install it to your computer.
Step 2: Run the program. Then, you can add your password-protected Word document to the program. You can choose to add files or add folders.
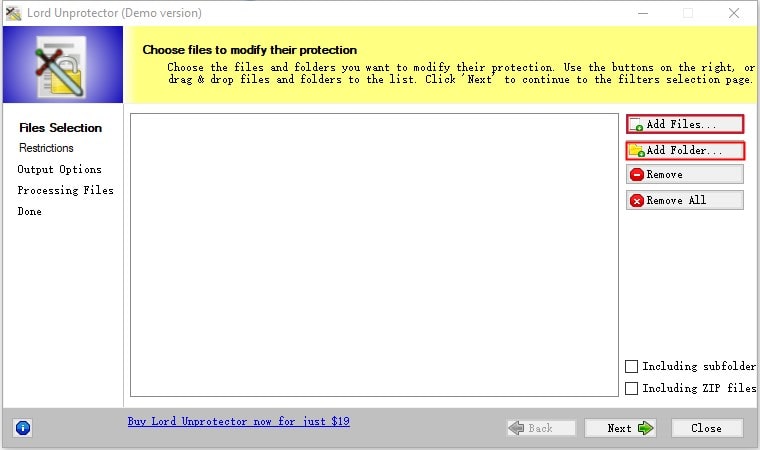
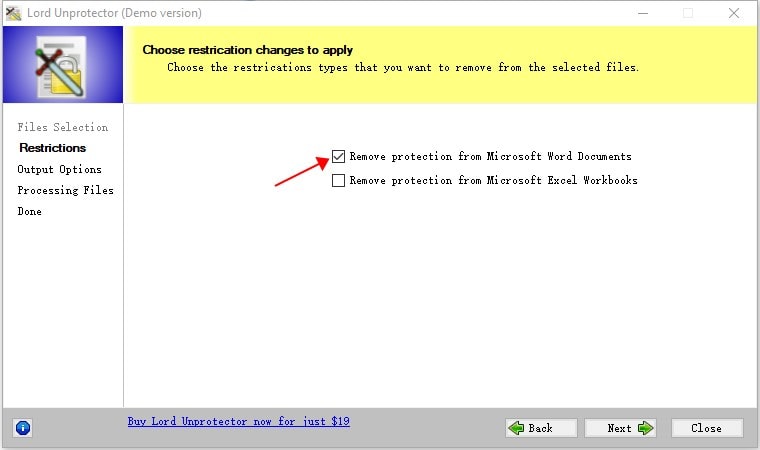
Step 3: You need to choose "Remove protection from Microsoft Word Documents". Click "Next" to continue.
Step 4: Choose the location that you want to save the new documents. Or you can choose to overwrite the original files. Then press "Finish" button.
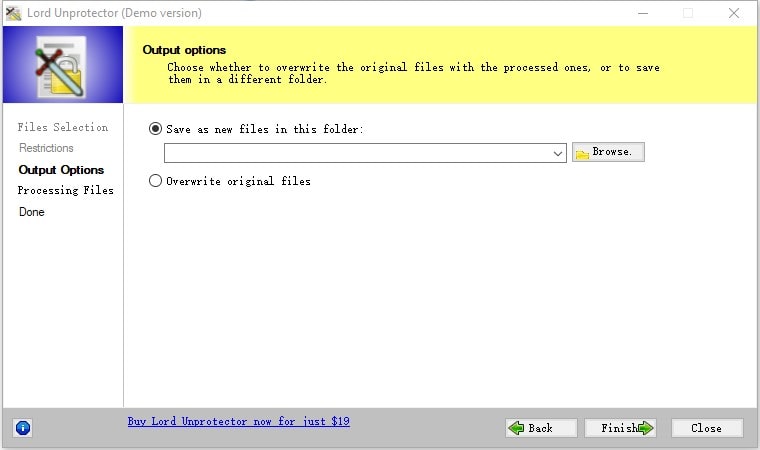
Once finished, you can find the unprotected Word documents under the path you chose before.
Check some notes of this method:
This program can only unprotect Word document with editing restrictions.
The program offers a demo version. But it can only process one file at a time, and you cannot process whole folders.
The next time you have a document that is password protected or restricted in one way or another, you now have various options to help you unprotect the Word document. If you have forgotten the password, then Passper for Word will be your best choice to unprotect Word document without password.


