A checkbox in a Word document may not be the first thing that comes to mind when editing documents. But they can be very effective and important in certain types of documents. If for example, you are using Word to create forms, learning how to add a checkbox to that document may become instrumental in helping you design the best fillable form. In a fillable form, checkboxes make it easier for someone to not just understand what is required of them but also fill the form more easily.
Adding checkbox in Word is simple, thanks to the many features the program has that allow users to easily create and add checkboxes. In this article, we will look at how to add a checkbox in Word. There are actually two ways: one is to use Word's developer tools and the other involves changing bullet points into a checklist. The one you choose will ultimately depend on what the document will be used for.
1. With Developer Tools: Content Control
To learn how to insert a tick in word using Word's developer tools, follow these very simple steps.
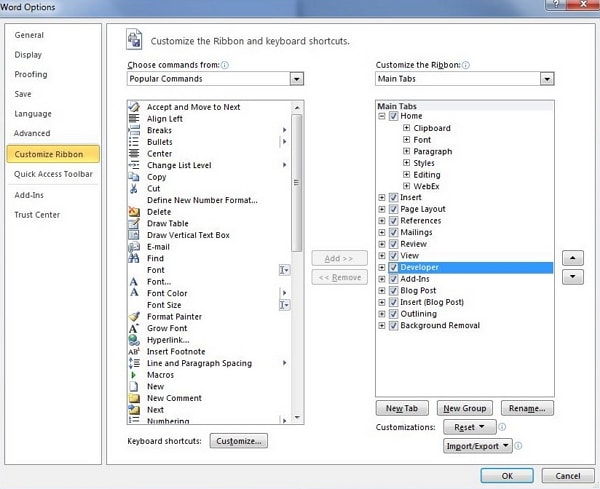
Step 1: The first thing to do is to make sure that you have the Developer tab on Word's main ribbon at the top. Most people don't. If you don't have the tab, begin by going to "File > Options" and chose ‘Customize Ribbon" in the listed options. In the "Customized Button" section on the left, make sure that "Main Tabs" is selected and then check "Developer" from the list of main tabs. This will place the "Developer" tab on the main ribbon.
Step 2: Now go back on the document, place the cursor where you would like to add the checklist in the document. Click on the "Checkbox Content Control" button located under the Developer Tab".
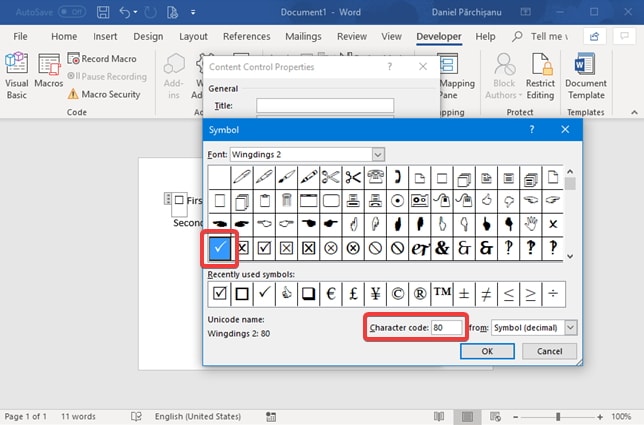
You will see a checkbox placed in the document. This checkbox is interactive and clickable, making it easy to manipulate and change.
2. Change Bullets to Checkbox: Only for Printing
The other way to tick a box in Word document is to change bullet points into a checkbox. Here's how to do that:
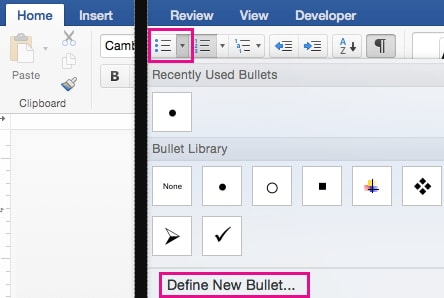
Step 1: Open the Word document and place the cursor where you would like the checklist to appear. In the home tab, click on the small arrow next to the bullet points to open bullet point options and select "Define new bullet".
Step 2: Click on "Symbol" in the next interface and select "Windings 2" as the font in the symbol box.
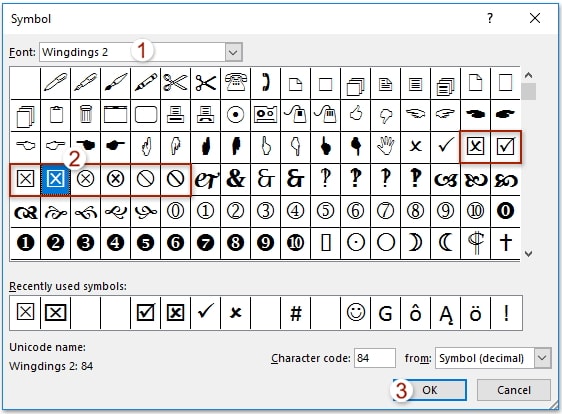
Step 3: From the options presented, find the option that most resembles a checklist. You can select any symbol you want and click "OK" when you've made your choice.
Step 4: In the Word document, proceed to type whatever content you wanted to include as the checklist and the selected "checklist symbol" will appear.
It is important to note, however, that this method doesn't create interactive checkboxes. It is a good solution when creating a document print out that has checkboxes on it and not a fillable form.
3. Bonus Tip: How to Remove a Word Password
One of the other pressing issues that most Microsoft Word users have to deal with involves password protection. Word offers great features to protect the document including adding an opening password that prevents someone without the password from opening the document. While this is a great way to keep the content on the document safe, it can also become quite problematic when you lose or forget the password. Word doesn't offer you any obvious ways to recover the password in case you forget it. This is also one factor that has left many people at a loss for what to do.
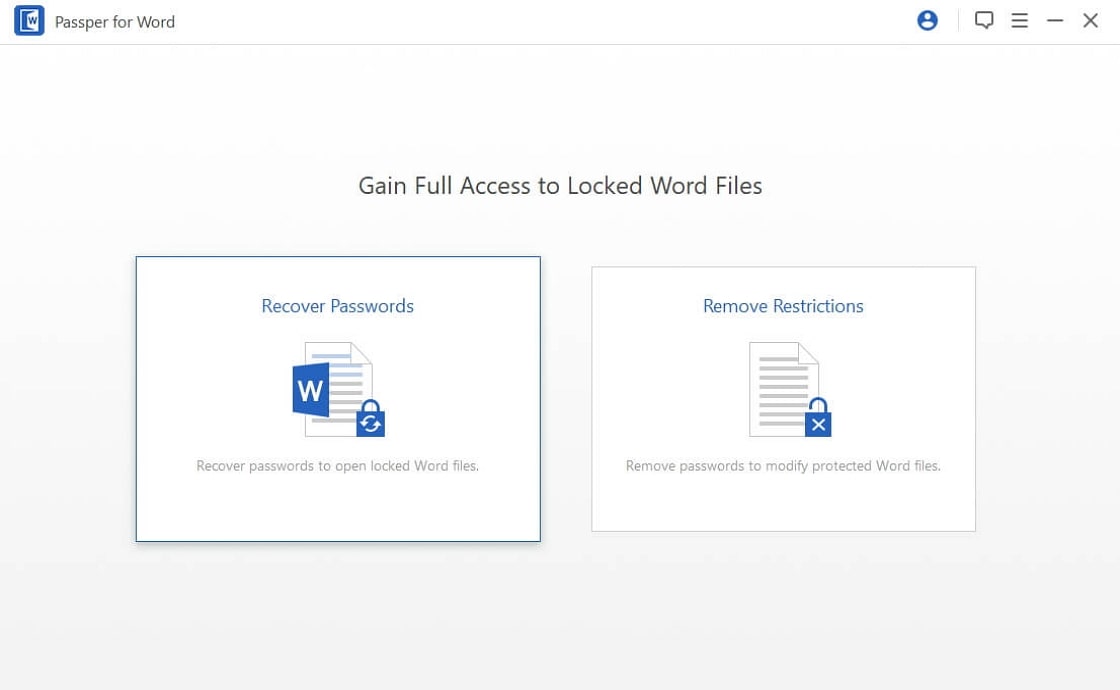
If you have lost the password on your Word document, we have a solution that allows you to effectively recover the password, allowing you to open the document without needing the password. This solution is Passper for Word, a password recovery tool designed to recover Word passwords and remove any restrictions placed on the document. You can also check for other office password recovery tools when necessary.
Some of the features that make Passper for Word the ideal tool for the job include the following:
Fastest Password Checking Speeds: Passper is one of the fastest tools in the market in terms of password checking speeds. This is because it has the capability to check 3,000,000 every second and a large database of millions of frequently used passwords to refer to.
Recovery Change Increased with 4 Attack Modes: It utilizes 4 different attack modes to further increase the chances of recovery and give it one of the highest recovery rates in the business.
Remove Editing Restrictions in 1 Click: It is also fully compatible with all versions of Word including Word 2019 and it is very easy to use, allowing you to remove the password in just a few simple steps and remove editing restrictions in a single click.
This lightweight program will not take too much space on your computer and it is also 100% safe. None of the data on your computer will be at risk and neither will the data on the Word document you are working with.
Conclusion
Passper for Word has a lot of advantages when compared to other methods of password recovery. In a fast-paced world, you probably don't have hours to wait for a password attacking tool to recover your password. This is why Passper for Word has invested in technology designed to significantly reduce this waiting time. A faster recovery time combined with more attack modes and a high recovery rate than other tools makes Passper the best Word password recovery tool.


