When you have a Word document that has a lot of content you don't want someone to see, you have several options to password protect the document. These protections are available for all versions of Word in varied degrees although you may not be able to use them on Word Online. These protections can be very helpful in allowing you to protect sensitive content.
But which protections do you use? When selecting the type of protections to apply to any Word document, the reasons for protection can be a determining factor. In this article, we are going to be looking at various ways you can use to lock a Word document and prevent anyone without a password from accessing the file.

1. Mark as Final
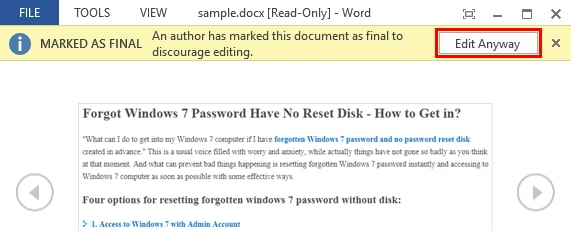
One of the easiest ways to protect Word document from further editing is to "Mark as Final". Marking a Word document as final will inform anyone that the document is complete and marked as "Read only" preventing anyone from making any changes to it. This will hide any editing marks, comments and tracked changes on the document and a pop up will appear on the document, informing the reader that it has been marked as final.
It is a less secure way to lock a Word document since the reader can simply click on "Edit Anyway" to change the document. It is however a very effective way to openly share content while letting the reader know that the document is complete.
2. Encrypt with Password
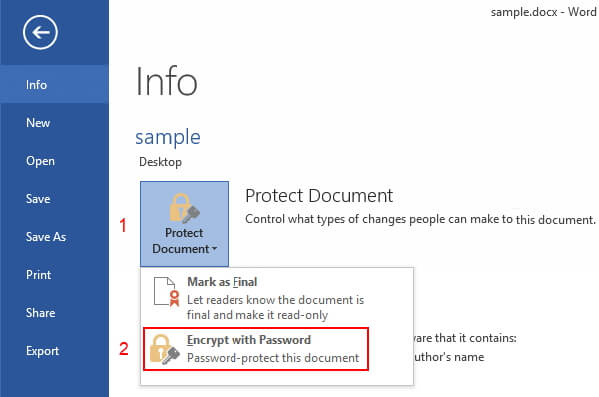
The other way to password protect word is to encrypt it with a password. When the document is encrypted in this way, anyone who opens it will need a password to access the content on the document.
You can use a password to encrypt a Word document by clicking on "File > Info > Protect Document" and then enter the password you want to use in the dialogue box that appears. Then enter the password again to confirm it.
This method is a lot more secure since anyone without a password will not be able to open the document. It is important to note however that this method doesn't include a recovery option and you may be unable to access the document if you lose the password.
3. Restrict Editing
You may also choose to lock a word document by restricting editing. Restrict Editing is an option that is available under the "Review" tab. After you choose to restrict editing on the Word document, you will have 2 options:
Formatting Restrictions - prevents the reader from making changes to the document. You can also click on "Settings" to select the allowed styles.
Editing Restrictions - You can restrict the type of editing that can be done on the document or even cancel editing permissions completely. You may also be able to specify users who can edit the document by clicking on the "Exceptions" or "More Users" option.
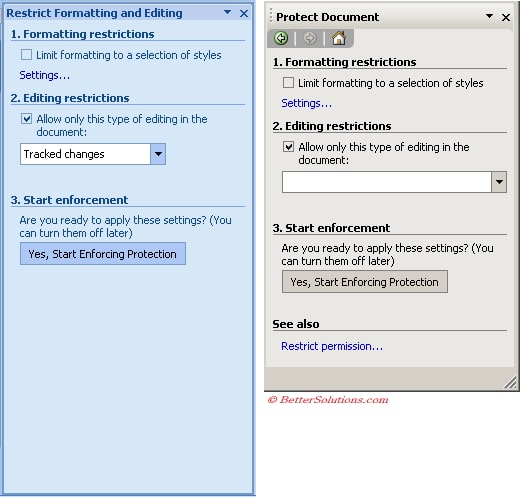
To make these changes take effect, you must click on the "Yes, Start Enforcing Protection" button in the "Restrict Editing" toolbar.
4. Protect Word Document on Mac
You may have already noticed that there is a slight difference of procedure when protecting a document in Word for Windows and Word for Mac. If you are using Word for Mac, follow these simple steps to protect a Word document from being opened or edited:
Step 1: Open the Word document you would like to protect and then click on "Review > Protect Document".
Step 2: Under "Security", you will need to choose if you want to set a password to open the document. Set a password to modify the document or both. Type in the password you want to use and re-type it to confirm.
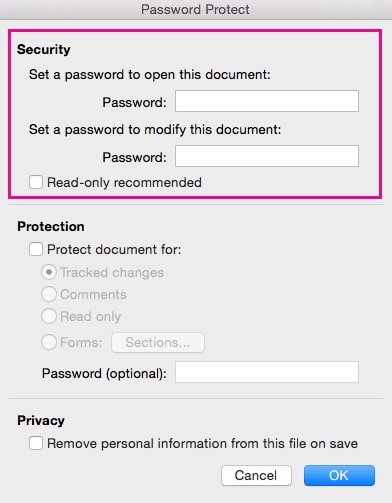
Step 3: Click on "OK".
Keep in mind that passwords you use are case sensitive and cannot be longer than 15 characters long. There is also no way to recover the password, so be sure to set a password that is easy to remember and keep a copy of it somewhere safe so you can access it when you need it.
5. How Unlock Word Document If Password is Lost
While Word does offer you amazing ways to protect your Word document and restrict editing, it can be very hard to recover the password if you lose it, especially if you are using older versions of Word. This means that if you ever lose the password you used to encrypt the document, you may be unable to access the document and thereby lose all the content on it without the possibility of being able to recover the content.
If you find yourself in a situation where you've lost your Word password or can't remember it, you may find Passper for Word highly useful. This Word password recovery tool is ideal for you when you need to recover a forgotten Word password or remove all kinds of restrictions from Word documents. It is highly effective, with the highest recovery rates in the business. Some of the features that make Passper for Word the best tool include the following:
Passper for Word can help you recover the opening password or remove restrictions from any Word document without deleting or modifying the data on the Word document.
It can help you access locked Word documents when you can't open them, can't edit them, can't print them or can't delete the content on the document.
It utilizes 4 different attack modes. Each is designed to help you easily recover your password depending on how much information you have about the password. These attack modes make Passper for Word a password recovery tool with the highest recovery rate of any other tools.
It is also very easy to use. You can remove restrictions in 2 seconds and recover the password in a few simple steps.
The recovery process can be saved at any time when you need to interrupt the process.
Let's take a look at how you can use Passper for Word to recover an opening password for any Word document:
Step 1: Download and Install Passper for Word on your computer. Once the program has been installed successfully, open it and then select "Recover Passwords" in the main window.
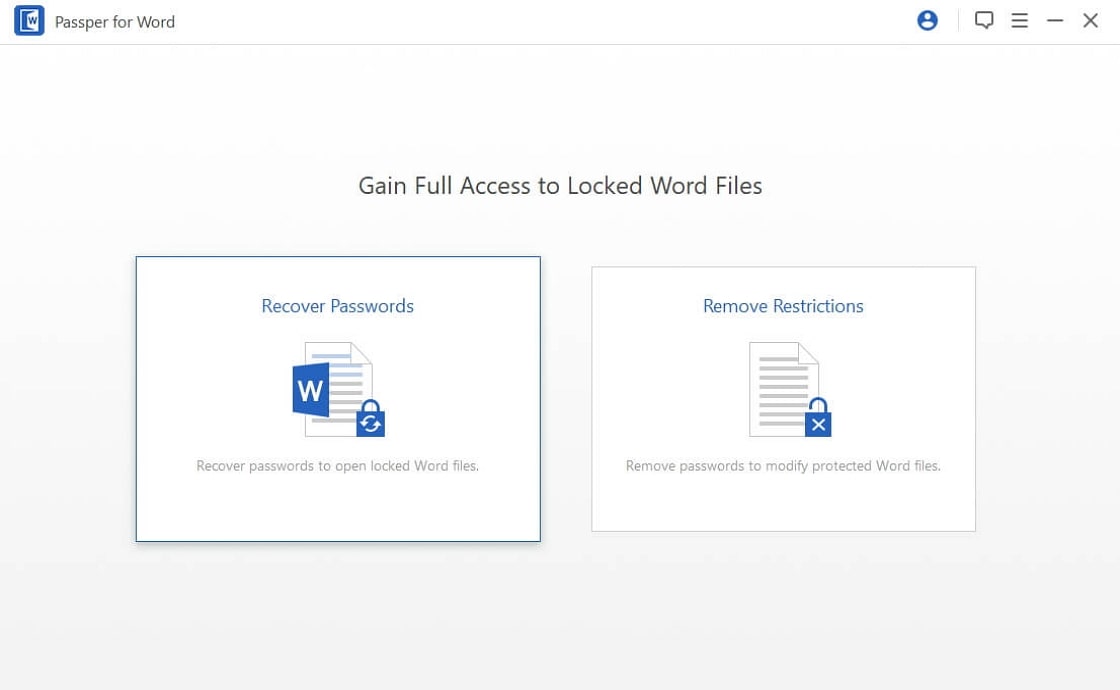
Step 2: Click "Add" to import the protected Word document into Passper for Word and then select the type of attack mode you would like to use. The attack mode you choose will depend on how complex the password is and how much information you have about the password.
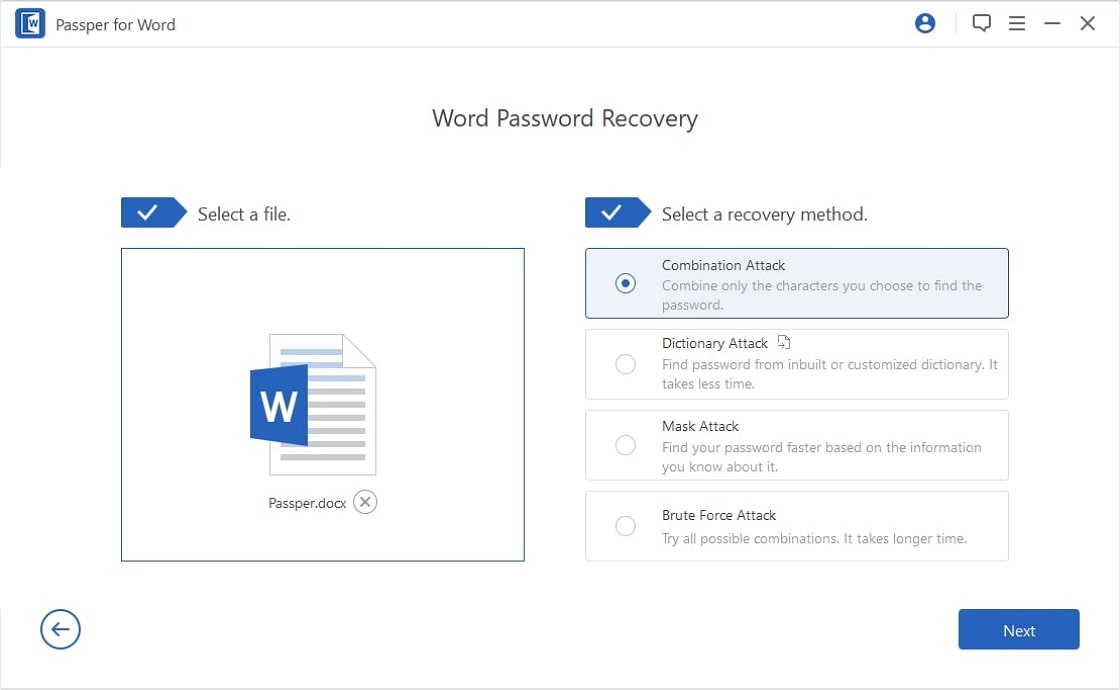
Step 3: Click "Recover" once you've selected the attack mode and configured your settings. The program will immediately begin recovering the password. Wait until the process is complete (it may take a while depending on the attack mode you've chosen and the complexity of the password).
The password will appear on the next window once the recovery process is complete. You can then use the recovered password to open the Word document.
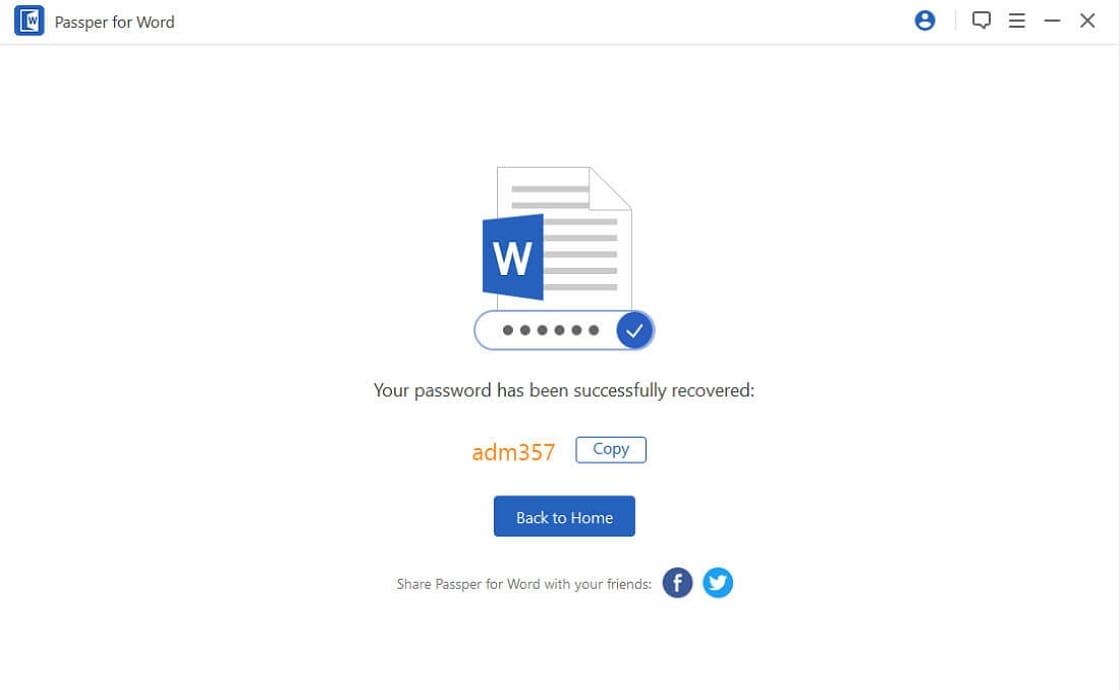
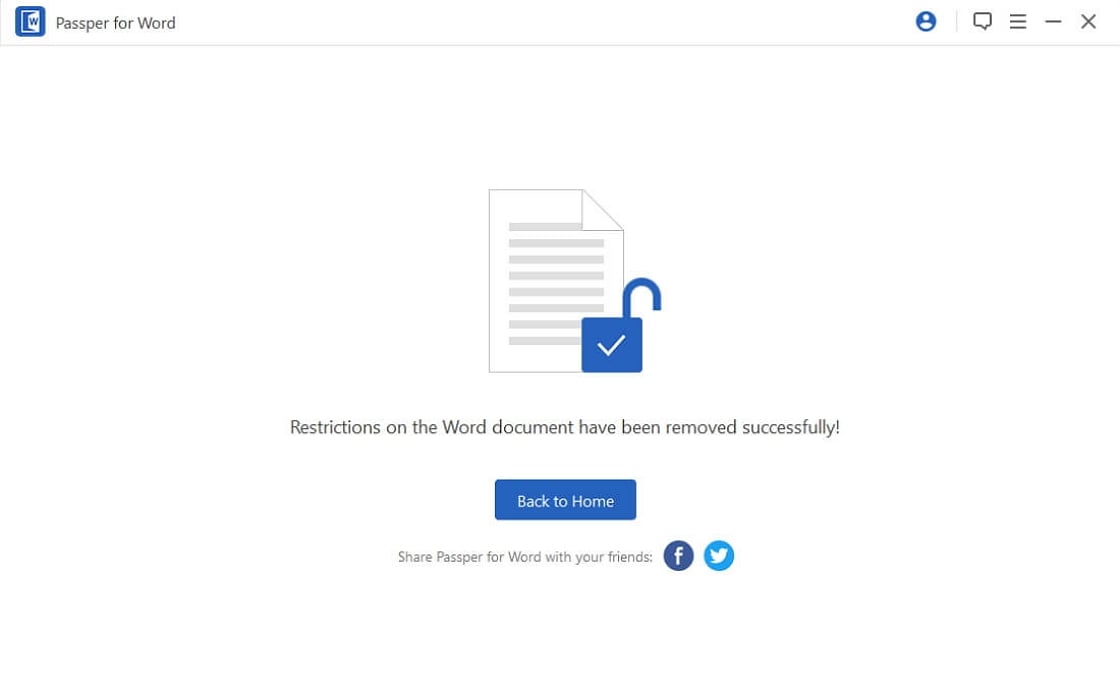
You can also use Passper for Word to remove any restrictions on the Word document. To do that, follow these simple steps.
Step 1: Open Passper for Word and then click on "Remove Restrictions".
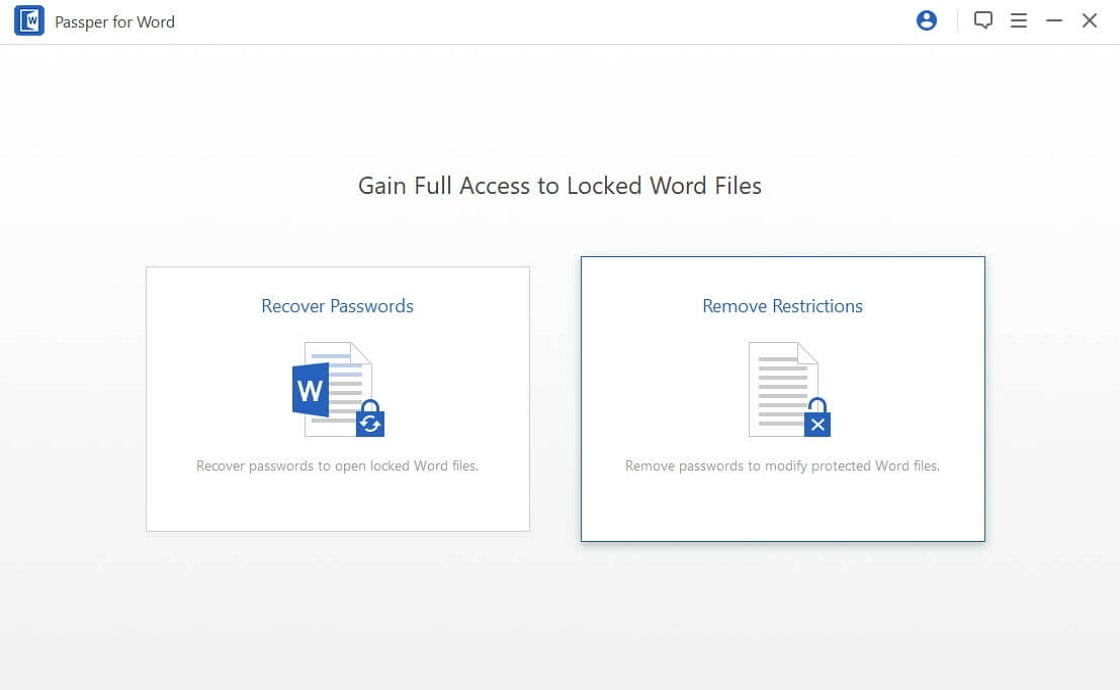
Step 2: Click on "+" to add the document to the program. When it is successfully added to the document, click on "Remove" and in a few seconds the document will be free of all restrictions.
Conclusion
Protecting content on your Word document can be essential when it contains sensitive information. But since Word doesn't give you options to recover the password in case you forget it, you may be unable to access the information yourself. Passper for Word offers you the best chance for recovering the password if you forget it, but also lifts any restrictions that may be preventing you from editing the document.


