Password protection is the easiest way to keep the contents of any document private and this method is often used in many documents with highly sensitive information. As you can expect, password protection can be a very valuable asset, particularly for businesses that handle or deal with sensitive information, not meant for the public. They serve to keep the information in the document only available to the few ones who need the information.
But on the flipside, a password-protected Excel worksheet can be very problematic to handle especially when you don't know the password or if you somehow set a complex password and can't remember it. It can be even worse if only sections of the document have been protected, meaning that you can't edit or format any part of the Excel sheet. If you are in a situation where you've lost the password, you don't remember the password or you don't have access to the password but you still need to edit the Excel sheet, this article will come in very handy. That's because we are going to share with you various ways you can use to unprotect Excel sheet or Excel workbook, rendering it easily editable.
Part 1: How to Unprotect Excel Sheet with Password
Part 2: How to Unprotect Excel Worksheet/Workbook without Password
Let's begin with the easiest.
Part 1. How to Unprotect Excel Sheet with Password
When you know the password, unlocking the protected worksheet can be as simple as the following:
If you are using Excel 2003:
Step 1: From the toolbar, click on "File".
Step 2: Hover to the file you want to unlock and open it.
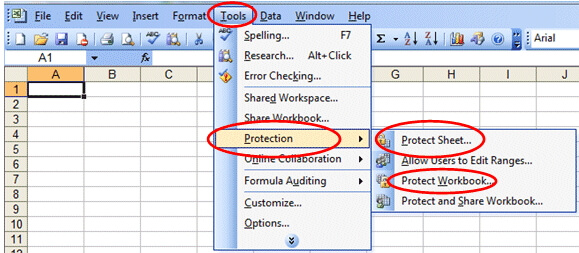
Step 3: Click on "Tools" and then choose "Protection" from the drop-down menu.
Step 4: After clicking on "Protection", click on "Unprotect Worksheet" from the options. You will get a pop-up box into which you can type in the password that you already know. Then type in the password.
If you are using later versions of Excel 2010, 2013 and 2016:
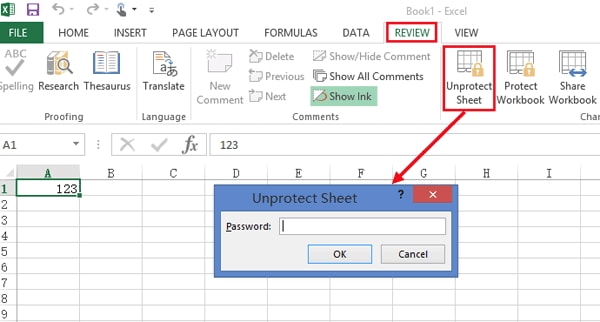
Step 1: Open the protected document that you want to unlock. You can do that by clicking on "File > Open" and then browsing for the file you need.
Step 2: Select "Review" on the top ribbon and then click on "Unprotect Sheet".
Step 3: Enter the password and the document will be unlocked.
This method only works if you already know the password on the protected file. Keep reading if you don't know the password.
Part 2. How to Unprotect Excel Worksheet/Workbook Without Password
The following methods will help you unlock the password of your MS Excel Worksheet or Workbook if you don't know the password, choose the best one according to the comparison form below:
| Way 1-Passper for Excel | Way 2-Using ZIP | Way 3-Using VBA Code | Way 4-Online Tool | |
| Remove 'Password to Modify' | ||||
| Recover 'Password to Open' | ||||
| Security | 100% secure, no data loss | Data loss | Data loss | Not secure, the data is often divulged very easily |
| Complexity | Easy to use | Complex, not easy for beginners | Complex and time-consuming | Easy |
| Unprotect Time | 3s, in one click | 10 mins | 25mins | 30s |
Way 1: Unprotect Excel Worksheet/Workbook with Passper for Excel
If you don't have the password used to unprotect the Excel sheet, you may find it highly problematic to do simple things like edit sections of a document. One of the ways to work around this problem is to use Passper for Excel. Passper for Excel is highly influential in helping you remove restrictions from an Excel worksheet, rendering it editable. It uses advanced AI algorithms to intelligently identify issues in Excel files, allowing for the quick removal of restrictions or cracking passwords.
Following are some core features of Passper for Excel:
Unprotect Excel worksheet or workbook with 100% success rate.
Your worksheet or workbook can be unprotected within 3 seconds.
The tool is easy to use. The whole process is as simple as 1-2-3.
The program has a broad compatibility. It can unprotect Excel 97/2000/2003/2007/2010/2013/2016/2019/2021 worksheet/workbook.
Passper for Excel is a trustworthy program. It has received positive reviews from its users.

The following step by step guide shows how to use the program to unprotect Excel worksheet/workbook:
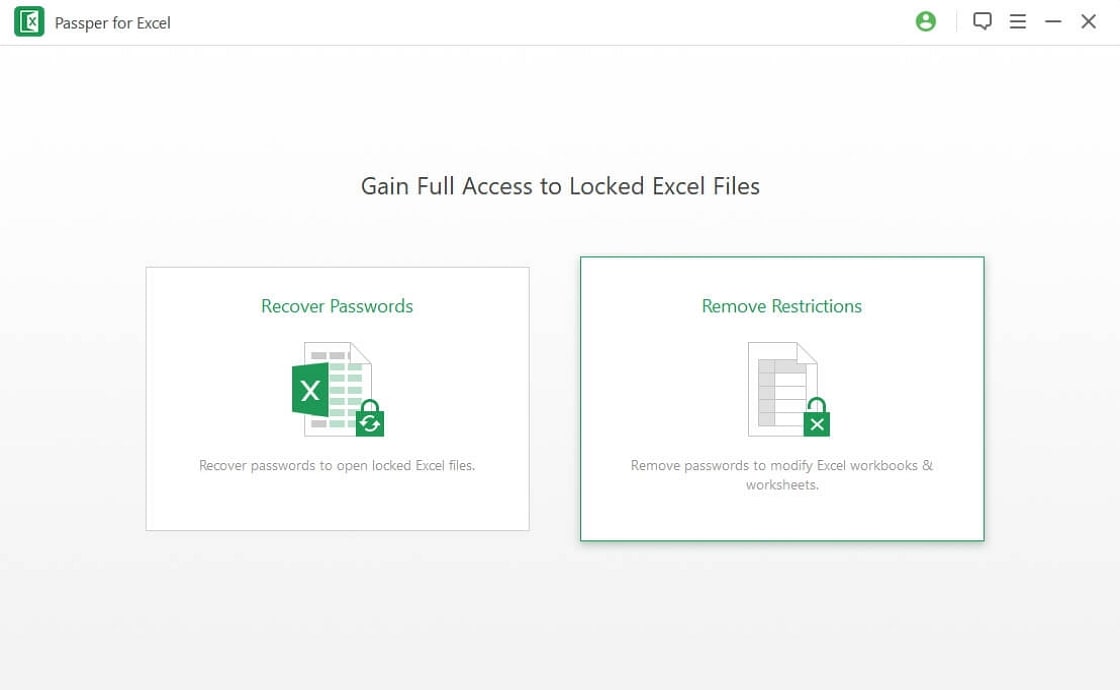
Step 1Once the program is installed on your computer, launch Passper for Excel and then select "Remove Restrictions" on the main window to begin.
Step 2Now click on "Select a File" to select the Excel worksheet or workbook that you want to unprotect.
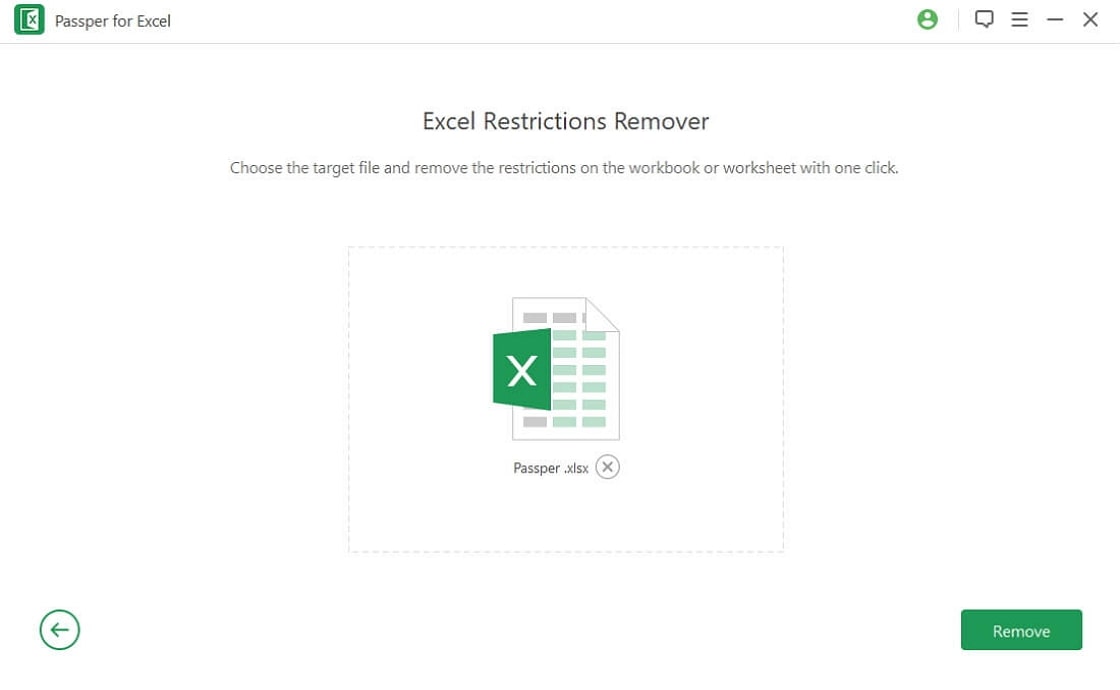
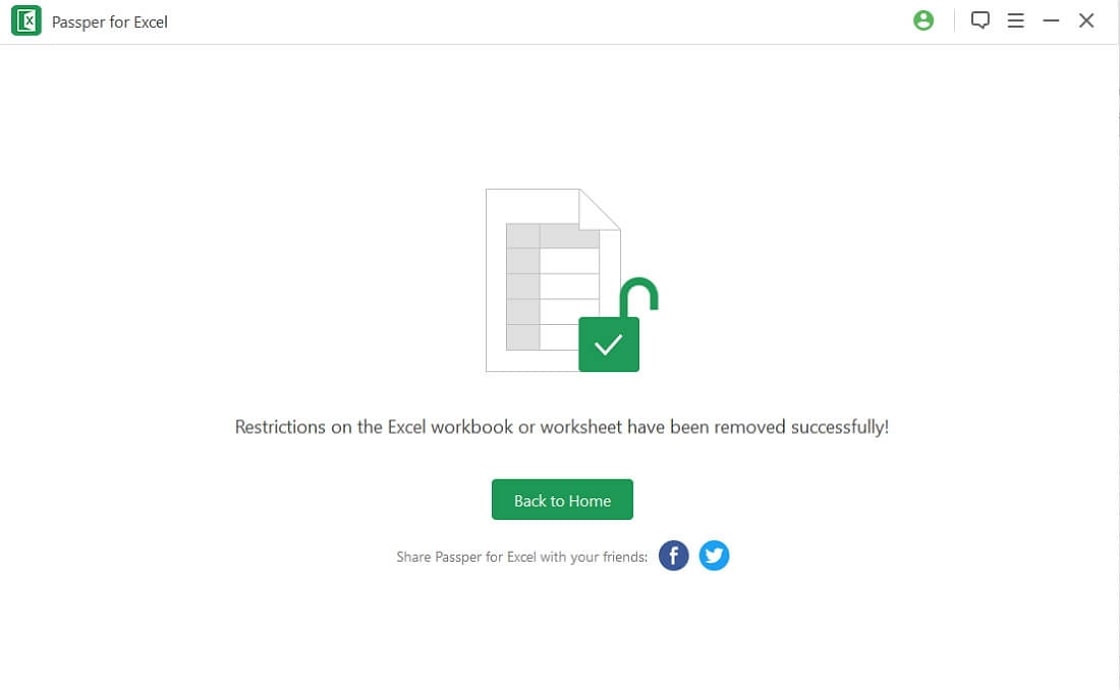
Step 3When the document is added, simply click on "Remove" and the program will remove any restrictions placed on the document.
Way 2: How to Unprotect Excel Worksheet/Workbook via ZIP
You can also use ZIP software to easily unlock a password-protected MS Excel worksheet/workbook. However, we do not recommend you to try this method since it is complicated to process and the success rate is very low. If you still want to try it, the following is a simple guide to show you how:
Step 1: Install a ZIP supported compression program like 7-Zip on to your computer.
Step 2: Locate the Excel sheet or workbook you want to unprotect, then right-click on it and select "Open with 7-ZIP". You should see several folder and files.
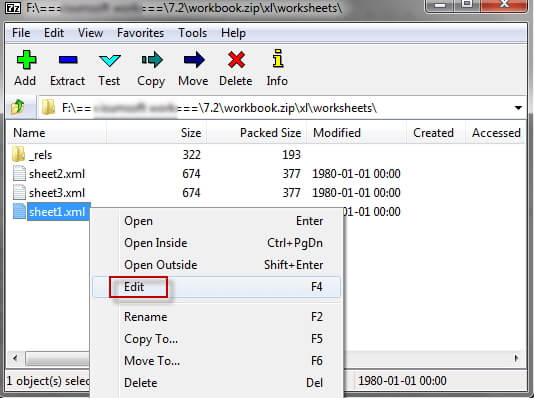
Step 3: Locate the password protected sheet under this path: \workbook.zip\xl\worksheets\. Right click on it and then select "Edit". This will open the file in Notepad or any other text editor on your computer.
Step 4: Locate and completely delete the following tag in the editor:
Step 5: Close the editor and when 7-Zip asks you to replace the existing XML file, click on "Yes" to save the modified document.
Step 6: Now simply open the Excel file and you will find your worksheet is not protected.
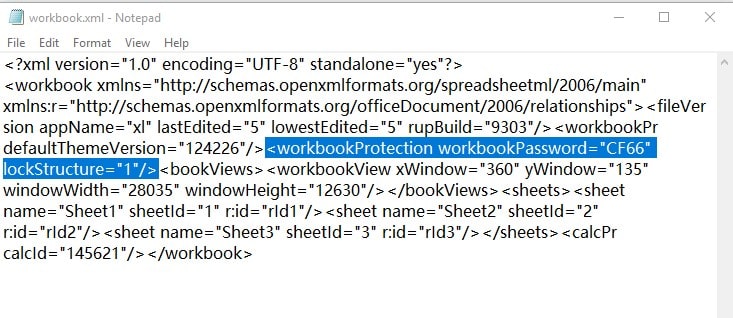
Note: If you have password protection on the workbook, go to "workbook.zip\xl\workbook.xml" and remove the tag "
Way 3: Using VBA Code
This method involves executing some VBA codes to unlock your protected Excel file. However, it only works with the Excel 2010 and older versions. Importantly, if there are more than one protected Excel sheet in your file, you need to run the VBA code for each sheet individully.
Step 1: Open the protected worksheet normally using Microsoft Excel.
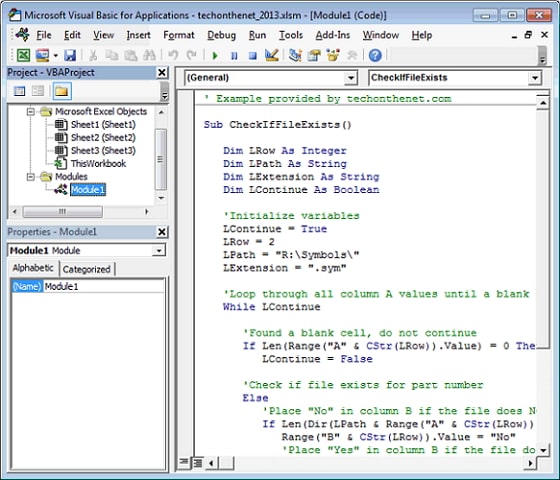
Step 2: Press and hold "ALT + F11" to access the Microsoft Visual Basic for Application interface.
Step 3: Click on "Insert > Module" and in the Module Window, paste the code below.
Sub PasswordRecovery()
Dim i As Integer, j As Integer, k As Integer
Dim l As Integer, m As Integer, n As Integer
Dim i1 As Integer, i2 As Integer, i3 As Integer
Dim i4 As Integer, i5 As Integer, i6 As Integer
On Error Resume Next
For i = 65 To 66: For j = 65 To 66: For k = 65 To 66
For l = 65 To 66: For m = 65 To 66: For i1 = 65 To 66
For i2 = 65 To 66: For i3 = 65 To 66: For i4 = 65 To 66
For i5 = 65 To 66: For i6 = 65 To 66: For n = 32 To 126
ActiveSheet.Unprotect Chr(i) & Chr(j) & Chr(k) & _
Chr(l) & Chr(m) & Chr(i1) & Chr(i2) & Chr(i3) & _
Chr(i4) & Chr(i5) & Chr(i6) & Chr(n)
If ActiveSheet.ProtectContents = False Then
MsgBox "One usable password is " & Chr(i) & Chr(j) & _
Chr(k) & Chr(l) & Chr(m) & Chr(i1) & Chr(i2) & _
Chr(i3) & Chr(i4) & Chr(i5) & Chr(i6) & Chr(n)
Exit Sub
End If
Next: Next: Next: Next: Next: Next
Next: Next: Next: Next: Next: Next
End Sub
Step 4: After pasting the code, press the "F5" key. This will execute the code, and on the next pop-up prompt, click on "OK". The password in the Excel file will be removed right away.
Way 4: Unprotect Excel Worksheet Online
There are also certain options to help you unlock an Excel spreadsheet online. By using the online tool, you need to upload your locked Excel file to its server. If there are sensitive data in your Excel file, we sincerely suggest you choose other solutions. These online tools are very easy to use as the following step by step process shows:
Step 1: Go to http://service.password-find.com to access the tool you'll need to unlock the Excel spreadsheet.
Step 2: Click on "Unprotect Your File" button on the main window.
Step 3: Upload the file you need to unlock and then click "Next" to start the process to unlock the document.
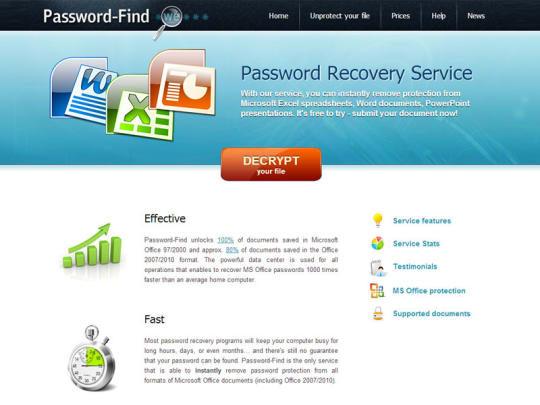
In a few minutes, the online tool will easily unlock the document and you can then download the file and save it to your computer.
Tips: How to Unprotect an Excel Document to Open the File
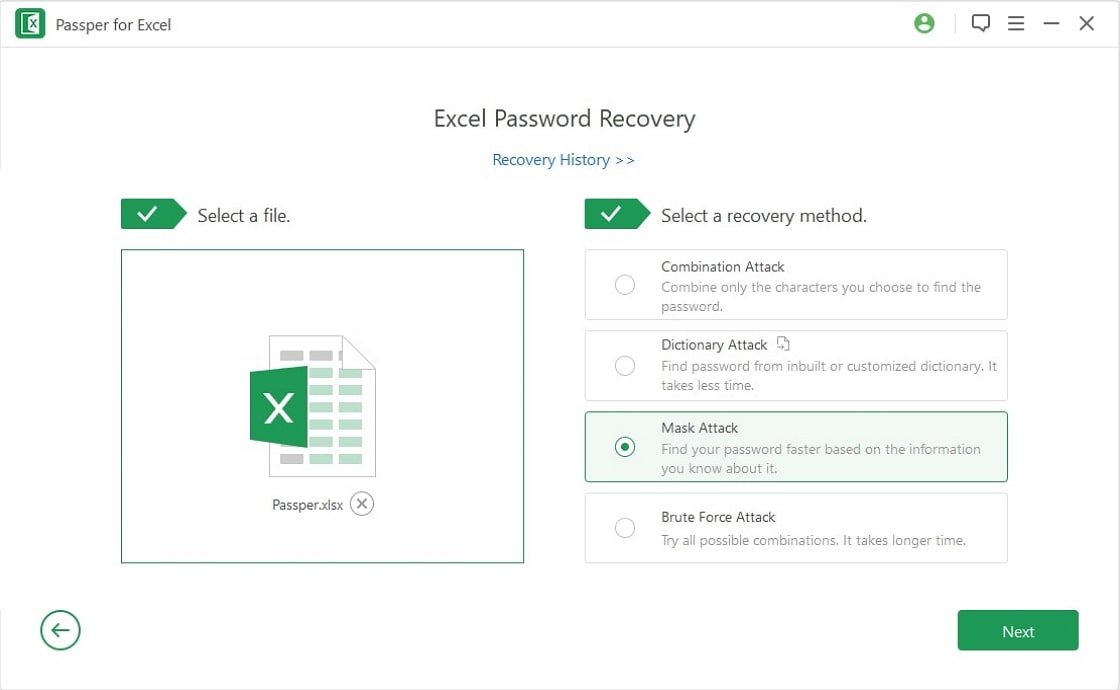
If you receive an Excel file that is protected with an opening password, Passper for Excel is also here for you. This program is meant to make it easier for you to open any password-protected MS Excel document when you don't know the password. In order to achieve this goal, Passper for Excel adopts 4 powerful and customized attack methods which greatly increase the recovery rate.
The following is how to open a locked Excel document using Passper for Excel in three simple steps:
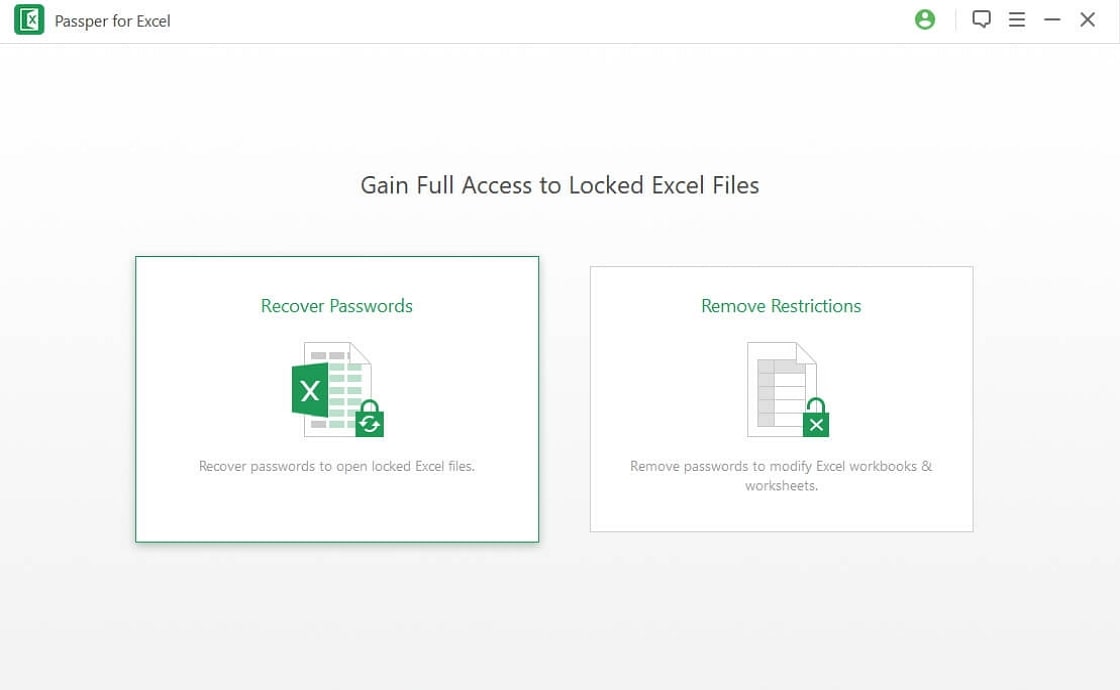
Step 1Install Passper for Excel on to your computer and then launch the program. Click on "Recover Passwords" and then click on "+" to browse for the password-protected Excel files you need to unprotect.
Step 2 Next, choose the most appropriate attack mode from the 4 modes available on the interface.
Step 3Once click on the "Recover" button, the program will immediately begin recovering the password which will be displayed on the screen shortly.
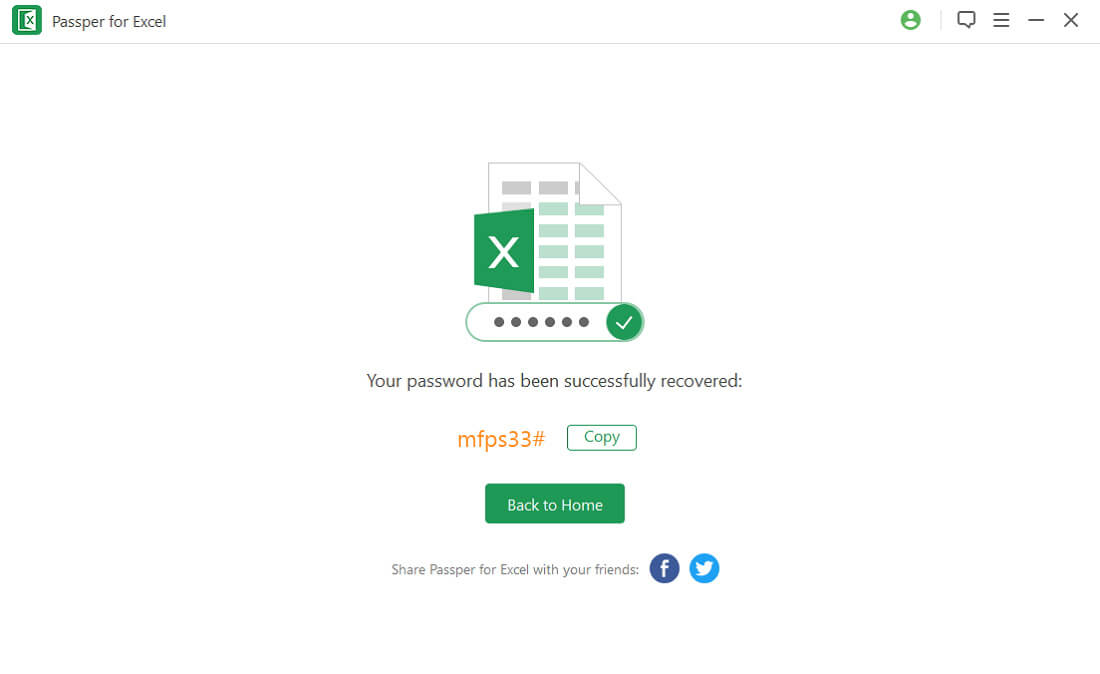
You can then use the password to unlock the file and continue to edit it.
A password can provide the best way to protect a document from prying eyes. But as we have seen throughout the article, the password can also become a problem when you lose it or simply don't remember it. Fortunately for you, we have provided you with numerous ways to help you overcome this hurdle and easily unprotect Excel sheet with or without password.
Yet, Passper for Excel provides the best way to remove a password and unlock the file. The process is easy and you will have a fully-editable document in three simple steps. It even helps you overcome some of the restrictions that can keep you from editing the document.


