You're fed up with entering the password each time you login into your Windows 10 PC and want to disable the password?If you know the login password of your Windows PC, it's pretty easy. But if you forgot what the password is, you need to take advantage of a password removal tool to help you remove the login password. Now in this post we will show you some crucial workarounds to disable the password in Windows 10, just check them out.
Part 1: Disable Windows 10 password without Password
Solution 1: Permanently Remove Password Using Passper WinSenior
If don't know the password of Windows PC, no worries!Here is an ultimate password remover that will surely disable the Windows 10 password by permanently removing it on startup. Passper WinSenior is such a tool. It is a prefssional password reset which focuses on resetting or removing Windows password in 3 steps, below are more features you must know:
Free Download for Win 10/8.1/8/7/XP
Disable Windows Login without Password: Passper WinSenior is able to disable password even you forgot what the password is.
One Click to Create Reset Disk: If you have no reset disk prepared in advance, you can use Passper Senior to create one with one click.
100% Success Rate: Adopted the advanced tech and algorithm, passper WinSenior ensures the success rate to be 100%
Pretty Easy to Use: With the intuitive and clear interface, you can disable Windows password with only 3 steps, no skill required.
Safe to Use and Trustworthy: As the sub-brand of iMyfone, it is trusted and recognizzed by PCWorld, techradar, Payetteforward, Makeuseof and so on.

Now download, install and launch Passper WinSenior on an accessible computer, and follow the steps below on how to use it:
Step 1Now insert a blank USB drive into your computer and select USB Flash Drive option from the interface, then hit the Create button to srat creating the passwor d reset disk. Once the process done, eject your USB.

Step 2Insert the created USB drive into locked PC and reboot it. Select the brand and type of your computer to get the key you need when enter boot menu. Keep Pressing the key you just got until the boot menu interface appears. Then choose your USB drive from the list.
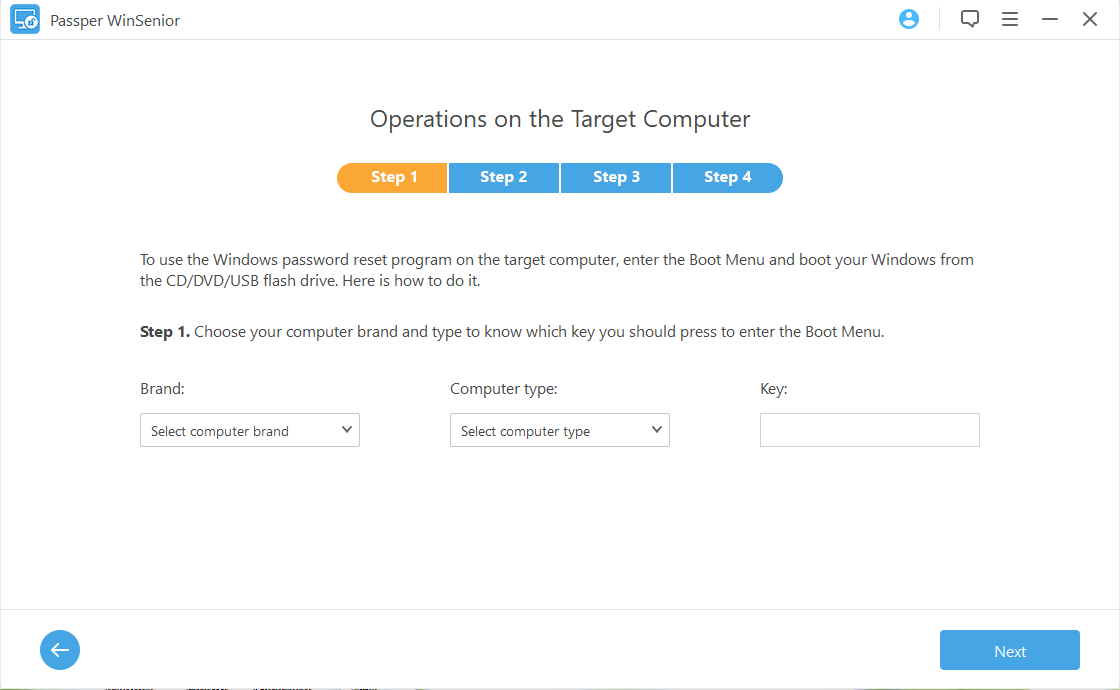
Step 3 Once done, the interface of the program will show up. Select the operating system from the menu and choose the Remove Windows Password option. Then locate the target user account that you need to remove the password from and click on the "Next" button.
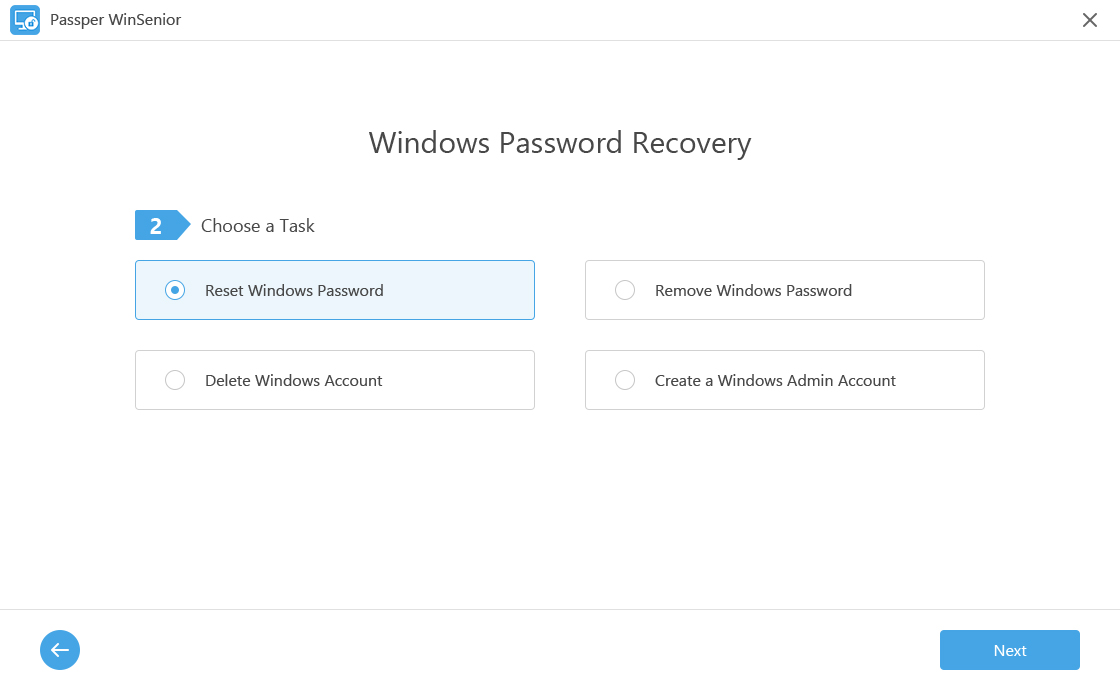
Wait for a second, your password will be removed in a short time. Eject the CD/DVD/Flash Drive and restart your computer. You can now log into your computer without any password.
2. Using Password Reser Disk
If you have a reset disk prepared, you can also try this method to remove the password on Windows 10 when you forgot the login password.
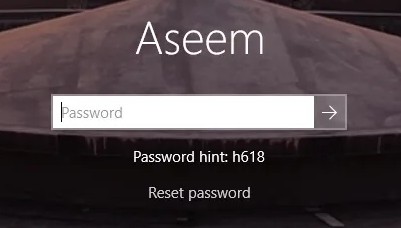
Step 1. When type a wrong password on the login screen, then a password or a username error message will be shown. Simply click on "Ok" and hit "Reset Password" link to proceed.
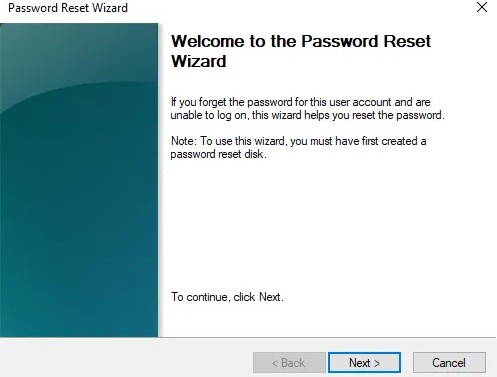
Step 2. Then you will see a "Password Reset Wizard" page. Now insert the password reset disk you prepare in your computer and choose it and click "Next" to proceed. Keep on selecting "Next" in the subsequent windows.
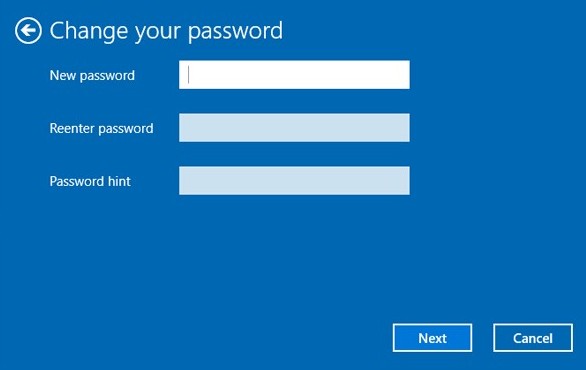
Step 3. In the new password, password confirmation, and password hint boxes, just leave them blank and again hit "Next".
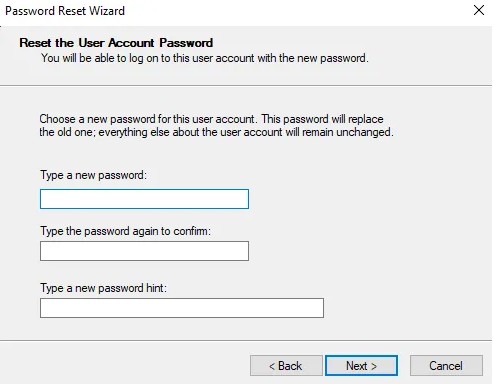
Step 4. Next, click "Finish". After all these, you've successfully disabled login password, then you can login into your computer without entering the password.

But please note that using this meethod, you must have prepared a reset disk in advance. And the password disable of this method processes are a little bit complicated. If you are a tech newbie, obviously, Passper WinSenior is more suitable for you.
Part 2: Disable Windows 10 Password Knowing the Password
If you know the password, below are 3 methods you can refer to to disable the password on Windows 10. Follow the step by step guide below
1. Disable Windows 10 Password with Local Group Policy Editor
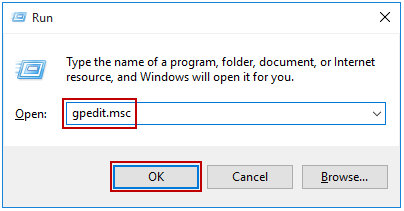
Step 1. Start this concurrently pressing the "Win + R" keys on the keyboard to open the "Run" dialog. Key in the "gpedit.msc" command and click "OK."
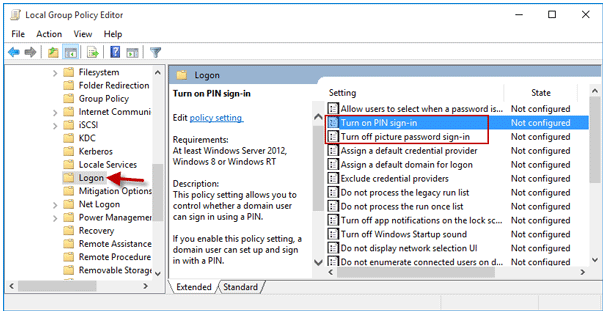
Step 2. Immediately after the above step, Local Group Policy Editor will open. Now, to continue with Windows 10 disable login screen process, you are supposed to select the following options procedurally to navigate to "Computer Configuration > Administrative Templates > System > Login." Finally, on the right of the Local Editor Window, the "Turn on PIN sign-in" and the "Turn off picture password sign-in" can easily be seen.
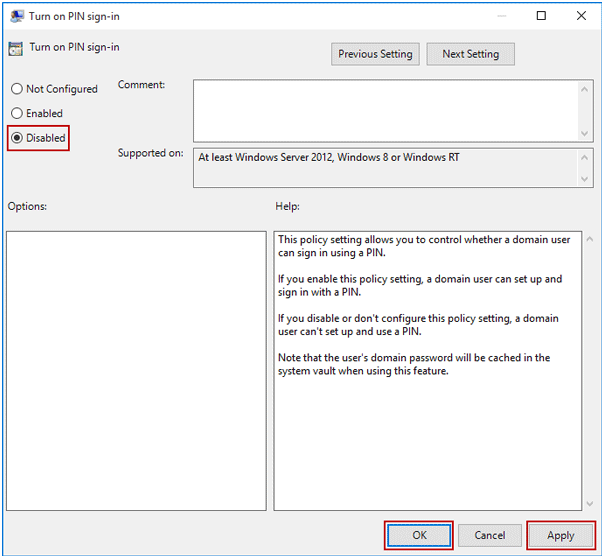
Step 3. If you would like to disable the PIN password, double tap the "Turn on PIN sign-in" and check on the "Disabled" option. Then hit "Apply" and "OK" button to proceed.
Step 4. To disable Picture password sign-in. Double hit the "Turn off picture password sign-in" option. Followed by checking the "Enabled" checkbox and then hit "Apply" and "OK."
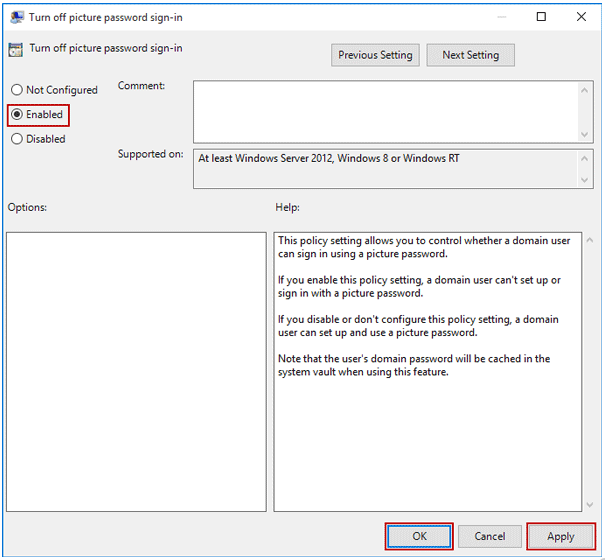
By completing step 1 through to step 4, the PIN code or Picture Password will be removed successfully.
2. Disable Login Password in Windows 10 from User Accounts
Step 1. Launch Command Prompt. Enter in the "netplwiz" and click "Enter" key.
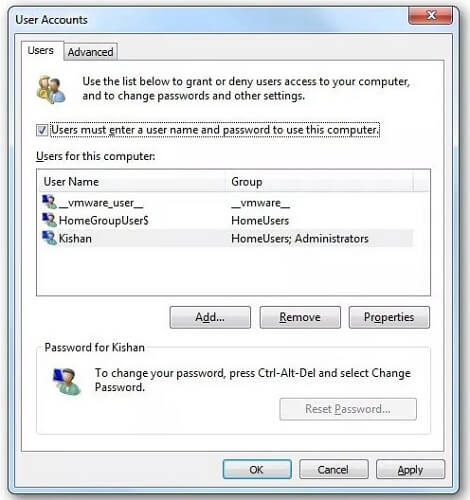
Step 2. Then you'll be directed to User Accounts dialog. In this dialog, select the right account which you intend to disable its password and then uncheck the checkbox adjacent to "Users must enter a user name and password to use this computer." Click the "OK" button.
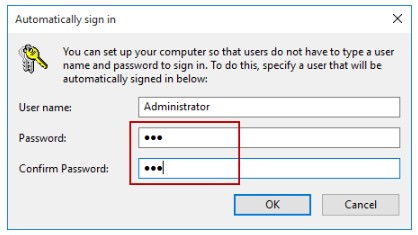
Step 3. Make sure that the security parameters are right, i.e. the user name and its password, then click "OK." At this point, the password login should be disabled.
Simple! That is a straightforward guide about how to disable login password.
3.Disable Windows 10 Password from Account Settings
Step 1. Open the computer where you want to disable Windows 10 password, then open the "Settings" app by using the Start menu shortcut or press the Windows key + I shortcut simultaneouly on the keyboard.
Step 2. Then select and click on "User Accounts" which is located under the "Settings" window to open account options.
Step 3. Next, click the "Sign-in options" and hit the "Change" button under the "Password" category.
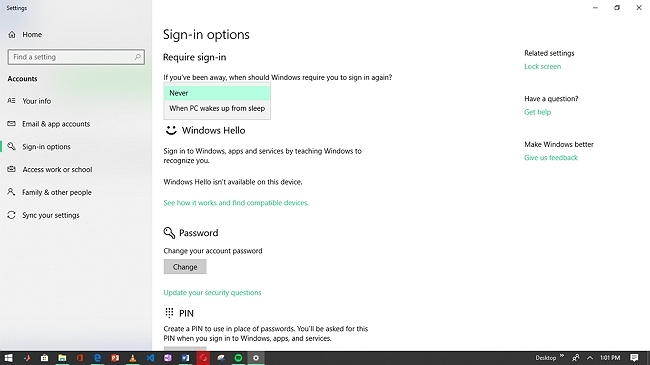
Step 4. Here, you will be prompted to type in your current password. Simply enter the password and click "Next" to proceed.
Step 5. To disable Windows 10 login password, just leave the new password blank, then click "Next" to comfimation the change.
Summary
That's it. In this article, we summarized 5 ways to help you disable password on Windows 10. You can find the solution based on your situation. If you think this article is helpful, please kindly share it with your friends.


