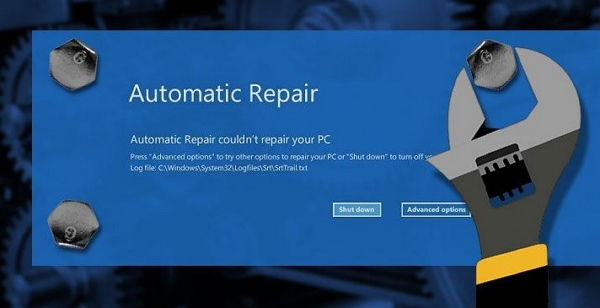
Automatic repair is an in-built security feature on Windows 10 PC which frequently keeps monitoring the system stability for you voluntarily. You may not be aware when this program is executing its work because it runs on the background. Despite the positive work automatic repair do, it has proven to bring more harm than good when it dives in an endless automatic repair loop. Waiting for some time for this process to complete or performing frantic options like rebooting the PC have failed in most occasions.
This unfortunate issue might be excited by several spontaneous processes in the system. To mention some of the processes which are the possible cause for this issue includes installing an update for a driver or program, hardware failure, software issue and upgrading the OS. The said problem can be solved with the following fixes.
Fix 2. Disable Early Launch Anti-Malware Protection
Fix 3. Erase a Problematic File
Fix 5. Perform a System Restore or Reset
Extra Tips: How to Recover Forgotten Windows Password with Passper WinSenior
Fix 1. Refresh or Reset PC
The problem of the system being stuck on Windows 10 automatic repair loop is well documented. Therefore, this prompted Microsoft to suggest a quick solution for Windows users. They recommend that if faced with endless automatic repair loop, just refresh the PC as follows:
Step 1. Power on your PC and it'll go to "Preparing automatic repair" screen if the issue has not resolved.
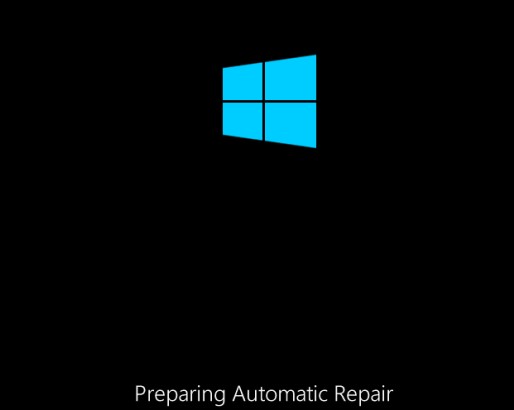
Step 2. Now, forcefully shutdown the machine by pressing and holding the power button three times.
Step 3. After rebooting for 2-3 time, you'll access the boot repair page.
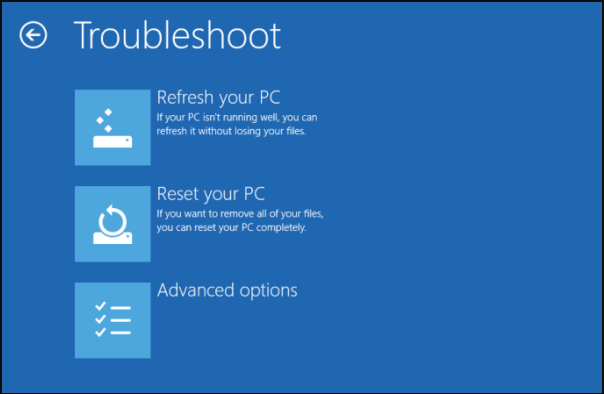
Step 4. Choose "Troubleshoot" and a new page will appear where you can either select "Refresh PC" or "Reset PC."
Fix 2. Disable Early Launch Anti-Malware Protection
If the refresh or reset fixes fail to change Windows 10 infinite loop automatic repair status, another useful solution is turning off the early launch anti-malware protection. You can feasibly disable this anti-malware from Command Prompt in the Windows boot options menu. This latter menu appears after trying severally to restart the PC. Use the following manual to disable early launch anti-malware protection.
Step 1. Select "Troubleshoot" from the Windows Boot Options menu and then click "Advanced Options" followed by clicking "Startup Settings." Upon reaching this point the computer restarts and present you with command prompt window.
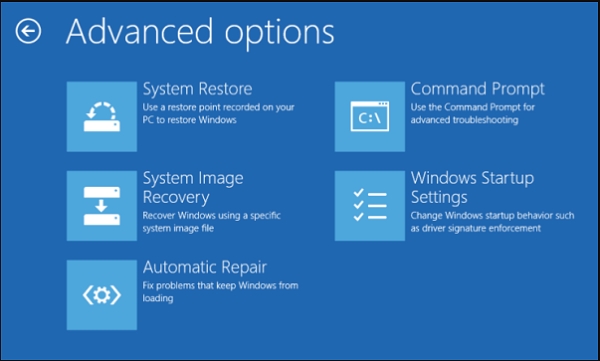
Step 2. Hit "Disable early launch anti-malware protection.
Step 3. Now, reboot the PC and wait to see if it can restart into Windows.
Fix 3. Erase a Problematic File
At times corrupt files on your system may cause the system to be stuck on infinite loop automatic repair. This is a common case. How can you know that a certain file is corrupt? Follow the steps below and if there is one:
Step 1. Go to the Windows Boot Options menu and click on the "Troubleshoot" option. From the new window, choose "Advanced Options" and then tap on the "Command Prompt."
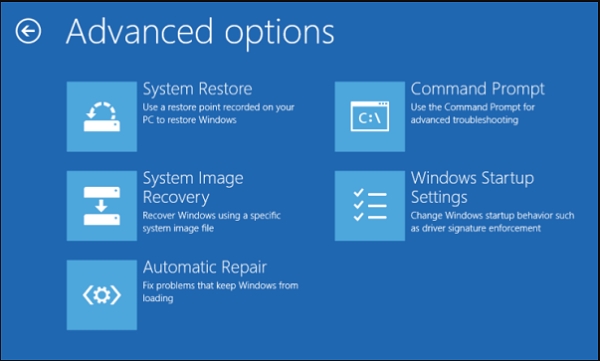
Step 2. On the Command Window type "C: cd Windows \System32\LogFiles\Srt.SrtTrail.txt" command on the Command line. If the message which reads "c:\windows\system32\drivers\vsock.sys is corrupt" is displayed on the screen, this is a clear indication that there is a corrupt file on the PC. So what you do, go to the specified location using the Command Prompt and enter the "del" command to erase the problematic file immediately.

Fix 4. Manually Repair MBR
The Master Boot Record (MBR) plays an integral part of the PC system. This means that this need to be secured and stable all the time. If they are missing, corrupted, or not properly configured, they may trigger a continuous Windows 10 automatic repair loop. If you have the feeling that this might be the case, keep an eye on the following procedure.
Step 1. Navigate to Command Prompt Window by selecting "Troubleshoot," clicking "Advanced Options," and finally selecting "Command Prompt."

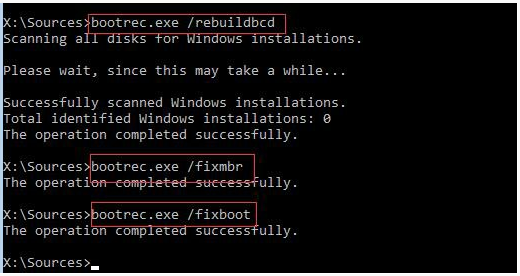
Step 2. Wait for Command Prompt to appear so that you can enter the lines below in succession:
"bootrec.exe /rebuildbcd"
"bootrec.exe /fixmbr"
"bootrec.exe /fixboot"
Fix 5. Perform a System Restore or Reset
After trying all the above fixes but still, the issue persists, opt for this last option on the quick fixes to get back to the Windows normal reboot menu. Perform a system restore or reset as follows:
Step 1. From the Windows, Boot Options Menu choose "Troubleshoot." Hit on the "Advanced Options" and then select the "System Restore" option.

Step 2. Wait for a Wizard Window to appear on the screen. Use this Wizards' onscreen instruction and choose an appropriate restore point and then click "Finish" to start restoring the system.
After the endless loop issue repaired, you can reboot your PC and check whether the issue fixed.
Extra Tips: How to Recover Forgotten Windows Password with Passper WinSenior
Some of users reported that the login box became grey when reboot the computer after repaired the endless loop issue. To have this issue solved, you need to take advantage of a third-party password recovery tool. Passper WinSenior is a password recovery giant which offers the easiest and fastest password recovery solution regardless of the password complexity.
Key Features of Passper WinSenior:
It is 100% effective to recover all kinds of Windows password.
1 second to reset/remove a password or delete/create an account.
Supports CD/DVD/USB flash drive to burn password reset disk.
3 simple steps to get back your password with no data loss.
Fully compatible with Windows 10/8.1/8/7/XP/Vista.
100,000 + Downloads
Recover Windows password with this suite as follows:
Step 1 Put in a blank CD/DVD/USB flash drive into an accessible PC/laptop, then click on Create button to start creating password reset disk. Once done, eject the burn disk.

Step 2 Insert the burned password reset disk on the locked computer and follow the on-screen instructions to enter boot menu.
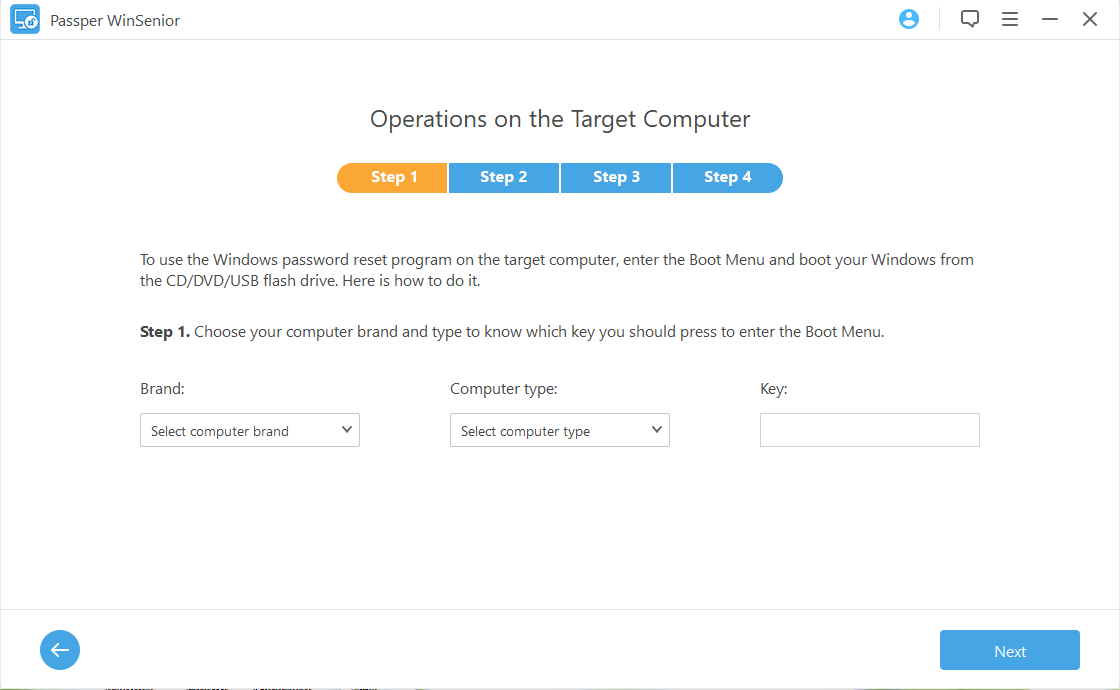
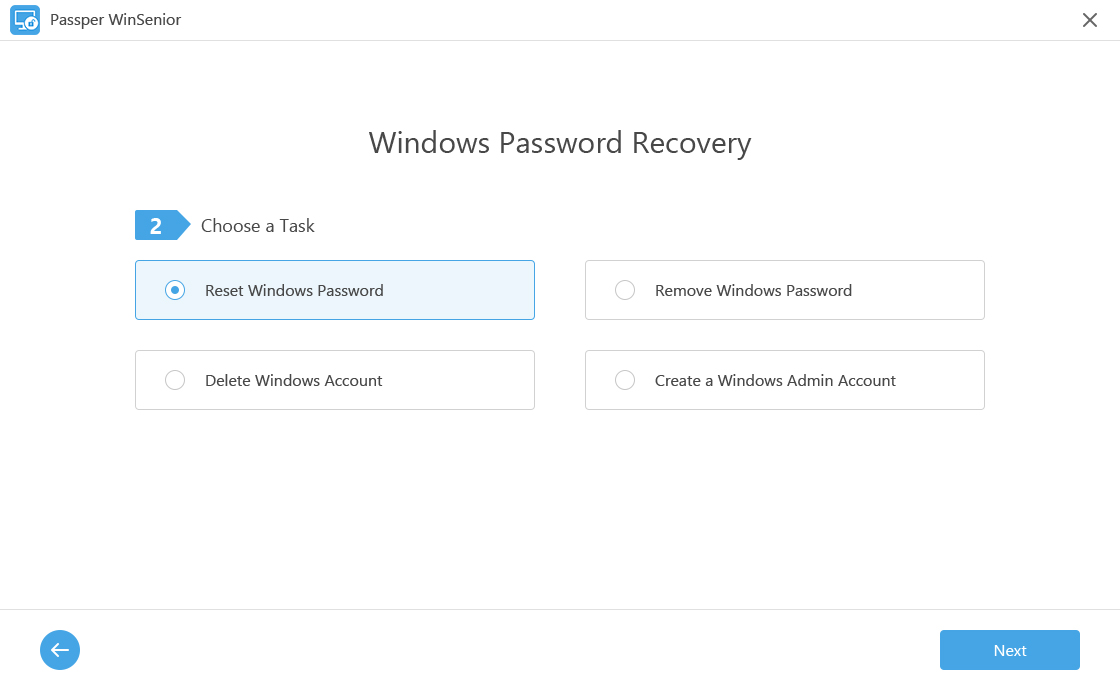
Step 3 Select "Reset Windows Password" from Passper WinSenior interface. And select the target user account and click next then enter the password for the latter account and hit "Reset."
Upon a successful message appearing on the screen, tap "Reboot Computer." Remove your password reset disk and again click "Reboot Now" as a confirmation that you intend to reboot the computer. Later, power on the computer and use the new password to log in.
Conclusion
When it happens that you pump into Windows 10 infinite loop automatic repair, try all the above fixes as a remedy because it is all they are currently available. However, if it persists employ Passper WinSenior and comfortably gets access to your files effortlessly.


